RB170002 Dryer Drum Roller Set 1992 & Newer, 2 Pieces (replaces 3447593, AP5186795)

XPart Supply Ltd. 884118010002

Price
$85.76

Frequently Bought Together

Drum Roller Kit, Drum Support Roller Assembly, Roller Wheel Set

3447593, AP5186795, PS12220620, EAP12220620

Speed Queen, Alliance, Huebsch, Amana Commercial, Primus


Fits Models: (Ctrl+F and Enter Your Model Number)

Speed QueenADE3LRGS171TW01, ADG4BRGS111TW01, ADE3SRGS171TW01, ADG4SRGS111TW01, ADE3LRGS173TW01, ADG4BRGS113TW01, ADE3SRGS173TW01, ADG4SRGS113TW01, LDE30RGS113TW01, LDG30RGS113TW01, LDE30RGS115TW01, LDG30RGS115TW01, LDE47RGS113TW01, LDG47RGS113TW01, LDE47RGS115TW01, LDG47RGS115TW01, CES68AWF, CES68AWN, CES68AWP, CES68AWW, CGS68AWF, CGS68AWN, CGS68AWP, CGS68AWW, LES47AWF, LES47AWN, LES47AWP, LES47AWW, LGS47AWF, LGS47AWN, LGS47AWP, LGS47AWW

AllianceADE3LRGS171TW01, ADG4BRGS111TW01, ADE3SRGS171TW01, ADG4SRGS111TW01, ADE3LRGS173TW01, ADG4BRGS113TW01, ADE3SRGS173TW01, ADG4SRGS113TW01, LDE30RGS113TW01, LDG30RGS113TW01, LDE30RGS115TW01, LDG30RGS115TW01

HuebschHDE30RGS113TW01, HDG30RGS113TW01, HDE30RGS115TW01, HDG30RGS115TW01, HDE47RGS113TW01, HDG47RGS113TW01, HDE47RGS113TW01, HDG47RGS113TW01

Amana CommercialADE3LRGS171TW01, ADG4BRGS111TW01, ADE3SRGS171TW01, ADG4SRGS111TW01

PrimusPDE30RGS113TW01, PDG30RGS113TW01, PDE30RGS115TW01, PDG30RGS115TW01

Professional Repair Time: 60-90 minutes
DIY Repair Time: 90-120 minutes
Difficulty Rating: Moderate-Advanced (3.5/5) — Requires drum removal, roller removal and installation, belt routing, and mechanical assembly; moderate-advanced mechanical skill required

  1. Unplug the dryer from the electrical outlet to ensure complete power disconnection.
  2. Close the gas supply valve (if applicable for gas dryers) to prevent gas discharge during disassembly.
  3. Empty the dryer of any clothes or items inside.
  4. Remove the lint filter from the lint trap and set it aside.
  5. Remove the top panel of the dryer by unscrewing the fasteners along the back edge (typically 2-4 screws) and lifting the panel up and away from the cabinet.
  6. Take multiple photos of the drum roller location, mounting position, and the rear cabinet area before disassembly. Document the roller position, orientation, axle mounting, and any visible components from multiple angles. This is critical for proper reassembly.
  7. Remove the front panel of the dryer by locating and removing the fasteners (typically 4-6 screws along the sides or bottom). Disconnect any wire harness connectors attached to the door switch. Carefully pull the front panel away and set it aside.
  8. Support the drum as you remove the front panel to prevent it from falling forward.
  9. Locate the drum rollers at the rear of the dryer cabinet. They're typically positioned on the left and right sides of the cabinet where the drum rear rim rests on the rollers.
  10. Take a photo of the old rollers and their exact position on the cabinet before removal.
  11. Remove the drum belt from the motor pulley and idler pulley by carefully pulling the belt off. Note the belt routing for reassembly.
  12. Carefully lift the drum out of the dryer cabinet and set it aside in a safe location. The drum is heavy—use proper lifting techniques or get assistance.
  13. Inspect the drum rear rim where it contacts the rollers. Look for wear marks, grooves, or damage. A damaged drum rim may need resurfacing or the drum may need replacement.
  14. Locate the old drum rollers on the rear cabinet frame. They're typically mounted on axle shafts that are secured to the cabinet with mounting brackets.
  15. Remove the retaining ring clips from each end of the roller axle shafts using needle-nose pliers or a flathead screwdriver. The clips typically snap into grooves on the axle shaft.
  16. Remove the washers from each end of the roller axle shafts.
  17. Slide the old roller wheels off the axle shafts.
  18. Remove the axle shafts from the mounting brackets by pulling them straight out.
  19. Inspect the mounting brackets for damage, cracks, or wear. Replace brackets if damaged (brackets are typically not included with the roller kit and must be ordered separately if needed).
  20. Clean the mounting bracket area on the cabinet thoroughly with a clean cloth. Remove any lint, debris, or old grease. The mounting surface must be clean for proper roller operation.
  21. Inspect the cabinet frame for damage, cracks, or corrosion. Repair or reinforce the frame if damage is present.
  22. Unpack the new RB170002 drum roller set from its packaging. Handle carefully to avoid damaging the rollers, axles, or components.
  23. Verify all components are included in the kit: 2 roller wheels, 2 axle shafts, 4 washers (2 per axle), and 2 retaining ring clips.
  24. Compare the new rollers to the old ones to verify the roller diameter, axle shaft length, and configuration match. Ensure you have the correct replacement kit.
  25. Inspect the new rollers for any damage or defects before installation. Spin each roller by hand to verify the bearings rotate smoothly without binding or grinding.
  26. Apply a small amount of high-temperature grease to each axle shaft (optional but recommended for smooth operation and extended roller life).
  27. Install the new axle shafts into the mounting brackets by inserting them straight into the bracket holes. Ensure the shafts are fully seated.
  28. Install one washer on each end of each axle shaft, sliding them onto the shaft until they contact the mounting bracket.
  29. Slide the new roller wheels onto the axle shafts, positioning them between the washers. Ensure the rollers are centered on the shafts.
  30. Install the second washer on each end of each axle shaft, sliding them onto the shaft until they contact the roller wheel.
  31. Install the retaining ring clips on each end of each axle shaft by snapping them into the grooves on the shaft. Use needle-nose pliers to compress the clips and position them in the grooves.
  32. Verify the retaining clips are fully seated in the axle shaft grooves and will not come loose during operation.
  33. Verify the rollers spin freely by rotating them by hand. The rollers should spin smoothly without binding, grinding, or excessive play.
  34. Verify the rollers are properly positioned by comparing them to your photos. The rollers should be at the same position and orientation as the old rollers.
  35. Reinstall the drum by carefully lowering it into the dryer cabinet and aligning it with the front glides and rear drum rollers.
  36. Verify the drum rear rim rests properly on the drum rollers. The drum should be centered and level on the rollers.
  37. Reinstall the drum belt by routing it around the drum, motor pulley, and idler pulley exactly as shown in your photos. The belt should be centered on all pulleys and not twisted.
  38. Verify belt tension by pressing on the belt midway between pulleys. The belt should deflect approximately 1/2 inch (12-15mm) under moderate pressure.
  39. Manually rotate the drum by hand to verify it rotates smoothly without binding or resistance. The drum should spin freely and quietly.
  40. Verify the drum does not wobble or shift during rotation. The drum should rotate smoothly and stay centered on the rollers.
  41. Listen for unusual noises as you rotate the drum by hand. The drum should rotate quietly with only normal mechanical sounds. No squealing, grinding, or thumping noises should be present.
  42. Reinstall the front panel by aligning it with the dryer and securing all fasteners. Reconnect any wire harness connectors to the door switch.
  43. Reinstall the top panel by aligning it with the dryer and securing all fasteners along the back edge.
  44. Reinstall the lint filter into the lint trap.
  45. Restore the gas supply (if applicable) by opening the gas supply valve.
  46. Plug the dryer back in and restore power.
  47. Run a test cycle (without clothes) on a short drying cycle to verify proper roller operation.
  48. Verify the drum rotates smoothly during the test cycle without unusual noises or vibrations.
  49. Listen for squealing, grinding, or thumping noises during the entire cycle. The drum should rotate quietly with only normal mechanical sounds.
  50. Monitor for unusual vibrations throughout the test cycle. The dryer should operate smoothly without excessive shaking.
  51. If squealing or grinding noises occur, the rollers may not be properly installed or the drum rim may be damaged. Stop the cycle and verify roller installation and drum rim condition.
  52. If thumping noises occur, the drum may not be properly seated on the rollers or the rollers may be misaligned. Stop the cycle and verify drum position and roller alignment.
  53. If the drum wobbles or shifts, the rollers may be misaligned or not level. Stop the cycle and verify roller position and alignment.
  54. Run a full drying cycle with a typical load of clothes to confirm the repair is complete and the dryer operates normally.
  55. Monitor the dryer for 24-48 hours of normal use to ensure it operates properly without unusual noises, vibrations, or performance issues.

Safety Notes: Always unplug the dryer before working on it. Close the gas supply valve (if applicable) to prevent accidental gas discharge. The drum is heavy—use proper lifting techniques or get assistance. Never operate the dryer without the drum rollers installed—this can damage the drum and cabinet. Ensure the rollers are properly installed and secured before operating the dryer. Verify the retaining clips are fully seated to prevent roller or axle shaft dislodgement during operation.

Always replace both drum rollers at the same time, even if only one appears worn. If one roller has failed, the other is likely near failure due to similar age and usage. Replacing both rollers ensures balanced drum support and prevents premature failure of the remaining roller.

Inspect the drum rear rim for damage before installing new rollers. A damaged or worn drum rim will cause the new rollers to wear prematurely. Inspect the drum rim carefully for grooves, wear marks, or damage. If the drum rim is damaged, it may need to be resurfaced with fine sandpaper (400-600 grit) or the drum may need replacement.

Apply high-temperature grease to the axle shafts for extended roller life. A small amount of high-temperature grease on the axle shafts reduces friction and extends roller bearing life. Use grease rated for dryer applications (typically rated to 400°F or higher).

Verify the retaining clips are fully seated before operating the dryer. Loose or improperly installed retaining clips can allow the rollers or axle shafts to dislodge during operation, causing severe damage to the drum and cabinet. Double-check that all clips are fully seated in the axle shaft grooves.

This drum roller set is model-specific. The RB170002 is designed for Speed Queen and Alliance dryers manufactured from 1992 to present. Always verify your dryer model number and manufacturing date match the compatibility requirements before ordering. Using an incorrect roller set can result in non-fit or improper drum support.

This is a complete drum roller set. The RB170002 includes 2 roller wheels, 2 axle shafts, 4 washers, and 2 retaining ring clips—everything needed for complete roller replacement. Install all components included in the kit for proper drum support and smooth rotation.

Drum roller replacement is a moderate repair. This repair requires significant mechanical skill, specialized tools (socket sets, needle-nose pliers), and knowledge of dryer mechanics. If you're uncomfortable with the process, consult a professional technician. Improper installation can cause poor performance, uneven drum rotation, or damage to other dryer components.

Monitor the first few drying cycles after installation. After installing the new drum rollers, run several drying cycles and monitor for smooth drum rotation, quiet operation, and proper performance. Address any issues immediately before they affect drying performance or indicate improper installation.

Drum roller failure can have multiple causes. If the new rollers don't solve the problem, the issue may be with the drum rim (damaged or worn), the drum bearing, the motor, or another component. Further diagnosis may be required to identify the root cause.

Keep the rollers clean. Lint accumulation around the rollers can cause binding and premature wear. Clean the lint filter before every drying cycle and periodically inspect the roller area for lint accumulation.

This repair prevents drum damage and extends dryer life. Worn drum rollers cause the drum to drop and contact the cabinet, causing severe damage to both the drum and cabinet. Replacing worn rollers promptly prevents this damage and extends dryer life significantly.

Verify the drum belt is properly routed after roller installation. The drum belt must be centered on all pulleys and not twisted. Improper belt routing can cause uneven drum rotation or belt wear. Verify belt routing against your photos before operating the dryer.

Check the drum bearing for wear. If the drum wobbles or shifts even after roller replacement, the drum bearing (front or rear) may be worn. Inspect the bearing and replace if necessary.

Verify the cabinet frame is not cracked or damaged. A cracked or damaged cabinet frame can cause roller misalignment and poor drum support. Inspect the frame carefully and repair or reinforce if damage is present.

This repair restores smooth, quiet drum rotation. A properly functioning drum roller set is essential for quiet, smooth dryer operation. Replacing worn rollers eliminates noise, reduces motor load, and prevents drum damage.

Monitor for noise changes during operation. After roller replacement, the dryer should operate significantly quieter than before. If noise persists or worsens, the rollers may not be properly installed or other components may be damaged.

Verify the rollers are level and properly aligned. Misaligned or unlevel rollers can cause uneven drum rotation and poor drying performance. Verify roller position and alignment against your photos.

This repair is cost-effective compared to drum replacement. The cost of drum roller replacement ($80-150) is far less than the cost of a new drum ($300-600+) or complete dryer replacement ($800-2,000+). Replace the rollers promptly when failure is detected to prevent the need for expensive drum or dryer replacement.

Keep the dryer vent clean. A restricted dryer vent causes the motor to work harder and can accelerate roller wear. Clean the dryer vent regularly to maintain proper airflow and reduce motor load.


  • Dryer makes loud thumping noises (especially during drum rotation)
  • Dryer makes squealing or grinding noises
  • Drum rotates roughly or unevenly
  • Visible wear marks or flat spots on roller wheels
  • Drum wobbles or shifts during rotation
  • Dryer vibrates excessively during operation
  • Drum difficult to rotate by hand
  • Motor working harder than normal (increased current draw)
  • Loud banging or clunking noises during drum rotation
  • Drum drops or sags at the rear
  • Dryer louder than normal during operation
  • Uneven drying due to poor drum rotation


Whirlpool refrigerator replacement parts, Frigidaire refrigerator replacement parts, GE refrigerator replacement parts, Kenmore refrigerator replacement parts, KitchenAid refrigerator replacement parts, LG refrigerator replacement parts, Maytag refrigerator replacement parts, Whirlpool refrigerator drawers and glides replacement, Whirlpool dishwasher replacement parts, GE dishwasher replacement parts, KitchenAid dishwasher replacement parts, Maytag dishwasher replacement parts, Frigidaire dishwasher replacement parts, Kenmore dishwasher replacement parts, Whirlpool washer replacement parts, GE washer replacement parts, Maytag washer replacement parts, Kenmore washer replacement parts, LG washer replacement parts, Whirlpool dryer replacement parts, GE dryer replacement parts, Maytag dryer replacement parts, Kenmore dryer replacement parts, LG dryer replacement parts, Whirlpool range replacement parts, GE range replacement parts, Whirlpool stove replacement parts, GE stove replacement parts, GE oven replacement parts, GE microwave replacement parts, buy Whirlpool refrigerator parts online, buy GE dishwasher parts online, replacement Kenmore washer parts for sale, buy Maytag dryer parts, LG washer replacement parts online, KitchenAid refrigerator parts for sale, Whirlpool stove and range replacement parts

RB170002 Dryer Drum Roller Set

The RB170002 is a genuine OEM dryer drum roller set for Speed Queen and Alliance brand commercial and residential dryers manufactured from 1992 to present. This drum roller set is a critical component that supports the dryer drum and allows it to rotate smoothly during drying cycles. The kit includes two complete drum roller assemblies, each consisting of a precision-engineered roller wheel, hardened steel axle shaft, washers, and retaining ring clips. The roller wheels are made of high-impact plastic or rubber material with sealed ball bearings that provide smooth, quiet rotation and long service life. Each roller measures approximately 2 inches in diameter and is designed to support the rear of the dryer drum as it rotates. The rollers are mounted on the dryer cabinet frame and the drum rides on top of the rollers, with the drum weight distributed evenly across both rollers. As the drum rotates during drying cycles, the rollers spin freely on their axles, supporting the drum weight while minimizing friction and wear. Over time, drum rollers can fail due to bearing wear from thousands of hours of drum rotation, roller wheel wear or flat spots from continuous drum contact, axle shaft wear or bending from drum weight and vibration, debris accumulation in the bearings causing binding, moisture intrusion into the bearings causing corrosion, or manufacturing defects. When drum rollers fail, symptoms include the dryer making loud thumping, squealing, or grinding noises (especially during drum rotation), the drum rotating roughly or unevenly, visible wear marks or flat spots on the roller wheels, the drum wobbling or shifting during rotation, the dryer vibrating excessively during operation, the drum difficult to rotate by hand, or the motor working harder than normal (increased current draw). If rollers continue to wear, the drum will eventually drop and contact the dryer cabinet, causing severe damage to both the drum and cabinet. The RB170002 is a complete drum roller set that restores smooth, quiet drum rotation. Replacing worn drum rollers eliminates noise, reduces motor load, prevents drum damage, and extends dryer life. Important: This kit is designed for Speed Queen and Alliance dryers manufactured from 1992 to present. Always verify your dryer model number and manufacturing date match the compatibility requirements before ordering.

Key Features and Design

  • Heavy-Duty Construction: Made from durable materials, these rollers are built to withstand regular use and provide long-lasting support for your dryer's drum.
  • Compatibility: Replaces popular part numbers like 3447593 and AP5186795, fitting a wide range of models including ADE30RGS171TW01, ADEE9RGS173CW01, and many others for seamless integration.
  • Set of Two: Includes two pieces for easy replacement, helping maintain balanced and efficient drum rotation.

Performance and Benefits

This roller set solves common issues like noisy operation or uneven drying by restoring smooth drum movement, reducing wear on your appliance. From XPart Supply Ltd., a trusted name in replacement parts, it enhances your dryer's efficiency and reliability, saving you time and money on repairs while ensuring clothes dry evenly and quickly.

The RB170002 Dryer Drum Roller Set offers long-lasting quality with its heavy-duty construct. Designed to help ensure smooth dryer operation, the set of 2 pieces will ensure your dryer functions for longer.

Part number RB170002 replaces 3447593, AP5186795

Supported Models:

ADE30RGS171TW01, ADE32FSS431AN01, ADE32FSS431NN22, ADE32FSS541RN01, ADE3LRGS171TW01, ADE3SRGS173CW01, ADE3SRGS173TW01, ADE3SRGS175CW01, ADE3SRGS175CW14, ADE3SRGS175TW01, ADE3TFWS431AW01, ADE3TRGS451LW22, ADE3TRWS431AW01, ADE3TRWS431NW22, ADE3TRWS431NW29, ADE3TRWS461AW01, ADE41FSS171TN01, ADE41FSS171TN03, ADE4BFGS171TW01, ADE4BRGS171TW01, ADE4BRGS171TWAH, ADE4BRGS175CW01, ADE4BRGS175CW14, ADE4BRGS175TW01, ADEE8RGS173CW01, ADEE8RGS173TW01, ADEE9BGS173CW01, ADEE9BGS173TW01, ADEE9BGS175CW01, ADEE9BGS175CW14, ADEE9BGS175TW01, ADEE9BSS173CN01, ADEE9BSS173TN01, ADEE9BSS175CN01, ADEE9BSS175CN14, ADEE9BSS175TN01, ADEE9RGS173CW01, ADEE9RGS173TW01, ADEE9RGS175CW01, ADEE9RGS175CW14, ADEE9RGS175TW01, ADG30RGS111TW01, ADG32FSS301AN01, ADG3LRGS111TW01, ADG3SRGS113CW01, ADG3SRGS113TW01, ADG3SRGS115CW01, ADG3SRGS115CW14, ADG3SRGS115TW01, ADG3TFWS301AW01, ADG3TRWS301AW01, ADG41FSS111TN01, ADG41FSS111TN03, ADG4BFGS111TW01, ADG4BRGS111TW01, ADG4BRGS111TWAH, ADG4BRGS115CW01, ADG4BRGS115CW14, ADG4BRGS115TW01, ADGE8RGS113CW01, ADGE8RGS113TW01, ADGE9BGS113CW01, ADGE9BGS113TW01, ADGE9BGS115CW01, ADGE9BGS115CW14, ADGE9BGS115TW01, ADGE9BSS113CN01, ADGE9BSS113TN01, ADGE9BSS115CN01, ADGE9BSS115CN14, ADGE9BSS115TN01, ADGE9RGS113CW01, ADGE9RGS113TW01, ADGE9RGS115CW01, ADGE9RGS115CW14, ADGE9RGS115TW01, AES17AWF, AES20AWF, AES28AWF, AES28AWF1500, AES68AWF, AES68AWF1500, AEZ17A*F1702, AEZ28A*F1702, AEZ68A*F1702, AGS17AWF, AGS20AWF, AGS28AWF, AGS68AWF, AGZ17A*F1102, AGZ28A*F1102, AGZ68A*F1102, ASE30FGW171TW01, ASEE8AGW173TW01, ASG30FGW111TW01, ASGE8AGW113TW01, ATE50FGP171TW01, ATE50FWP431AW01, ATEE9AGP173TW01, ATEE9ASG453NW36, ATEE9ASG455NW36, ATEE9ASP133DN04, ATEE9ASP133DW04, ATEE9ASP175TW01, ATEE9ASP283CW01, ATEE9ASP285CW01, ATEE9ASP285CW14, ATEE9ASP433XW34, ATEE9ASP435XW34, ATEE9ASP453LW26, ATEE9ASP455LW01, ATEE9ASP543DN04, ATEE9ASP543DW04, ATEE9ASP545DW04, ATEE9AWP433AW01, ATEE9AWP435AW01, ATG50FGP111TW01, ATG50FWP301AW01, ATGE9AGP113TW01, ATGE9ASP093CW01, ATGE9ASP095CW01, ATGE9ASP095CW14, ATGE9ASP115TW01, ATGE9ASP123DN04, ATGE9ASP123DW04, ATGE9ASP125DW04, ATGE9ASP303XW01, ATGE9ASP303XW26, ATGE9ASP305XW01, ATGE9ASP543DN04, ATGE9ASP543DW04, ATGE9ASP545DW04, ATGE9AWP303AW01, ATGE9AWP305AW01, ATHE9ASP453NW29, ATHE9ASP455NN29, ATHE9ASP455NW29, BD3NGBGS403UW01, BD3NGBSS403UN01, BD3NLBGS403UW01, BD3NLBSS403UN01, BD3NXAGS403UW01, BDE30FGS171CW01, BDG30FGS111CW01, BDGNGBGS303EW01, BDGNLBGS303EW01, BDGNXAGS303EW01, BTE50FSP171TW01, BTE50FSP281CW01, BTEE6ASP173TW01, BTEE6ASP283CW01, BTG50FSP091CW01, BTG50FSP111TW01, BTGE6ASP093CW01, BTGE6ASP113TW01, CDE3LRGS171CW01, CDE4BFGS171CW01, CDG3LRGS111CW01, CDG4BFGS111CW01, CES68AWF, CES68AWF1500, CEZ68A*F1702, CGS68AWF, CGZ68A*F1102, CTSA7AWN, CTSA7AWN1500, CTSA9AWN, DDE30RGS173CW01, EDE3TRWS543PW01, FDE3TRGS301NW10, FDE3TRGS401NW22, FDG3TRGS301NW10, FEN16A*G4018, FEN17A*G3018, FEN17A*G4018, FES16A*G4018, FES17A*F3300, FES17A*F4350, FEU17A*F1702, FEZ17A*F1702, FGN16A*M3013, FGN17A*M3013, FGS17A*F3060, FGZ17A*F1102, FTE50FSP301NW01, FTE50FSP301NW10, FTEE5ASP303NW10, FTEE5ASP303ZW01, FTG50FSP301NW10, FTGE5ASP303NW10, HDENEAGS153CW01, HDENEAGS173CW01, HDENERGS153CW01, HDENERGS173CW01, HDENXAGS153CW01, HDENXAGS173CN01, HDENXAGS173CW01, HDENXAGS543DW01, HDENXAGW173CN01, HDENXRGS153CW01, HDENXRGS173CW01, HDENYAGS153CW01, HDENYAGS173CW01, HDENYBGS173CW01, HDENYRGS153CW01, HDENYRGS173CW01, HDGNEAGS113CW01, HDGNERGS113CW01, HDGNXAGS113CN01, HDGNXAGS113CW01, HDGNXAGS123DW01, HDGNXAGS543DW01, HDGNXAGW113CN01, HDGNXRGS113CW01, HDGNYAGS113CW01, HDGNYBGS113CW01, HDGNYRGS113CW01, JDEJEAGW303EW01, JDEJGAGW303EW01, JDEJGASW303EN01, JDEJGBGW303EW01, JDEJGBSW303EN01, JDEJRAGW303EW01, JDEJXAGW303EW01, JDGJEAGW303EW01, JDGJGAGW303EW01, JDGJGASW303EN01, JDGJGBGW303EW01, JDGJGBSW303EN01, JDGJRAGW303EW01, JDGJXAGW303EW01, KES18AWF, KES18AWF1500, KGS18AWF, LDE3TRGS171CW01, LDE3TRGS451NW22, LDE3TRGS461NW22, LDE3TRGS551NW22, LDE3TRWS331TW05, LDE3TRWS541NW22, LDG3TRGS111CW01, LDG3TRWS111TW05, LDL3TRWW301NW22, LEB07A*F1709, LED17A*F1700, LEG37A*F4350, LEH37A*F3300, LEK37A*F4350, LEN27A*G3008, LEN27A*G3018, LEN27A*G4008, LEN27A*G4018, LEN27A*G99M3, LEN37A*G3018, LEN37A*G4018, LES17A*F3000, LES17A*F3007, LES17A*F3022, LES17A*F4500, LES17A*M4588, LES27A*G3018, LES27A*G4000, LES27A*G4018, LES27A*G4500, LES27A*G4518, LES28A*G4018, LES33A*F4562, LES37A*F3000, LES37A*F3028, LES37A*F3300, LES37A*F3327, LES37A*F4350, LES37A*F5412, LES37A*G3018, LES37A*G4018, LET57A*F1700, LET67A*F1700, LET68A*F1700, LEY47A*F1709, LEZ27A*F1502, LEZ27A*F1702, LEZ27A*G3018, LEZ27A*G4018, LEZ37A*F1702, LEZ37A*F3000, LEZ37A*F3300, LEZ37A*G3018, LEZ37A*G4018, LEZ37A*G5618, LEZ57A*F1702, LEZ67A*F1702, LGG37A*F3058, LGH37A*F1182, LGH37A*F5423, LGK37A*F3058, LGK37A*F3060, LGN27A*F3060, LGN27A*M3008, LGN27A*M3013, LGN37A*M3013, LGS17A*F3020, LGS17A*F3081, LGS17A*K1180, LGS17A*M3020, LGS17A*M3082, LGS27A*M3013, LGS27A*M3080, LGS37A*F3000, LGS37A*F3022, LGS37A*F3028, LGS37A*F3058, LGS37A*F3060, LGS37A*F3080, LGS37A*F5412, LGS37A*F5423, LGS37A*G3013, LGS37A*G3080, LGS37A*M3013, LGS37A*M3080, LGS38A*M3013, LGS38A*M3020, LGS40A*M3020, LGT57A*F1100, LGT68A*F1100, LGY47A*F1109, LGZ27A*F1102, LGZ27A*M3013, LGZ37A*F1102, LGZ37A*F3000, LGZ37A*G3013, LGZ37A*M3013, LGZ57A*F1102, LGZ67A*F1102, LTE50FGP541NW23, LTEA5FSP153TW01, LTEA5FSP153TW04, LTEA5FSP173TW01, LTEA5FSP173TW04, LTEE5AGP133ZW30, LTEE5ASP133FW01, LTEE5ASP153TW01, LTEE5ASP155TW01, LTEE5ASP173TW01, LTEE5ASP175TW01, LTEE5ASP283CW01, LTEE5ASP285CW01, LTEE5ASP293CW01, LTEE5ASP295CW01, LTEE5ASP303WW01, LTEE5ASP303WW37, LTEE5ASP303ZW01, LTEE5ASP333NW01, LTEE5ASP433AW01, LTEE5ASP433AW12, LTEE5ASP453VW26, LTEE5ASP543NW01, LTEE5ASP543NW23, LTEE5ASP543RW01, LTEE5ASP553KW01, LTEE5FSP175TW01, LTG50FSP081JW01, LTGA5FSP113TW01, LTGE5ASP093CW01, LTGE5ASP095CW01, LTGE5ASP113FW01, LTGE5ASP113JW01, LTGE5ASP113TW01, LTGE5ASP115TW01, LTGE5ASP303AW01, LTGE5ASP303AW12, LTGE5FSP115TW01, LTKA6A*N4350, LTL50FGP541NW23, LTLE5ASP303NW35, LTLE5ASP543NW23, LTME5ASP543KW01, LTSA7A*N, LTSA7A*N1500, LTSA7A*N2989, LTSA7A*N3000, LTSA7A*N3300, LTSA7A*N4350, LTSA7A*N4351, LTSA9A*N, LTSA9A*N1180, LTSA9A*N3000, LTSA9A*N3060, LTSA9A*N3061, LTUA7A*N, LTUA7A*N2802, LTUA9A*N, LTZA7A*N, LTZA7A*N2802, LTZA9A*N, LTZA9A*N0902, MDE3TRWS331TW06, MDG3TRWS111TW06, ND3NLBGS403NW22, ND3NLBGS403ZW01, ND3NLBSS403UN01, ND3NXASS403UN01, NDENXAGS303UW01, NDGNXAGS303EW01, PD3JGBGS403UG01, PD3JXAGS403UG01, PDEJGBGS303UG01, PDEJGBGS543ZG01, PDEJXAGS434AG01, PDGJGBGS303UG01, PDGJGBGS543ZG01, PDGJXAGS303UG01, PDGJXAGS304AG01, PDGJXAGS543ZG01, PTEE3FSP173TG01, PTEE3FSP175TG01, PTEE3FSP283CG01, PTEE3FSP285CG01, PTEE3FSP433AG01, PTGE3FSP093CG01, PTGE3FSP095CG01, PTGE3FSP113TG01, PTGE3FSP115TG01, PTGE3FSP303AG01, SDENEAGS153CW01, SDENEAGS173CW01, SDENERGS153CW02, SDENERGS173CW02, SDENXAGS153CW01, SDENXAGS173CN01, SDENXAGS173CW01, SDENXAGS433AW01, SDENXAGS543DW01, SDENXRGS153CW02, SDENXRGS173CW02, SDENXRGS433AW01, SDENXRGS433LW01, SDENYAGS153CW01, SDENYAGS173CW01, SDENYRGS153CW01, SDENYRGS173CW01, SDENYRGS303NW22, SDENYRGS303ZW01, SDGNEAGS113CW01, SDGNERGS113CW02, SDGNXAGS113CN01, SDGNXAGS113CW01, SDGNXAGS123DW01, SDGNXAGS303AW01, SDGNXAGS543DW01, SDGNXRGS113CW02, SDGNXRGS303AW01, SDGNYAGS113CW01, SDGNYRGS113CW01, SDLNXRGS303LW01, SDLNXRGS543NW23, SDLNXRGS543PW01, TD3NGBS403NW36, TTHE5ASP303NW36, TTPE5ASP303NW36, UTE50FSP171TW08, UTEE5ASP173TW01, UTEE5ASP173TW08, UTEE5ASP175TW01, UTEE5ASP175TW08, UTEE5ASP283CW01, UTEE5ASP285CW01, UTG50FSP111TW08, UTGE5ASP113TW01, UTGE5ASP113TW08, UTGE5ASP115TW01, UTGE5ASP115TW08, YDE3TRGS171CW01, YDE3TRGS301NW10, YDG3TRGS111CW01, YTEE5ASP133FW01, YTEE5ASP173TW01, YTEE5ASP175TW01, YTEE5ASP283CW01, YTEE5ASP285CW01, YTEE5ASP303NW10, YTGE5ASP093CW01, YTGE5ASP095CW01, YTGE5ASP113FW01, YTGE5ASP113TW01, YTGE5ASP115TW01, ZDE30RGS171CW01, ZDE3LRGS171CW01, ZDE3SRGS173CW01, ZDE3SRGS173FW28, ZDE41FSS171CN01, ZDE4BFGS171CW01, ZDE4BRGS171CW01, ZDEE8RGS173CW01, ZDEE8RGS543FW01, ZDEE9BGS173CW01, ZDEE9BGS543FW01, ZDEE9BSS173CN01, ZDEE9BSS543FN01, ZDEE9RGS173CW01, ZDEE9RGS543FW01, ZDG30RGS111CW01, ZDG3LRGS111CW01, ZDG3SRGS113CW01, ZDG3SRGS113FW28, ZDG41FSS111CN01, ZDG4BFGS111CW01, ZDG4BRGS111CW01, ZDGE8RGS113CW01, ZDGE8RGS113FW01, ZDGE9BGS113CW01, ZDGE9BGS113FW01, ZDGE9BSS113CN01, ZDGE9BSS113FN01, ZDGE9RGS113CW01, ZDGE9RGS113FW01

Hard to find parts? We've got them or we'll find them!

Over 10,000 New & Used Parts Ready for Pickup

Show this item number to our store staff to help locate the exact part you need
XPART GTIN/UPC NUMBER
9665434878241

XPart Supply Advantage

Your trusted partner for fast, reliable parts delivery across North America

Lightning Fast Shipping

Same-day processing with expedited delivery options across North America

Massive Inventory

Over 10,000 parts in stock and ready to ship immediately

North America Coverage

Comprehensive shipping network covering USA, Canada, and Mexico

Quality Guaranteed

Premium parts with warranty protection and expert customer support

10K+
Parts in Stock
24-48H
Local Delivery
99.8%
Customer Satisfaction
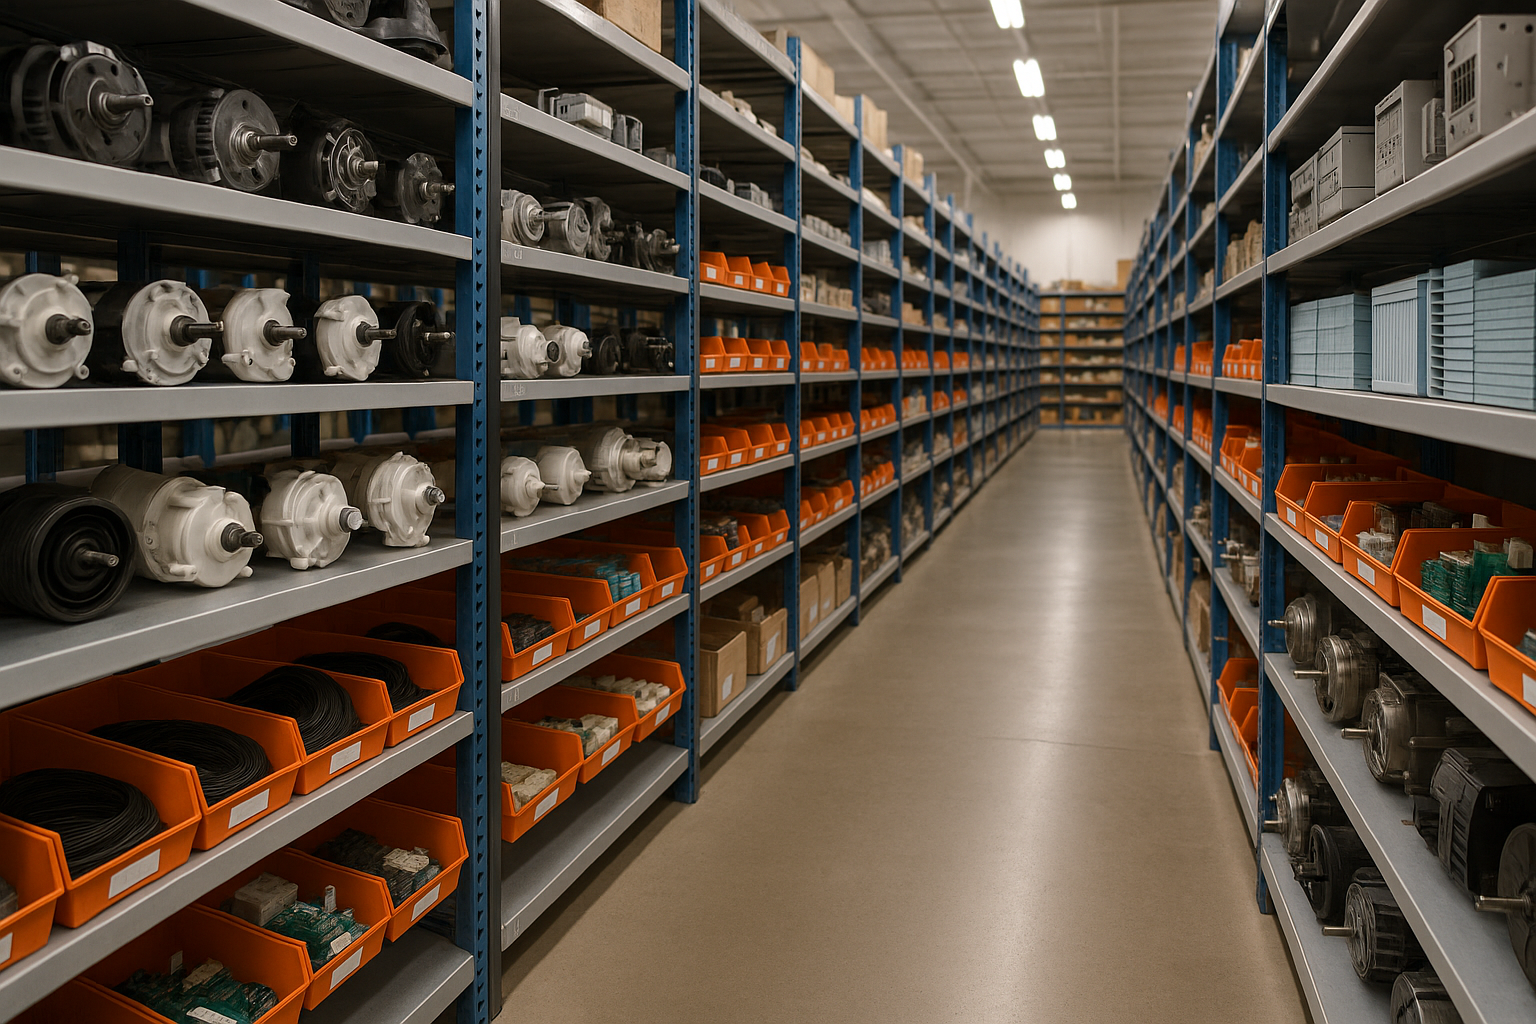
Professional appliance parts warehouse with organized shelving and extensive inventory

Express Warehouse Shipping

Order within the countdown for same-day shipping!

00 Hours
00 Minutes
00 Seconds

In stock orders placed during business hours ship the same day.

Order of $75 or more of eligible items qualify for FREE Shipping.

Same-day shipping deadline has passed

Orders placed now will ship the next business day.

Same-day shipping deadline has passed

Orders placed outside business hours will be processed when we reopen.

Business Hours: Monday - Friday, 9:00 AM - 5:00 PM EST

Trusted Family Business

29 years of Excellence in Appliance Parts

For over 29 years, our family has been dedicated to providing quality appliance parts and exceptional service. What started as a small local business has grown into a trusted name, but we've never forgotten our roots. Every customer receives the personal attention and care that only a family-owned business can provide.

Years of Experience

Our knowledge has been built over the past 29 years in the business, ensuring expert advice for every appliance need.

Personal Service Guarantee

We treat every customer like family, providing personalized solutions and standing behind our products.

Built on Trust

Our reputation has been built one satisfied customer at a time, creating lasting relationships in our community.

Buy Online Pick Up In-Store

Address
101 Trillium Dr
Kitchener, Ontario N2R 1J8
Phone
Hours
Monday - Friday 9:00 AM - 5:00 PM
Get Directions

Contact Us Customer Service

Hard to find parts? We've got them or we'll find them!

Call now for expert appliance parts assistance

Available Monday - Friday, 9AM - 5PM EST