
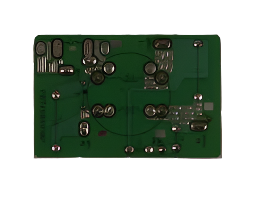
Microwave Causing Interference? Noise Filter F692Y8F20AP – Fix EMI & Signal Disruption Fast
If your microwave is causing interference with nearby electronics, Wi-Fi, or other appliances, a failed line noise filter is the most common cause. In Samsung over-the-range and countertop microwaves, the noise filter suppresses electromagnetic interference on the power line — when it fails, the microwave may trip breakers, disrupt Wi-Fi signals, cause flickering lights, or simply stop powering on. ⚡ Common failure point in Samsung microwaves manufactured 2010–2022. Part F692Y8F20AP is the genuine OEM replacement that restores clean power filtering and eliminates interference immediately.
❓ Is This the Right Part?
This is the correct fix if ALL of the following are true:
- ✔ Microwave has power but behaves erratically or won't start
- ✔ Other kitchen appliances or Wi-Fi are disrupted when microwave runs
- ✔ Wall outlet and circuit breaker confirmed OK
- ✔ Door switches and control board test functional
- ✔ ONLY problem is interference, tripped breakers, or no-power condition
Not sure? Send us your model number — we'll confirm before you order.
🔧 Common Symptoms
- Microwave won't turn on — most common complaint after power surge
- Wi-Fi drops or slows whenever microwave is running
- Circuit breaker trips when microwave starts
- Flickering lights or interference on nearby electronics
- Microwave runs but display is blank or erratic
- Burning smell near power entry point inside unit
✔ If these symptoms match, the noise filter is the most likely failed component in the system.
✔ In most cases, replacing this noise filter restores normal operation immediately.
📦 Part Details
- Part Number: F692Y8F20AP
- Type: Microwave Line Noise Filter / EMI Suppressor Assembly
- Replaces: OEM direct-fit noise filter — supersedes DE96-00887A, DE96-00887B (no modification required)
- Brands: Samsung, Kenmore (Samsung-built)
While the cabinet is open, inspect the power cord and door interlock switches — a power surge that burns a noise filter often stresses these components too. Replacing them together prevents a repeat service call within weeks.
⚙️ Installation
Skill Level: MODERATE — 30–45 minutes. Unplug the microwave completely before beginning — capacitors inside retain lethal charge even when unplugged; discharge the capacitor before touching internal components. Remove the outer cabinet, locate the noise filter at the power entry point, disconnect the wire leads (photograph first), and swap in the new unit. All connectors are keyed; no soldering required.
💡 Pro Tip
Microwave capacitors can hold 2,000+ volts even after unplugging. Use an insulated screwdriver to short the capacitor terminals before reaching inside the cabinet. This is a non-negotiable safety step — skipping it has caused serious injuries. If you're not comfortable with this step, a qualified appliance technician can complete the swap in under an hour.
Find your model hub: SMH1816S, SMH1816B, SMH1816W, SMH9187ST, SMH9187B, SMH9187W, SMH9207ST, SMH9207B, SMH9207W, ME18H704SFS, ME18H704SFB, ME18H704SFW, ME21H706MQS, ME21H706MQB, ME21H706MQW, SMH2117S, SMH2117B, SMH2117W, SMH2262S, SMH2262B, SMH2262W, SMH9151ST, SMH9151B, SMH9151W, ME16H702SES, ME16H702SEB, ME16H702SEW, ME19R7041FS, ME19R7041FB, ME19R7041FW, ME21M706BAS, ME21M706BAG, ME21M706BAW
✅Compatibility & Cross Reference
Not sure about your model number? Call 1-877-899-7278 and we’ll help you confirm. All brand names are the property of their respective owners and are used for compatibility reference only.
Buy Online Pick Up In-Store
Kitchener, Ontario N2E 1W8
- Choosing a selection results in a full page refresh.
