


TAKES TOO LONG TO DRY
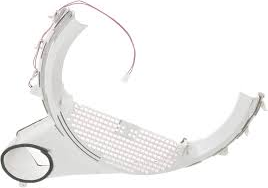
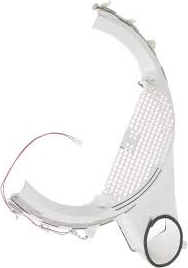
GE (General Electric) Dryer Duct Trap Assembly WW02F00669, Replaces WE01X25335, 234D2073G007, WE14X20617, Fixes Takes too long to dry
Genuine OEM dryer duct-trap assembly; its air duct encloses and supports the lint screen in the dryer exhaust-air duct.
Part WW02F00669Replaces WE01X25335, 234D2073G007, WE14X20617GE (General Electric)
Guaranteed to Fit — or your money back.
Confirm your full appliance model number before ordering.
Confirm your full appliance model number before ordering.
Is This the Right Part?
Part NumberWW02F00669
ReplacesWE01X25335, 234D2073G007, WE14X20617, WW02F00418, WW02F00594
ManufacturerGE (General Electric)
Appliance TypeDryer
Part TypeDryer Duct Trap Assembly
✅ Cross Reference Information
WE01X25335, 234D2073G007, WE14X20617, WW02F00418, WW02F00594
Common Symptoms
- Takes too long to dry.
- Lint on clothing.
- Not drying properly.
- Unusual smells.
Check Before Replacing
- Disconnect power before inspection. Inspect the duct-trap assembly for visible damage or warping and confirm the lint screen is properly supported and seated.
Pro Tip
Verify the complete dryer model number before ordering, because similar-looking duct assemblies can differ in fit.
Part Details
Part NumberWW02F00669
Part TypeDryer Duct Trap Assembly
ManufacturerGE (General Electric)
Appliance TypeDryer
Primary FunctionEncloses and supports the lint screen in the dryer exhaust-air duct.
Installation Notes
- Required Tools:
- Phillips screwdriver
- Flathead screwdriver
- 1/4" nut driver
- Needle-nose pliers
- Work gloves
- Flashlight
- Camera or smartphone (for reference photos)
- Multimeter (for electrical testing if needed)
- Masking tape and marker (for labeling)
- Lint brush or vacuum (for cleaning)
- Step-by-Step Installation:
- Disconnect Power:
- Unplug the dryer from the electrical outlet or turn off the circuit breaker that supplies power to the dryer. Never work on the dryer with power connected. For gas dryers, also turn off the gas supply valve.
- Move Dryer:
- Pull the dryer away from the wall to provide access to the rear and sides. You'll need at least 3 feet of clearance.
- Remove Front Panel (if necessary):
- Depending on your model, you may need to remove the front panel to access the duct trap assembly:Remove screws securing the front panel (typically 2-4 screws at the top corners or along the top edge)Carefully tilt the front panel forward or lift it upRest the front panel on top of the dryer or support it carefullySome models have the duct trap accessible from the rear—check your model first
- Locate Duct Trap Assembly:
- Look inside the dryer cabinet at the rear or bottom of the drum. You'll see the duct trap assembly—a plastic or metal housing with a lint screen support frame and mounting brackets.
- Take Reference Photos (Critical):
- Before disconnecting anything, take 20-30 clear, close-up photos of the duct trap assembly from multiple angles showing:Overall position and orientation inside the dryerMounting bracket positionsConnection points to the dryer cabinetLint screen support frameExhaust hose connection portAny wire or clip connectionsRelationship to other components (drum, heating element, etc.) This is absolutely critical for correct reinstallation.
- Document Assembly Position:
- Create a detailed diagram or written description showing the exact position of the duct trap assembly inside the dryer cabinet. Note which direction it faces, how it's mounted, and how it connects to other components.
- Disconnect Exhaust Hose (if connected):
- If the external exhaust vent hose is connected to the duct trap assembly:Locate the hose connection point on the duct trapLoosen any hose clamps or fastenersCarefully pull the hose off the connection portPlace the hose aside (you may need to reconnect it to the new assembly)
- Remove Mounting Hardware:
- The duct trap assembly is secured to the dryer cabinet with mounting screws, clips, or brackets (typically 3-6 fasteners). Remove all mounting hardware. Keep these fasteners—you'll need them for reinstallation.
- Remove Old Duct Trap Assembly:
- Once all connections and mounting hardware are removed, carefully pull the old duct trap assembly away from the dryer cabinet. Handle gently to avoid damaging other components or sharp edges. The assembly may be tight—you may need to wiggle it gently to remove it.
- Inspect Old Assembly:
- Examine the old assembly for visible damage: cracks in the plastic housing, melted areas, lint blockage, corrosion, or mechanical damage. Check for lint accumulation inside the duct—this is the most common cause of dryer airflow problems. If lint is clogged inside, this confirms the diagnosis and explains the dryer's reduced performance.
- Clean Mounting Area:
- Wipe down the dryer cabinet area where the duct trap assembly was mounted. Remove any dust, lint, or debris. A clean mounting surface ensures proper assembly installation and good fit.
- Compare Old and New Assemblies:
- Remove the new duct trap assembly from its packaging. Compare the new assembly to the old assembly:Verify the overall size and shape matchCheck that mounting hole positions are identicalConfirm the lint screen support frame matchesEnsure the exhaust hose connection port is in the same locationVerify part numbers match or are compatibleCheck that the assembly is not damaged or cracked
- Position New Duct Trap Assembly:
- Carefully position the new duct trap assembly into the dryer cabinet. Align mounting holes with the mounting points on the cabinet. Ensure the assembly is oriented correctly and positioned exactly as the old assembly was positioned (use your reference photos).
- Install Mounting Hardware:
- Secure the duct trap assembly with mounting screws, clips, or brackets. Tighten screws firmly but do not overtighten—excessive force can crack the plastic housing. Ensure the assembly is securely mounted and doesn't move or shift.
- Verify Assembly Fit:
- Ensure the duct trap assembly fits properly inside the dryer cabinet:The assembly should not interfere with the dryer drum rotationThe assembly should not touch or rub against other componentsThe exhaust hose connection port should be accessibleThe lint screen support frame should be properly positionedThe assembly should sit flush against the mounting points
- Reconnect Exhaust Hose:
- If you disconnected the external exhaust vent hose, reconnect it to the duct trap assembly:Align the hose with the connection port on the duct trapPush the hose onto the connection port until it's fully seatedTighten any hose clamps or fasteners to secure the connectionEnsure the hose connection is airtight and secure
- Verify All Connections:
- Before closing the dryer, carefully verify that:The duct trap assembly is securely mountedAll mounting hardware is tightThe exhaust hose is properly connected and secureNo wires or clips are pinched or damagedThe assembly doesn't interfere with other componentsThe lint screen support frame is properly positioned
- Reinstall Front Panel (if removed):
- If you removed the front panel:Position the front panel back onto the dryerAlign the panel with the mounting pointsEnsure no wires or hoses are pinched between the panel and dryerSecure the panel with all mounting screws
- Move Dryer Back:
- Push the dryer back into position, leaving a small gap from the wall for ventilation and hose clearance.
- Restore Power:
- Plug the dryer back into the electrical outlet or turn on the circuit breaker. For gas dryers, turn on the gas supply valve.
- Test Dryer Operation:
- Start the dryer and run it for 5-10 minutes on a heat cycle:The dryer should start immediatelyThe dryer drum should rotate smoothlyThe heating element should turn on (the dryer should feel warm)Air should flow out of the external vent hose
- Verify Airflow:
- Feel the air coming out of the external vent hose:The airflow should be strong and consistentThe air should be warm or hotThere should be no blockage or weak airflowCompare the airflow to how it was before (if you remember)
- Check for Lint Escape:
- During the test run, check that lint is not escaping into the dryer cabinet or around the duct trap assembly:Open the dryer door during operation (it will stop)Look inside the dryer cabinetThere should be no lint visible around the duct trap assemblyAll lint should be captured by the lint screen and directed through the duct
- Test Lint Screen Fit:
- Remove the lint screen and verify it fits properly in the duct trap assembly's support frame:The lint screen should slide in smoothlyThe screen should sit flush in the frameThe screen should not be loose or wobblyReinstall the lint screen
- Monitor for 30 Minutes:
- Allow the dryer to run for 30 minutes with multiple cycles. Monitor for:Consistent airflow out the vent hoseNormal heating performanceNo unusual noises or vibrationsNo lint escaping into the cabinetNormal drying performanceProper dryer temperature
- Full Functionality Test:
- Run a complete functionality test:Dry a full load of laundry through a complete cycleVerify the dryer heats properlyVerify the drum rotates smoothlyVerify airflow is strong and consistentVerify clothes dry in normal timeVerify no lint escapes into the cabinet
- Check External Vent Hose:
- After the test run, check the external vent hose:Feel the air coming out—it should be warm and strongCheck for any lint buildup around the vent openingVerify the hose is not kinked or blockedEnsure the hose connection is secure
- Monitor for 24 Hours:
- Allow the dryer to operate for 24 hours with multiple loads and monitor for any issues: reduced airflow, lint escaping, heating problems, or operational failures.
- Clean Lint Screen Regularly:
- After installation, establish a routine of cleaning the lint screen before every load:Remove the lint screen from the duct trap assemblyWipe the screen with your hand or a lint brush to remove lintReinstall the screenRegular cleaning prevents lint accumulation and maintains airflow
- Inspect Duct Trap Periodically:
- Every 6 months, inspect the duct trap assembly for lint accumulation:Remove the front panel (if necessary)Look inside the duct trap assemblyIf lint is accumulating, clean it out using a lint brush or vacuumEnsure the duct is clear and not blockedReinstall the front panel
Verified Compatible Models
Fitment reminder: Verified compatibility is maintained by the XPart Model Hub Network. Match the complete appliance model number before ordering.
Buy Online Pick Up In-Store
Address
101 Trillium Dr
Kitchener, Ontario N2E 1W8
Kitchener, Ontario N2E 1W8
Phone
Hours
Mon–Fri 9 AM–5 PM • Sat 9 AM–1 PM


