


Dishwasher Dead or Won’t Respond? Control Board W11087226 – Fix Unresponsive Panel Fast
If your Whirlpool, Maytag, or KitchenAid dishwasher won’t start, has a dead control panel, stops mid-cycle, or displays error codes, the main control board is the most likely cause. In most Whirlpool-built dishwashers, this is caused by a failed control board. When it fails, the appliance cannot process any cycle commands, respond to button presses, or complete any wash program. ⚡ Common failure point in Whirlpool-platform dishwashers. Part W11087226 is the genuine OEM replacement that restores full electronic control and gets your dishwasher running reliably again.
❓ Is This the Right Part?
This is the correct fix if ALL of the following are true:
- ✔ Dishwasher has power — door latch clicks and registers
- ✔ Door latch, thermal fuse, and water supply have been confirmed OK
- ✔ Control panel lights up but no cycle starts, or panel is completely dead
- ✔ ONLY problem is failure to start, mid-cycle stops, error codes, or unresponsive buttons
Not sure? Send us your model number — we’ll confirm before you order.
🔧 Common Symptoms
- Dishwasher won’t start — no response to any button presses
- Control panel lights up but no cycle begins
- Dishwasher stops mid-cycle and won’t resume
- Error codes displayed on the control panel
✔ If these symptoms match, this is the most likely failed component in the system.
✔ In most cases, replacing this control board restores normal operation immediately.
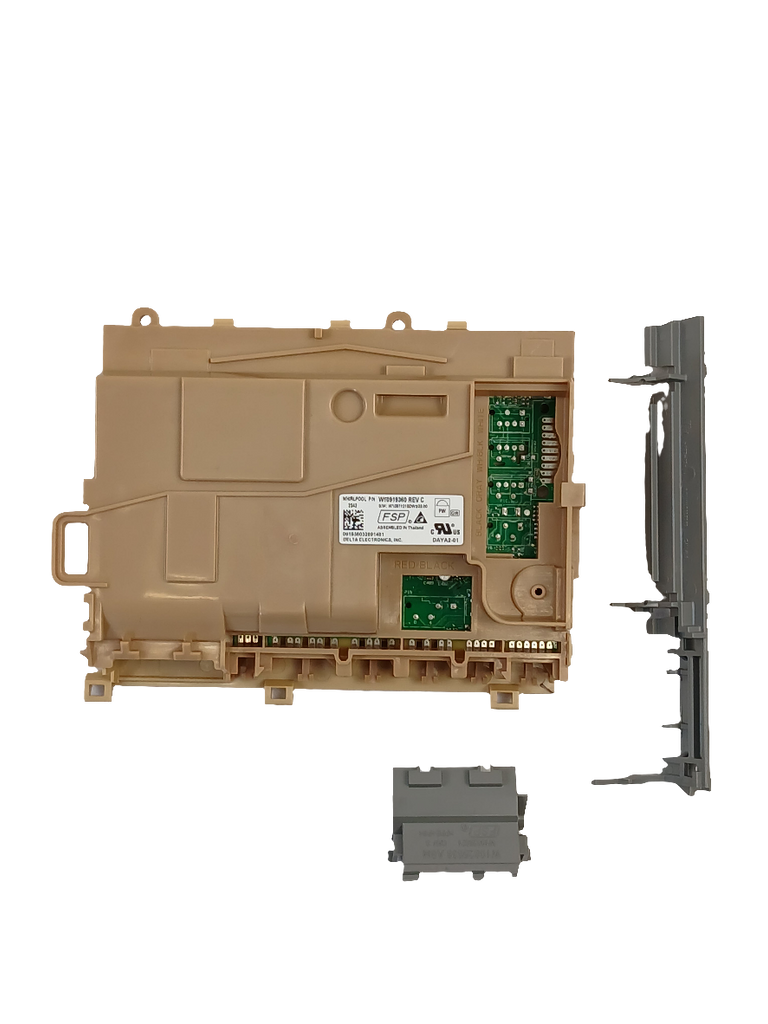
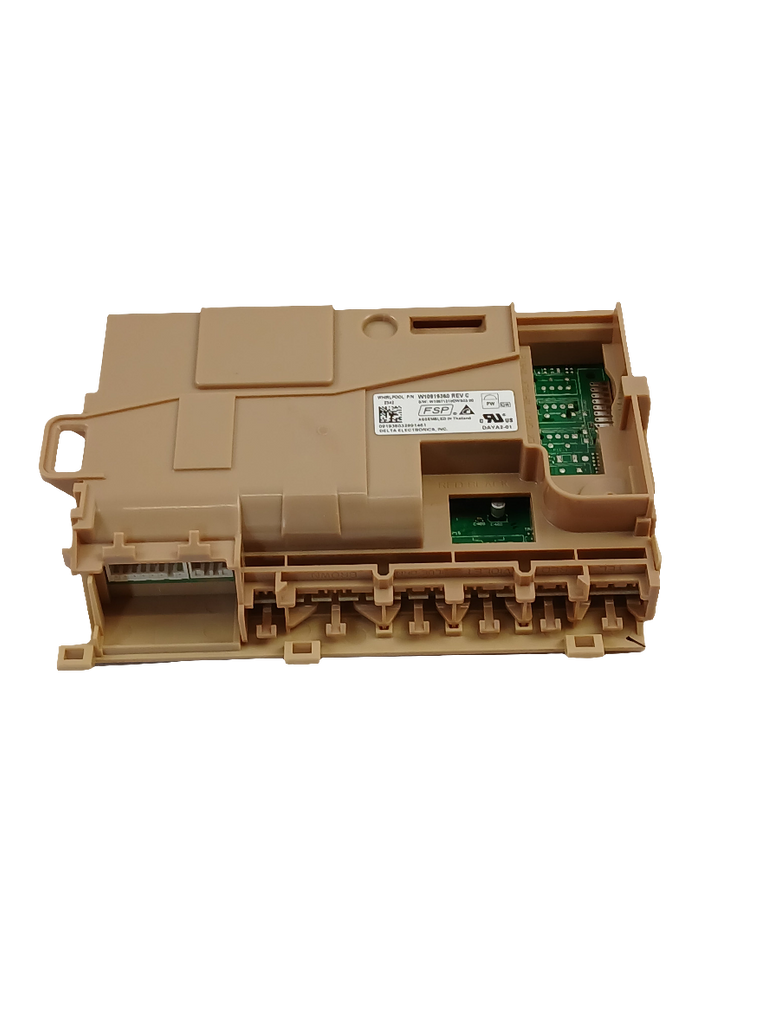
📦 Part Details
- Part Number: W11087226
- Type: Main Electronic Control Board / PCB Assembly — manages cycle selection, water temperature, wash timing, drain sequencing, and heated dry
- Replaces: W10919360, W10906426, W10906427, W10906428, W10906429, W10906430
- Brands: Whirlpool, Maytag, KitchenAid, Jenn-Air, Amana, Kenmore
Inspect the door latch switch and thermal fuse before installing the new board — a failed latch or blown fuse can mimic a dead control board exactly and will prevent a new board from operating. Replacing both in the same service call avoids a second labour charge.
⚙️ Installation
Skill Level: ADVANCED — 60–90 minutes. Disconnect power at the breaker before servicing. Open the door and remove the inner door panel screws (typically 6–8 Torx T20 around the perimeter). Photograph all wire harness connectors before disconnecting, swap the board, reconnect all harnesses per your photos, and reassemble the door panel. Restore power and run a test cycle to confirm operation.
✓ Compatible Models
Confirmed compatible with WDF330PAHB0, WDF330PAHB1, WDF330PAHB2, WDF330PAHB3, WDF330PAHB4, WDF330PAHD0, WDF330PAHD1, WDF330PAHD2, WDF330PAHS0, WDF330PAHS1, WDF330PAHS2, WDF330PAHS3, WDF330PAHS4, WDF330PAHS5, WDF330PAHT0, WDF330PAHT1, WDF330PAHT2, WDF330PAHT3, WDF330PAHT4, WDF330PAHW0, WDF330PAHW1, WDF330PAHW2, WDF330PAHW3, WDF330PAHW4, WDF331PAHB0, WDF331PAHS0, WDF331PAHW0 plus additional Whirlpool-platform models. Contact us to verify your model number before ordering.
💡 Pro Tip
A failed door latch switch or a blown thermal fuse can mimic a dead control board exactly. Before ordering, confirm the door latch is clicking and registering. If the board replacement doesn’t restore operation, the thermal fuse is the next most likely culprit — replacing both in the same service call saves a second labour charge.
✓ Model-Specific Repair Pages
✅Compatibility & Cross Reference
Not sure about your model number? Call 1-877-899-7278 and we’ll help you confirm. All brand names are the property of their respective owners and are used for compatibility reference only.
Buy Online Pick Up In-Store
Kitchener, Ontario N2E 1W8


- Choosing a selection results in a full page refresh.

