



Equivalent PartsCross-reference listings may have additional stockCheck Stock →
WASHER NOT AGITATING DURING WASH CYCLE (STUCK IN SPIN MODE)
WASHER NOT SPINNING DURING SPIN CYCLE (STUCK IN AGITATE MODE)
WASHER MAKING LOUD GRINDING OR CLICKING SOUNDS DURING MODE TRANSITIONS
WASHER VIBRATING EXCESSIVELY DURING SPIN
WASH BASKET SPINNING DURING AGITATION (IMPROPER MODE ENGAGEMENT)
AGITATOR NOT ROTATING DURING WASH CYCLE
WASHER STOPPING MID-CYCLE WITH ERROR CODES
WASHER MAKING CONTINUOUS CLICKING SOUNDS WITHOUT TRANSITIONING MODES
WASHER NOT COMPLETING WASH CYCLES
WASHER MAKING LOUD BANGING SOUNDS DURING SPIN
WASHER LEAKING DURING SPIN CYCLE (DUE TO IMPROPER BASKET ENGAGEMENT)
WASHER NOT DRAINING PROPERLY (MODE SHIFTER NOT ENGAGING SPIN)
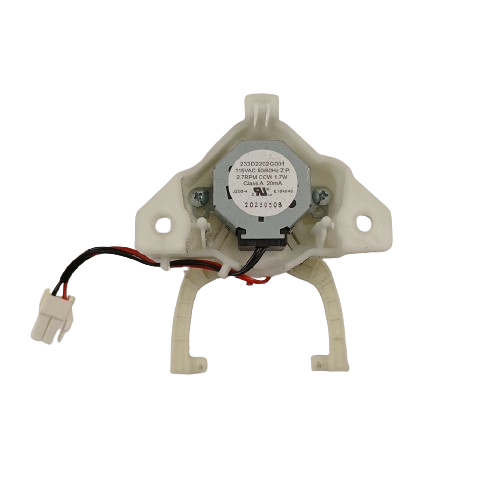
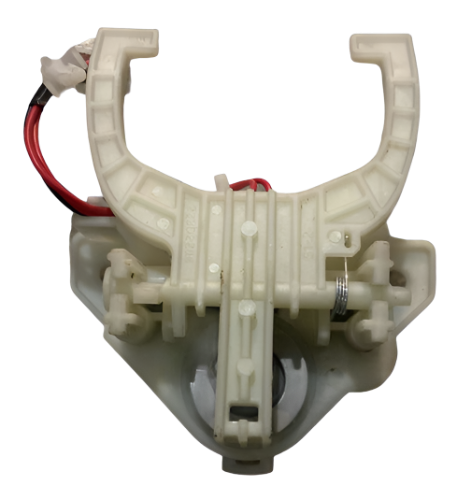
GE / Mabe Washer Mode Shifter Assembly WW01F03184, Fixes Washer not agitating during wash cycle (stuck in spin mode) Washer not spinning during spin cycle (stuck in agitate mode) Washer making loud grinding or clicking sounds during mode transitions Washer vibrating excessively during spin Wash basket spinning during agitation (improper mode engagement) Agitator not rotating during wash cycle Washer stopping mid-cycle with error codes Washer making continuous clicking sounds without transitioning modes Washer not completing wash cycles Washer making loud banging sounds during spin Washer leaking during spin cycle (due to improper basket engagement) Washer not draining properly (mode shifter not engaging spin)
Top-load washer mode shifter assembly that shifts the drive system between agitation and spin.
Part WW01F03184GE / Mabe
Guaranteed to Fit — or your money back.
Confirm your full appliance model number before ordering.
Confirm your full appliance model number before ordering.
Is This the Right Part?
Part NumberWW01F03184
ManufacturerGE / Mabe
Appliance TypeWasher
Part TypeWasher Mode Shifter Assembly
✅ Cross Reference Information
233D2202G001
Common Symptoms
- Washer not agitating during wash cycle (stuck in spin mode) Washer not spinning during spin cycle (stuck in agitate mode) Washer making loud grinding or clicking sounds during mode transitions Washer vibrating excessively during spin Wash basket spinning during agitation (improper mode engagement) Agitator not rotating during wash cycle Washer stopping mid-cycle with error codes Washer making continuous clicking sounds without transitioning modes Washer not completing wash cycles Washer making loud banging sounds during spin Washer leaking during spin cycle (due to improper basket engagement) Washer not draining properly (mode shifter not engaging spin)
Check Before Replacing
- Verify the washer model number against the manufacturer parts listing before ordering.
- Observe whether the washer fails specifically during the agitate-to-spin or spin-to-agitate transition.
- Inspect for abnormal drive-system noise, while recognizing that other components can cause similar symptoms.
Pro Tip
Document all mechanical connections with detailed photos before disconnecting.
Part Details
Part NumberWW01F03184
Part TypeWasher Mode Shifter Assembly
ManufacturerGE / Mabe
Appliance TypeWasher
Installation Notes
- Turn off power
- to the washer at the circuit breaker to ensure complete power disconnection.
- Close the water supply valves
- (hot and cold) to prevent water leakage during the repair.
- Unplug the washer
- from the wall outlet for additional safety.
- Verify power is off
- by attempting to turn on the washer. The washer should not respond.
- Move the washer
- away from the wall to provide access to the back and sides of the cabinet.
- Take multiple photos
- of the washer cabinet, mode shifter location, mounting, all mechanical connections, and linkage positions before disassembly. Document from multiple angles. This is absolutely critical for proper reassembly. Use a camera or smartphone to capture high-quality images.
- Create a detailed assembly map
- by photographing the mode shifter connection points, including the drive shaft connection, actuator arm position, spring locations, mounting bracket, and linkages. Use masking tape to label key reference points.
- Remove the washer cabinet
- by locating and removing the screws securing the top panel and front panel (typically 4-8 screws on the top and 4-8 screws on the front).
- Lift the top panel
- upward and tilt it back to access the interior of the washer. Some models require disconnecting the lid switch connector before removing the top panel.
- Remove the front panel
- by releasing the clips or removing the screws securing it to the cabinet frame. Carefully pull the front panel forward and set it aside.
- Locate the mode shifter assembly
- (typically mounted on the transmission or drive system near the bottom of the washer, accessible from the front or side).
- Take additional detailed photos
- of the mode shifter assembly, all mechanical connections, spring positions, actuator arm orientation, and linkage connections before disassembly.
- Disconnect the actuator linkage
- from the mode shifter by releasing the clip or removing the pin connecting the linkage to the actuator arm. Note the exact position and orientation.
- Remove the mounting bracket screws
- securing the mode shifter assembly to the transmission or washer frame (typically 2-4 mounting screws or bolts).
- Carefully remove the old mode shifter assembly
- from the washer and place it on a clean work surface with adequate space for inspection.
- Inspect the old mode shifter
- for visible damage such as a bent or broken actuator arm, worn or broken clutch components, broken or weakened springs, worn drive shaft splines, cracked or broken plastic mounting bracket, or seized linkages. This confirms the diagnosis.
- Inspect the transmission drive shaft
- and mounting area for damage, corrosion, or worn splines. The shaft should be intact with clear, undamaged splines. If the shaft is damaged or worn, it may need replacement.
- Clean the transmission mounting area
- thoroughly with a dry cloth to remove any debris, lint, or corrosion. Ensure the mounting surface is clean and dry.
- Unpack the new WW02F00671 mode shifter assembly
- from its packaging. Handle carefully to avoid damaging the actuator arm, springs, or clutch mechanism.
- Verify the mode shifter specifications
- match the old assembly: overall dimensions approximately 6-8 inches x 3-4 inches, drive shaft length and spline pattern, actuator arm design and orientation, mounting bracket hole locations, spring positions.
- Compare the new mode shifter to the old one
- to verify the dimensions, actuator arm design, drive shaft splines, mounting bracket, spring positions, and overall appearance match. Ensure you have the correct replacement part.
- Inspect the new mode shifter
- for any damage or defects before installation. The assembly should be intact with no visible damage, bent components, or broken springs.
- Position the new mode shifter assembly
- on the transmission or washer frame, aligning the drive shaft with the transmission shaft and the mounting bracket holes with the frame mounting points.
- Install the mounting bracket screws or bolts
- to secure the mode shifter to the transmission or washer frame. Tighten firmly but do not overtighten, which can crack the mounting bracket or strip the threads.
- Verify the mode shifter is securely mounted
- and does not wobble or shift when gently pressed.
- Reconnect the actuator linkage
- to the mode shifter by inserting the pin or engaging the clip connecting the linkage to the actuator arm. Use your detailed photos to ensure correct linkage position and orientation.
- Verify the actuator linkage is securely connected
- by gently tugging on it. The linkage should not pull off—it should be firmly connected.
- Manually test the mode shifter operation
- by gently moving the actuator arm through its full range of motion. The mode shifter should move smoothly between agitate and spin positions without binding or resistance.
- Verify the springs are properly positioned
- and provide appropriate tension for mode shifting. The springs should be intact and properly seated.
- Reinstall the front panel
- by positioning it on the cabinet frame and securing it with the mounting screws or engaging the clips.
- Reinstall the top panel
- by positioning it on the cabinet and securing it with the mounting screws. Reconnect the lid switch connector if it was disconnected.
- Move the washer back into position
- and restore power at the circuit breaker.
- Open the water supply valves
- (hot and cold).
- Turn on the washer
- and set it to a short wash cycle (approximately 10-15 minutes).
- Verify the washer agitates
- during the wash phase by observing the agitator rotation. The agitator should rotate back and forth smoothly without the wash basket spinning.
- Verify the washer spins
- during the spin phase by observing the wash basket rotation. The wash basket should spin at high speed without the agitator moving independently.
- Listen for unusual noises
- during mode transitions. The mode shifter should operate quietly without grinding, clicking, or squealing sounds.
- Allow the washer to complete the full cycle
- to verify proper operation throughout the wash, rinse, and spin phases.
- Test multiple wash cycles
- with different load sizes to verify the mode shifter operates properly under various conditions.
- Monitor the washer for 24-48 hours
- to ensure the mode shifter operates properly without issues.
- Safety Notes:
- Always turn off power and close the water supply valves before working on the washer to prevent electrical shock and water leakage. Handle mechanical components carefully to avoid damaging sensitive clutch mechanisms, springs, or actuator arms. Ensure the mode shifter is securely mounted and all linkages are properly connected before operating the washer. This repair requires advanced mechanical skills and careful attention to detail—most homeowners should hire a professional appliance repair technician for this repair.
Verified Compatible Models
Fitment reminder: Verified compatibility is maintained by the XPart Model Hub Network. Match the complete appliance model number before ordering.
Buy Online Pick Up In-Store
Address
101 Trillium Dr
Kitchener, Ontario N2E 1W8
Kitchener, Ontario N2E 1W8
Phone
Hours
Mon–Fri 9 AM–5 PM • Sat 9 AM–1 PM



