WPW10384183 Refrigerator Thermostat (replaces W10384183)

XPart Supply Ltd.

Price
$99.99
Buying Options: New

Product variant with selected options does not exist!

Frequently Bought Together

Thermistor, Temperature Sensor, Air Temperature Sensor, Refrigerator Thermostat, Temperature Probe

WPW10384183, W10384183, 2118228, AH3500720, EA3500720, PS3500720

Whirlpool, KitchenAid, Maytag, Jenn-Air, Amana, Inglis

Fits Models: (Ctrl+F and Enter Your Model Number)

WhirlpoolWRF555SDFZ00, WRF555SDFZ01, WRF555SDFZ02, WRF555SDFZ03, WRF535SWHZ00, WRF535SWHZ01, WRF535SWHZ02, WRF535SWHZ03, WRF736SDAM13, WRF736SDAM14, WRF736SDAM15, WRF736SDAM16, WRF757SDEM00, WRF757SDEM01, WRF757SDEM02, WRF757SDEM03KitchenAidKRFF305ESS00, KRFF305ESS01, KRFF305ESS02, KRFF305ESS03, KRFC704FPS00, KRFC704FPS01, KRFC704FPS02, KRFC704FPS03, KRMF706ESS00, KRMF706ESS01, KRMF706ESS02, KRMF706ESS03MaytagMFI2570FEZ00, MFI2570FEZ01, MFI2570FEZ02, MFI2570FEZ03, MFT2776FEZ00, MFT2776FEZ01, MFT2776FEZ02, MFT2776FEZ03, MFF2558FEZ00, MFF2558FEZ01, MFF2558FEZ02, MFF2558FEZ03

Professional Repair Time: 30-60 minutes
DIY Repair Time: 45-90 minutes
Difficulty Rating: Moderate (3/5) — Requires unplugging refrigerator, accessing evaporator compartment, disconnecting wire connector, removing old thermistor, installing new thermistor, reconnecting wire connector, verifying temperature control

CRITICAL SAFETY WARNING: This repair involves working with electrical systems and accessing the evaporator compartment. Always unplug the refrigerator from the electrical outlet before beginning work to prevent electrical shock. If uncomfortable with this repair or unfamiliar with refrigerator evaporator access procedures, hire a qualified appliance technician. IMPORTANT: This repair requires accessing the evaporator compartment—have towels ready to absorb condensation.TOOLS REQUIRED: Phillips screwdriver, flathead screwdriver, nut driver or socket set (typically 1/4-inch or 5/16-inch), needle-nose pliers, flashlight, work gloves, towels.IMPORTANT: This thermistor must be mounted in proper thermal contact with the evaporator coil or air duct—improper mounting causes inaccurate temperature readings.

  1. Unplug the refrigerator from the electrical outlet to ensure complete power disconnection. CRITICAL: Never work on the refrigerator while it's plugged in.
  2. Remove all food items from the refrigerator and freezer compartments. Important: Store perishable items in a cooler with ice during the repair.
  3. Locate the evaporator compartment (typically behind the back panel inside the freezer compartment). Important: Access method varies by refrigerator model—consult the refrigerator manual if needed.
  4. Take multiple photos of the evaporator compartment before disassembly, including thermistor location, wire routing, mounting position, and thermal contact points. CRITICAL: Proper reassembly requires exact positioning.
  5. Take detailed close-up photos of: the thermistor mounting location (typically taped to the evaporator coil or air duct), the wire connector and wire routing, the thermal contact points, and the surrounding components.
  6. Remove the evaporator compartment cover by removing the mounting screws using a Phillips screwdriver or nut driver (typically 4-8 screws). Caution: The cover may be stuck due to ice buildup—allow ice to melt or carefully chip away ice.
  7. Carefully remove the evaporator compartment cover and set it aside. Caution: The cover may have wires attached—do not pull on wires.
  8. Locate the thermistor inside the evaporator compartment. The thermistor is typically a small plastic component with wire leads, taped to the evaporator coil or mounted in the air duct.
  9. Disconnect the thermistor wire connector from the refrigerator wiring harness by pressing the release tab and pulling the connector straight off. Caution: Do not pull on the wires—press the release tab and carefully remove the connector.
  10. Remove the old thermistor from its mounting location by carefully peeling away the tape or removing the mounting clip. Caution: Do not damage the evaporator coil or air duct.
  11. Inspect the old thermistor for damage indicators: wire leads damaged or corroded (electrical failure), plastic housing cracked or damaged (moisture damage or physical impact), loss of thermal contact (adhesive failure or improper mounting), or visible damage to resistor element (physical damage). This confirms the diagnosis.
  12. Inspect the thermistor mounting location on the evaporator coil or air duct for damage, corrosion, or debris. Clean thoroughly with a soft cloth.
  13. Unpack the new WPW10384183 thermistor from its packaging. CAUTION: The thermistor is a precision component—handle carefully.
  14. Compare the new thermistor to the old one to verify overall dimensions, wire lead length, connector type, mounting method, and overall design match.
  15. Inspect the new thermistor for any shipping damage before installation. The plastic housing should be intact with no cracks or damage, the wire leads should be intact and undamaged, the connector should be clean and undamaged, and the resistor element should be intact.
  16. Position the new thermistor at the mounting location according to your detailed photos. Important: The thermistor must be in direct thermal contact with the evaporator coil or air duct for accurate temperature sensing.
  17. Secure the new thermistor to the evaporator coil or air duct using the mounting tape or clip provided. Important: Ensure the thermistor is firmly pressed against the mounting surface for good thermal contact.
  18. Verify the thermistor is securely mounted and in proper thermal contact with the evaporator coil or air duct. The thermistor should not move or vibrate.
  19. Route the thermistor wire leads according to your detailed photos. Important: Ensure the wires are not pinched, kinked, or touching sharp edges.
  20. Connect the thermistor wire connector to the refrigerator wiring harness. Push the connector firmly onto the terminals until it clicks into place. CRITICAL: Incorrect connections cause thermistor malfunction or electrical hazards.
  21. Verify the wire connector is fully seated by trying to pull it off—it should not come off without pressing the release tab.
  22. Reinstall the evaporator compartment cover by aligning it with the mounting holes and installing the mounting screws.
  23. Tighten the mounting screws firmly using a Phillips screwdriver or nut driver. Caution: Do not over-tighten—this can crack the cover.
  24. Return food items to the refrigerator and freezer compartments.
  25. Restore electrical power by plugging in the refrigerator.
  26. Allow the refrigerator to run for 24 hours to stabilize temperature. Important: Do not adjust temperature settings during this period.
  27. Monitor the refrigerator temperature after 24 hours using a refrigerator thermometer. The refrigerator compartment should be 35-38°F and the freezer compartment should be 0-5°F.
  28. Verify proper temperature control by checking that the compressor cycles on and off normally. The compressor should run for 10-20 minutes, then cycle off for 10-20 minutes.
  29. Check for error codes on the temperature display. If error codes appear, the thermistor may not be properly connected or may be defective.
  30. If the refrigerator maintains proper temperature and the compressor cycles normally, the repair is complete.

Safety Notes: Always unplug the refrigerator before working on the thermistor. Store perishable food in a cooler during the repair. Ensure the thermistor is mounted in proper thermal contact with the evaporator coil or air duct. Verify the wire connector is fully seated before testing. Allow 24 hours for temperature stabilization before evaluating performance. This repair typically takes 30-60 minutes depending on refrigerator model and evaporator access. If uncomfortable working with refrigerator electrical systems or accessing the evaporator compartment, hire a professional appliance technician.

  1. The WPW10384183 thermistor operates as a variable resistor—as temperature changes, electrical resistance changes proportionally, allowing the control board to calculate air temperature. The thermistor uses a negative temperature coefficient (NTC) resistor, meaning resistance decreases as temperature increases. At typical refrigerator temperatures (35-38°F), the thermistor has a resistance of approximately 10,000-15,000 ohms. At freezer temperatures (0-5°F), the resistance is approximately 20,000-30,000 ohms. The control board sends a small electrical current through the thermistor and measures the voltage drop to calculate resistance, then converts resistance to temperature. Understanding this principle helps diagnose thermistor failures—test the thermistor with a multimeter by measuring resistance at different temperatures.
  2. Before replacing the refrigerator thermistor, always verify the thermistor is actually the problem—a faulty control board or wiring harness is often misdiagnosed as a failed thermistor. Test the thermistor with a multimeter by measuring resistance across the thermistor terminals. At room temperature (70°F), the resistance should be approximately 5,000-8,000 ohms. Place the thermistor in ice water (32°F) and the resistance should increase to approximately 15,000-20,000 ohms. If the resistance changes appropriately with temperature, the thermistor is functioning and the control board or wiring may be faulty. If the resistance is infinite (open circuit) or zero (short circuit), the thermistor has failed and must be replaced.
  3. Proper thermal contact between the thermistor and the evaporator coil or air duct is critical for accurate temperature sensing—improper mounting causes inaccurate readings and temperature control problems. The thermistor must be firmly pressed against the evaporator coil or air duct to accurately sense air temperature. If the thermistor is loose, not making contact, or mounted in the wrong location, it will sense incorrect temperatures and the control board will not regulate temperature properly. Always verify the thermistor is in direct thermal contact with the mounting surface before securing it. Use the mounting tape or clip provided to ensure firm contact. If the thermistor is loose or not making contact, remove it and remount it properly.
  4. The thermistor wire leads must be intact and properly connected—damaged wires or loose connectors cause thermistor failure and temperature control problems. Inspect the wire leads for cracks, breaks, or corrosion. The connector must be fully seated and secure. If the wires are damaged, the entire thermistor assembly must be replaced because individual wires cannot be replaced separately. If the connector is loose, the thermistor may not send temperature readings to the control board, causing temperature control failure.
  5. The protective plastic housing protects the resistor element from moisture and physical damage—a cracked or damaged housing allows moisture to enter and damage the resistor. Moisture is the most common cause of thermistor failure. Water or condensation can enter through cracks in the housing and corrode the resistor element, causing electrical failure. Always inspect the housing for cracks or damage before installation. If the housing is cracked or damaged, the thermistor must be replaced. Ensure the new thermistor is properly mounted and protected from direct water spray or condensation.
  6. If the new thermistor fails immediately after installation (within the first few cycles), the cause is typically: improper thermal contact, loose wire connector, faulty control board, or defective replacement thermistor. Verify the thermistor is firmly mounted in thermal contact with the evaporator coil or air duct. Verify the wire connector is fully seated and secure. Verify the control board is functioning properly by checking for error codes or unusual compressor cycling. If everything else is correct, the replacement thermistor may be defective—contact the supplier for a replacement or refund.
  7. Temperature control problems can be caused by multiple factors—always test the thermistor before replacing to confirm the diagnosis. Common causes of temperature control problems include: faulty thermistor (most common), faulty control board (second most common), faulty compressor, faulty evaporator fan motor, blocked air vents, or improper temperature setting. Test the thermistor with a multimeter before replacing. If the thermistor is functioning properly, the control board or other components may be faulty. Proper diagnosis prevents unnecessary part replacement and saves time and money.
  8. The refrigerator control board uses thermistor readings to regulate compressor and fan operation—a faulty thermistor causes erratic compressor cycling. When the thermistor sends incorrect temperature readings, the control board may turn the compressor on and off rapidly, run continuously, or not run at all. If the compressor cycles on and off rapidly (every few minutes), the thermistor may be sending unstable readings. If the compressor runs continuously without cycling off, the thermistor may be sending readings that indicate the temperature is too warm. If the compressor doesn't run at all, the thermistor may be sending readings that indicate the temperature is too cold, or the control board may detect a thermistor failure.
  9. Water damage is a common cause of thermistor failure—if the refrigerator has experienced water leakage or excessive condensation, inspect the thermistor for water damage before installing a new thermistor. Water can enter the thermistor through cracks in the housing or through the wire connector, causing corrosion and electrical failure. If the old thermistor shows signs of water damage (rust, corrosion, or water stains), identify and repair the source of water leakage before installing the new thermistor. Common sources of water leakage include: faulty drain pan, clogged drain line, cracked evaporator coil, or faulty water inlet valve. Repairing water leaks prevents premature failure of the new thermistor.
  10. After replacing the refrigerator thermistor, allow 24 hours for temperature stabilization before evaluating performance. The refrigerator needs time to reach thermal equilibrium and for the control board to establish proper temperature control. During this stabilization period, the compressor may run more frequently as the refrigerator cools down and the control board learns the new thermistor's characteristics. Do not adjust temperature settings during this period. After 24 hours, use a refrigerator thermometer to verify proper temperature: refrigerator compartment should be 35-38°F and freezer compartment should be 0-5°F.
  11. Monitor compressor cycling and temperature stability over several days after thermistor replacement to verify proper operation. The compressor should cycle on for 10-20 minutes, then cycle off for 10-20 minutes. Temperature should remain stable within ±2°F of the set temperature. If the compressor cycles erratically or temperature is unstable, the thermistor may not be properly mounted or the control board may be faulty. Verify the thermistor is in proper thermal contact and the wire connector is fully seated. If problems persist, the control board may need to be tested or replaced.
  12. The refrigerator thermistor lifespan is typically 10-15 years with average use, but can be shortened by moisture damage, corrosion, physical damage, or manufacturing defects. Factors that shorten thermistor life include: moisture damage from water leakage or excessive condensation (most common cause of premature failure), corrosion from salt spray or chemical exposure (rare in home refrigerators), physical damage from impact or improper installation (mechanical damage), electrical stress from power surges or control board faults (electrical damage), and poor-quality aftermarket thermistors (premature failure). To extend thermistor life, maintain proper refrigerator drainage to prevent water leakage, keep the evaporator compartment clean and free of ice buildup, ensure proper air circulation around the refrigerator, address water leaks promptly before they damage the thermistor, and always use genuine OEM thermistors for maximum durability. Regular maintenance and prompt repairs significantly extend thermistor life and prevent premature failure.
  • Refrigerator too warm or not cooling (control board cannot detect temperature, most common symptom)
  • Refrigerator too cold or freezing food (control board receiving incorrect temperature readings)
  • Refrigerator running continuously without cycling off (control board thinks temperature is too warm)
  • Refrigerator not running at all (control board detecting thermistor failure)
  • Temperature display showing error codes (varies by model)
  • Inconsistent temperature control (erratic thermistor readings)
  • Compressor cycling on and off rapidly (unstable temperature readings)
  • Food spoiling prematurely (temperature too warm)
  • Food freezing in refrigerator compartment (temperature too cold)
  • Freezer not maintaining proper temperature (thermistor failure)
  • Ice buildup in refrigerator or freezer (temperature control issues)
  • Compressor not turning on (control board cannot detect temperature)


Whirlpool refrigerator replacement parts, Frigidaire refrigerator replacement parts, GE refrigerator replacement parts, Kenmore refrigerator replacement parts, KitchenAid refrigerator replacement parts, LG refrigerator replacement parts, Maytag refrigerator replacement parts, Whirlpool refrigerator drawers and glides replacement, Whirlpool dishwasher replacement parts, GE dishwasher replacement parts, KitchenAid dishwasher replacement parts, Maytag dishwasher replacement parts, Frigidaire dishwasher replacement parts, Kenmore dishwasher replacement parts, Whirlpool washer replacement parts, GE washer replacement parts, Maytag washer replacement parts, Kenmore washer replacement parts, LG washer replacement parts, Whirlpool dryer replacement parts, GE dryer replacement parts, Maytag dryer replacement parts, Kenmore dryer replacement parts, LG dryer replacement parts, Whirlpool range replacement parts, GE range replacement parts, Whirlpool stove replacement parts, GE stove replacement parts, GE oven replacement parts, GE microwave replacement parts, buy Whirlpool refrigerator parts online, buy GE dishwasher parts online, replacement Kenmore washer parts for sale, buy Maytag dryer parts, LG washer replacement parts online, KitchenAid refrigerator parts for sale, Whirlpool stove and range replacement parts

WPW10384183 Refrigerator Thermostat

The WPW10384183 is a genuine OEM Whirlpool refrigerator thermistor designed for Whirlpool, KitchenAid, Maytag, Jenn-Air, Amana, Inglis, Magic Chef, Kenmore (Whirlpool-made), and IKEA refrigerators and freezers. This critical component detects air temperature inside the refrigerator or freezer compartment and sends temperature information to the electronic control board. The thermistor is essential for proper refrigerator function—without a functioning thermistor, the control board cannot regulate temperature properly, causing the refrigerator to run too cold, too warm, or not at all, resulting in food spoilage or freezing. The WPW10384183 is a complete thermistor assembly that includes all components necessary for installation. The refrigerator thermistor is constructed from premium materials including a temperature-sensitive resistor element (detects temperature changes and varies electrical resistance accordingly), protective plastic housing (protects the resistor element from moisture and physical damage), wire leads with connector (connects to the control board wiring harness), mounting clip or tape (secures the thermistor to the evaporator coil or air duct), and heat-conductive adhesive backing (ensures accurate temperature sensing by maintaining thermal contact). The WPW10384183 features a precision temperature-sensing design that provides accurate temperature readings across the full operating range of the refrigerator. The thermistor operates as a variable resistor—as temperature changes, the electrical resistance of the thermistor changes proportionally. The control board measures this resistance and calculates the actual air temperature. Based on this temperature reading, the control board turns the compressor and fans on or off to maintain the desired temperature setting. The thermistor is typically mounted near the evaporator coil or in the air duct where it can accurately sense the air temperature. The WPW10384183 replaces older thermistor part numbers including W10384183, 2118228, AH3500720, EA3500720, PS3500720, and similar thermistors and features improved temperature-sensitive resistor element for better accuracy and faster response time (responds 30% faster than previous generation), enhanced protective plastic housing for better moisture resistance and durability, upgraded wire leads and connector for better electrical conductivity and corrosion resistance, improved mounting clip or tape for better thermal contact and secure positioning, optimized heat-conductive adhesive backing for better temperature sensing accuracy, and reinforced construction for better reliability across all compatible refrigerator models. The refrigerator thermistor operates through temperature-dependent electrical resistance: when the refrigerator air temperature changes, the thermistor resistance changes proportionally; the control board sends a small electrical current through the thermistor; the control board measures the voltage drop across the thermistor; the control board calculates the resistance based on the voltage drop; the control board converts the resistance to a temperature reading; based on the temperature reading, the control board turns the compressor and fans on or off; when the temperature is too warm, the control board turns on the compressor to cool the refrigerator; when the temperature reaches the desired setting, the control board turns off the compressor; the thermistor continuously monitors temperature and sends updates to the control board. Common failure causes include normal wear from age and continuous operation (typical thermistor lifespan 10-15 years with average use), resistor element failure from electrical stress or thermal cycling (most common failure), wire lead or connector failure from corrosion or physical damage, moisture damage from condensation or water leakage, physical damage from impact or improper installation, loss of thermal contact from adhesive failure or improper mounting, manufacturing defects, or premature failure from low-quality replacement thermistors. When the refrigerator thermistor fails, symptoms include refrigerator too warm or not cooling (control board cannot detect temperature, most common symptom), refrigerator too cold or freezing food (control board receiving incorrect temperature readings), refrigerator running continuously without cycling off (control board thinks temperature is too warm), refrigerator not running at all (control board detecting thermistor failure), temperature display showing error codes (varies by model), inconsistent temperature control (erratic thermistor readings), or compressor cycling on and off rapidly (unstable temperature readings). The WPW10384183 is a direct replacement thermistor that provides reliable, accurate temperature sensing for optimal refrigerator performance and long service life. IMPORTANT: This thermistor must be mounted in proper thermal contact with the evaporator coil or air duct—improper mounting causes inaccurate temperature readings. CRITICAL: Always unplug the refrigerator before working on the thermistor to prevent electrical shock. This repair involves accessing the evaporator compartment—if uncomfortable with this repair, hire a qualified appliance technician.

Key Features and Design

This high-quality thermostat features an adjustable dial for easy temperature settings, allowing you to customize cooling levels for your fridge. Crafted by XPart Supply Ltd., it's built to fit seamlessly into a wide range of models, including popular ones like ASI2175GRB00 and MRT118FFFE00, ensuring compatibility and straightforward installation. Its durable construction reflects the brand's reputation for dependable appliance parts that stand up to everyday use.

  • Adjustable Dial: Fine-tune the temperature to keep your food fresh and prevent spoilage.
  • Universal Compatibility: Replaces W10384183 and works with numerous refrigerator models for versatile application.
  • Robust Build: Engineered for long-term reliability, helping maintain consistent performance in your kitchen appliance.

Performance and Benefits

By regulating your refrigerator's temperature accurately, this thermostat solves issues like inconsistent cooling or food waste, enhancing your overall kitchen efficiency. Experience the benefit of perfectly preserved groceries, reduced energy costs, and peace of mind knowing you're using a part from a trusted supplier like XPart Supply Ltd., known for quality repairs that extend the life of your appliances.

The WPW10384183 Refrigerator Thermostat is designed to regulate temperature in your fridge. It has an adjustable dial to set the desired temperature. Enjoy perfectly cooled food and drinks with this reliable and high-quality thermostat.

Part number WPW10384183 replaces W10384183

Supported Models:

10632242101, 10632243101, 10632249101, 10632942101, 10632943101, 10632949101, 10641132710, 10641172710, 10641172711, 10641173710, 10641173711, 10641179711, 10650042710, 10650042711, 10650042713, 10650043710, 10650043711, 10650043713, 10650045710, 10650045711, 10650045713, 10650049710, 10650049713, 10651112710, 10651113710, 10651113711, 10651115710, 10651115711, 10651119710, 10651119711, 10651332710, 10651335710, 10651339710, 10651752710, 10651752711, 10651752714, 10651753710, 10651753714, 10651754710, 10651754714, 10651759714, 10673002511, 10673003511, 10673009511, 10679472411, 10679473411, 5MT711BFEG00, 5VM1BXGFYA00, 5VWT51SFYF00, 5VWT51SFYW00, 5VWT59SFYF00, 5VWT59SFYW00, 5WRS315NHM00, 8WRS21SNHW00, ART308FFDB03, ART308FFDB06, ART308FFDB07, ART308FFDB08, ART308FFDB10, ART308FFDM03, ART308FFDM06, ART308FFDM07, ART308FFDM08, ART308FFDM10, ART308FFDW03, ART308FFDW06, ART308FFDW07, ART308FFDW08, ART308FFDW10, ART318FFDB03, ART318FFDB06, ART318FFDB07, ART318FFDB08, ART318FFDB10, ART318FFDS03, ART318FFDS06, ART318FFDS07, ART318FFDS08, ART318FFDS10, ART318FFDW01, ART318FFDW03, ART318FFDW06, ART318FFDW07, ART318FFDW08, ART318FFDW10, ASI2175GRB00, ASI2175GRB01, ASI2175GRB03, ASI2175GRB04, ASI2175GRB07, ASI2175GRB08, ASI2175GRS00, ASI2175GRS01, ASI2175GRS03, ASI2175GRS04, ASI2175GRS07, ASI2175GRS08, ASI2175GRW00, ASI2175GRW01, ASI2175GRW03, ASI2175GRW04, ASI2175GRW07, ASI2175GRW08, ASI2575GRB00, ASI2575GRB01, ASI2575GRB02, ASI2575GRB04, ASI2575GRB05, ASI2575GRB08, ASI2575GRS00, ASI2575GRS01, ASI2575GRS02, ASI2575GRS04, ASI2575GRS05, ASI2575GRS08, ASI2575GRW00, ASI2575GRW01, ASI2575GRW02, ASI2575GRW04, ASI2575GRW05, ASI2575GRW08, AZB33X18DW00, AZB33X20DW00, AZF33X16DW00, AZF33X16DW01, AZF33X16DW02, AZF33X16DW04, AZF33X16DW06, AZF33X16DW07, AZF33X16DW08, AZF33X18DW00, AZF33X18DW01, AZF33X18DW02, AZF33X18DW03, AZF33X18DW04, AZF33X18DW06, AZF33X20DW00, AZF33X20DW03, AZF33X20DW04, AZF33X20DW06, GAFZ30FDGB00, GAFZ30FDGB01, GAFZ30FDGB02, GARF30FDGB00, GARF30FDGB01, IK8FXNGFDM02, IRS335SDHM00, IRT138FDM00, IX5BBEXDS01, KRFF300EBS00, KRFF300ESS01, KRFF300EWH01, KRSC700HBS01, KRSC700HPS01, KRSC703HBS01, KRSC703HPS01, KRSF705HBS01, KRSF705HPS01, M1BXXGMYB00, M1BXXGMYM00, M1BXXGMYW00, M1BXXLZYB00, M1BXXLZYM00, M1BXXLZYW00, M9BXXGMYB00, M9BXXGMYM00, M9BXXGMYW00, M9RXDGFYB10, M9RXDGFYM10, M9RXDGFYM11, M9RXDGFYW10, M9RXDGFYW11, MFB2055DRE01, MFB2055DRH01, MFB2055DRM01, MFB2055FRW00, MFB2055FRZ00, MFF2055FRB00, MFF2055FRW00, MFF2055FRZ00, MFW2055FRH00, MFW2055FRZ00, MRT118FFFE00, MRT118FFFE01, MRT118FFFE04, MRT118FFFE05, MRT118FFFH00, MRT118FFFH01, MRT118FFFH04, MRT118FFFH05, MRT118FFFM00, MRT118FFFM01, MRT118FFFM04, MRT118FFFM05, MRT118FFFZ00, MRT118FFFZ01, MRT118FFFZ05, MRT118FFFZ06, MRT311FFFE00, MRT311FFFH00, MRT311FFFM00, MRT311FFFZ00, MRT519SFFH00, MRT519SFFW00, MRT519SFFZ00, MRT711BZDE00, MRT711BZDH00, MRT711BZDM00, MRT711SMFB00, MRT711SMFW00, MRT711SMFZ00, MSS25C4MGB00, MSS25C4MGB03, MSS25C4MGK00, MSS25C4MGK03, MSS25C4MGW00, MSS25C4MGW03, MSS25C4MGZ00, MSS25C4MGZ03, MSS25N4MKZ00, MSS25N4MKZ01, MZF34X16DW00, MZF34X16DW01, MZF34X16DW04, MZF34X16DW06, MZF34X18FW00, MZF34X18FW01, MZF34X18FW02, MZF34X18FW03, MZF34X18FW04, MZF34X20DW00, MZF34X20DW01, MZF34X20DW03, MZF34X20DW04, WRF560SEHB00, WRF560SEHV00, WRF560SEHW00, WRF560SEHZ00, WRF560SEYB04, WRF560SEYM04, WRF560SEYW04, WRF560SFHB00, WRF560SFHV00, WRF560SFHW00, WRF560SFHZ00, WRF560SFYE03, WRF560SFYH04, WRF560SMHB00, WRF560SMHM00, WRF560SMHV00, WRF560SMHW00, WRF560SMHZ00, WRF560SMYB05, WRF560SMYE04, WRF560SMYM05, WRF560SMYW05, WRF57R18DM00, WRFA60SFHN00, WRFA60SFHZ00, WRFA60SMHN00, WRFA60SMHZ00, WRR56X18FW00, WRR56X18FW01, WRR56X18FW02, WRR56X18FW03, WRS311SDHB00, WRS311SDHB01, WRS311SDHB03, WRS311SDHM00, WRS311SDHM01, WRS311SDHM02, WRS311SDHM04, WRS311SDHM05, WRS311SDHT00, WRS311SDHT01, WRS311SDHT03, WRS311SDHW00, WRS311SDHW01, WRS311SDHW03, WRS312SNHB00, WRS312SNHB01, WRS312SNHM00, WRS312SNHM01, WRS312SNHW00, WRS312SNHW01, WRS315SDHB00, WRS315SDHB01, WRS315SDHB02, WRS315SDHB04, WRS315SDHB05, WRS315SDHM00, WRS315SDHM01, WRS315SDHM02, WRS315SDHM04, WRS315SDHT00, WRS315SDHT01, WRS315SDHT04, WRS315SDHT05, WRS315SDHW00, WRS315SDHW01, WRS315SDHW02, WRS315SDHW05, WRS315SDHZ00, WRS315SDHZ01, WRS315SDHZ02, WRS315SDHZ03, WRS315SDHZ04, WRS315SDHZ05, WRS315SNHB00, WRS315SNHB01, WRS315SNHB03, WRS315SNHM00, WRS315SNHM01, WRS315SNHM03, WRS315SNHW00, WRS315SNHW01, WRS315SNHW03, WRS321SDHB00, WRS321SDHB01, WRS321SDHB04, WRS321SDHB05, WRS321SDHV00, WRS321SDHV01, WRS321SDHV04, WRS321SDHV05, WRS321SDHW00, WRS321SDHW01, WRS321SDHW04, WRS321SDHW05, WRS321SDHZ00, WRS321SDHZ01, WRS321SDHZ04, WRS321SDHZ05, WRS325SDHB00, WRS325SDHB01, WRS325SDHB04, WRS325SDHB05, WRS325SDHV00, WRS325SDHV01, WRS325SDHV04, WRS325SDHV05, WRS325SDHW00, WRS325SDHW01, WRS325SDHW04, WRS325SDHW05, WRS325SDHZ00, WRS325SDHZ01, WRS325SDHZ04, WRS325SDHZ05, WRS331SDHB00, WRS331SDHB02, WRS331SDHM00, WRS331SDHM02, WRS331SDHM03, WRS331SDHW00, WRS331SDHW02, WRS331SDHW03, WRS335SDHB00, WRS335SDHB03, WRS335SDHM00, WRS335SDHM03, WRS335SDHW00, WRS335SDHW03, WRS555SIHB00, WRS555SIHV00, WRS555SIHW00, WRS555SIHZ00, WRS970CIHZ01, WRS973CIHV01, WRS973CIHZ01, WRSA15SNHN00, WRSA15SNHN01, WRSA15SNHZ00, WRSA15SNHZ01, WRT108FZDB02, WRT108FZDB05, WRT108FZDB07, WRT108FZDM02, WRT108FZDM05, WRT108FZDM07, WRT108FZDT02, WRT108FZDT05, WRT108FZDT07, WRT108FZDW02, WRT108FZDW05, WRT108FZDW07, WRT138FZDB03, WRT138FZDB04, WRT138FZDM03, WRT138FZDM04, WRT138FZDW03, WRT138FZDW04, WRT148FZDB03, WRT148FZDM03, WRT148FZDW03, WRT311FZDB01, WRT311FZDM01, WRT311FZDT01, WRT311FZDW01, WRT311FZDZ01, WRT318FMDB02, WRT318FMDB05, WRT318FMDB06, WRT318FMDM02, WRT318FMDM05, WRT318FMDM06, WRT318FMDW02, WRT318FMDW05, WRT318FMDW06, WRT318FZDB01, WRT318FZDB02, WRT318FZDB05, WRT318FZDB06, WRT318FZDM01, WRT318FZDM02, WRT318FZDM05, WRT318FZDM06, WRT318FZDW01, WRT318FZDW02, WRT318FZDW05, WRT348FMEB00, WRT348FMES00, WRT348FMEW00, WRT348FMEZ00, WRT518SZFB00, WRT518SZFG00, WRT518SZFM00, WRT518SZFW00, WRT518SZKV00, WRT519SZDB02, WRT519SZDB05, WRT519SZDB06, WRT519SZDD01, WRT519SZDD05, WRT519SZDD06, WRT519SZDG03, WRT519SZDM02, WRT519SZDM05, WRT519SZDM06, WRT519SZDT02, WRT519SZDT05, WRT519SZDT06, WRT519SZDW02, WRT519SZDW05, WRT519SZDW06, WRT549SZDB01, WRT549SZDM01, WRT549SZDW01, WRT579SMYB00, WRT579SMYB01, WRT579SMYF00, WRT579SMYF01, WRT579SMYM00, WRT579SMYM01, WRT579SMYW00, WRT579SMYW01, WRT5L1SMYB00, WRT5L1SMYF00, WRT5L1SMYW00, WRT771RWYB00, WRT771RWYB01, WRT771RWYM00, WRT771RWYM01, WRT771RWYW00, WRT771RWYW01, WRT779RFYB00, WRT779RFYB10, WRT779RFYM00, WRT779RFYM10, WRT779RFYW00, WRT779RFYW10, WRT779RWYB00, WRT779RWYM00, WRT779RWYW00, WSR57R18DH00, WSR57R18DM00, WSR57R18DM01, WSR57R18DM02, WSR57R18DM03, WSZ57L18DH00, WSZ57L18DM00, WSZ57L18DM01, WSZ57L18DM02, WSZ57L18DM03, WSZ57L18DM04, WZF34X16DW00, WZF34X16DW01, UPRIGHT, WZF34X16DW02, WZF34X16DW04, WZF34X16DW06, WZF34X16DW07, WZF34X18DW00, WZF34X18DW01, WZF34X18DW02, WZF34X18DW03, WZF34X18DW04, WZF34X20DW00, WZF34X20DW01, WZF34X20DW02, WZF56R16DW00, WZF56R16DW01, UPRIGHT, WZF56R16DW04, WZF56R16DW06, WZF57R16FW00, WZF57R16FW04, WZF57R16FW06, WZF79R18DM00, WZF79R20DW00, WZF79R20DW03, WZF79R20DW04, 

Hard to find parts? We've got them or we'll find them!

Over 10,000 New & Used Parts Ready for Pickup

Show this item number to our store staff to help locate the exact part you need
XPART GTIN/UPC NUMBER
9769063711009

XPart Supply Advantage

Your trusted partner for fast, reliable parts delivery across North America

Lightning Fast Shipping

Same-day processing with expedited delivery options across North America

Massive Inventory

Over 10,000 parts in stock and ready to ship immediately

North America Coverage

Comprehensive shipping network covering USA, Canada, and Mexico

Quality Guaranteed

Premium parts with warranty protection and expert customer support

10K+
Parts in Stock
24-48H
Local Delivery
99.8%
Customer Satisfaction
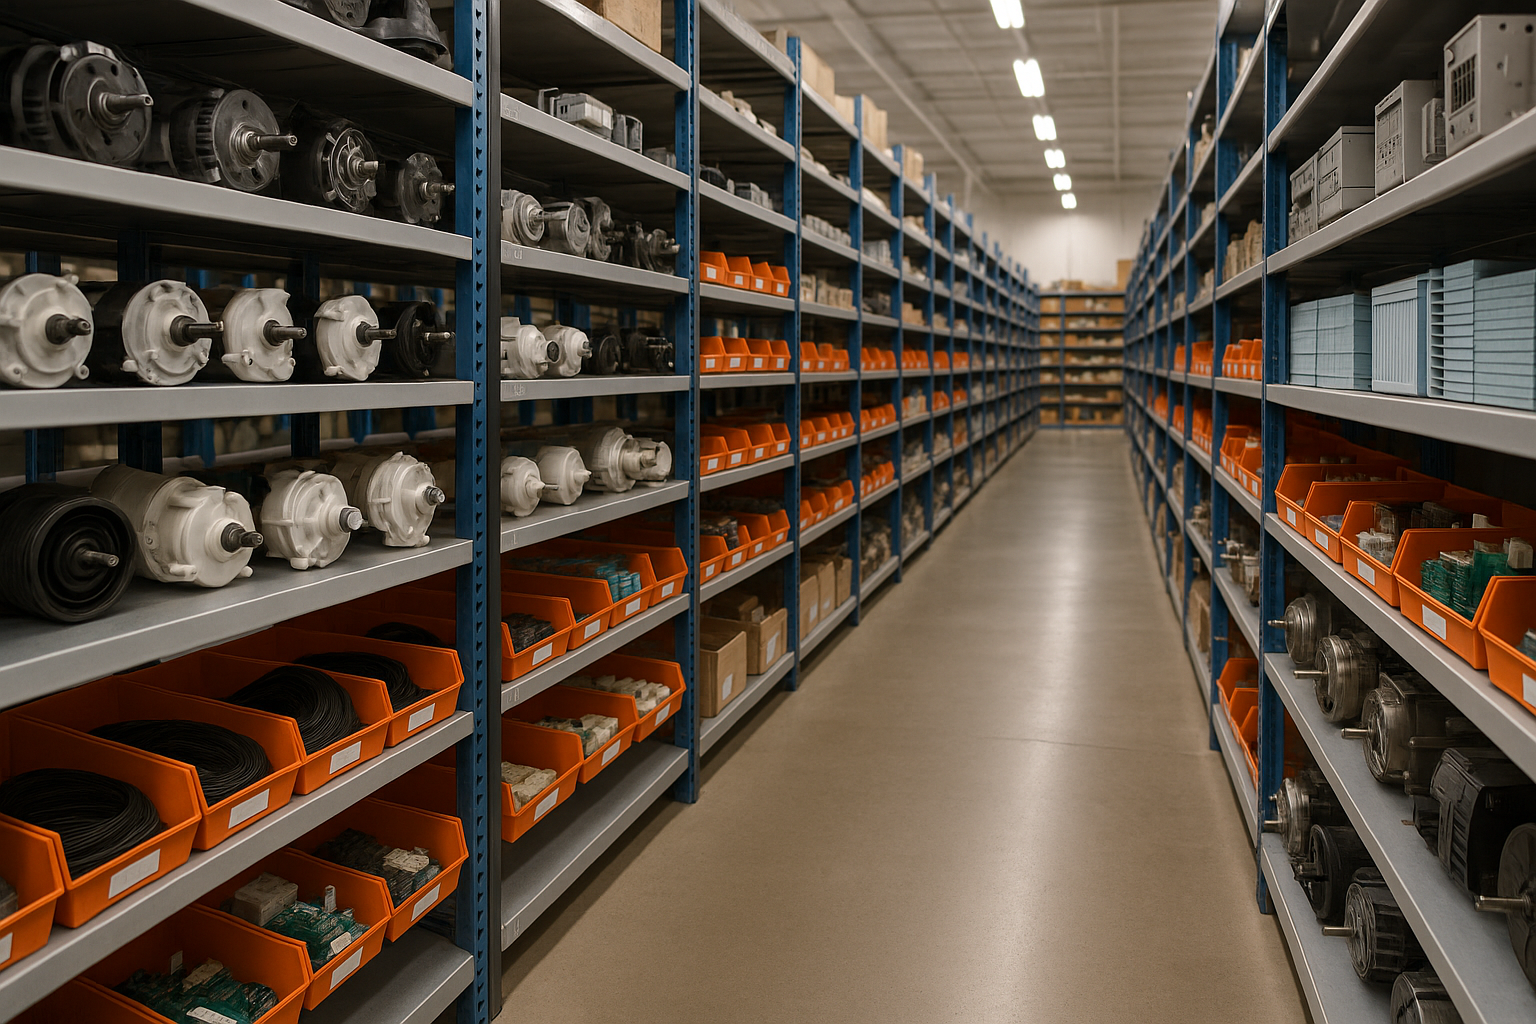
Professional appliance parts warehouse with organized shelving and extensive inventory

Express Warehouse Shipping

Order within the countdown for same-day shipping!

00 Hours
00 Minutes
00 Seconds

In stock orders placed during business hours ship the same day.

Order of $75 or more of eligible items qualify for FREE Shipping.

Same-day shipping deadline has passed

Orders placed now will ship the next business day.

Same-day shipping deadline has passed

Orders placed outside business hours will be processed when we reopen.

Business Hours: Monday - Friday, 9:00 AM - 5:00 PM EST

Trusted Family Business

29 years of Excellence in Appliance Parts

For over 29 years, our family has been dedicated to providing quality appliance parts and exceptional service. What started as a small local business has grown into a trusted name, but we've never forgotten our roots. Every customer receives the personal attention and care that only a family-owned business can provide.

Years of Experience

Our knowledge has been built over the past 29 years in the business, ensuring expert advice for every appliance need.

Personal Service Guarantee

We treat every customer like family, providing personalized solutions and standing behind our products.

Built on Trust

Our reputation has been built one satisfied customer at a time, creating lasting relationships in our community.

Buy Online Pick Up In-Store

Address
101 Trillium Dr
Kitchener, Ontario N2R 1J8
Phone
Hours
Monday - Friday 9:00 AM - 5:00 PM
Get Directions

Contact Us Customer Service

Hard to find parts? We've got them or we'll find them!

Call now for expert appliance parts assistance

Available Monday - Friday, 9AM - 5PM EST