


Oven Not Heating or Won’t Bake? Bake Element WS01F11296 – Fix No-Heat Fast
When your GE electric oven won’t heat, takes forever to preheat, or produces uneven baking results, the bake element is the first component to suspect. In most GE electric ranges and wall ovens, this is caused by a failed lower bake element coil. When it fails, the oven may produce no heat at all, only heat from the broil element at the top, or struggle to reach the set temperature — ruining baked goods and making the oven unreliable for everyday cooking. ⚡ One of the most common failure points in GE, GE Profile, Hotpoint, and Kenmore electric ovens. Part WS01F11296 is the genuine OEM long-body bake element that restores full lower heating power immediately upon installation — direct drop-in, no modifications required.
❓ Is This the Right Part?
This is the correct fix if ALL of the following are true:
- ✔ Oven powers on and broil element works normally at the top
- ✔ Oven control board and temperature sensor have been confirmed functional
- ✔ Bake element does not glow red when oven is set to bake mode
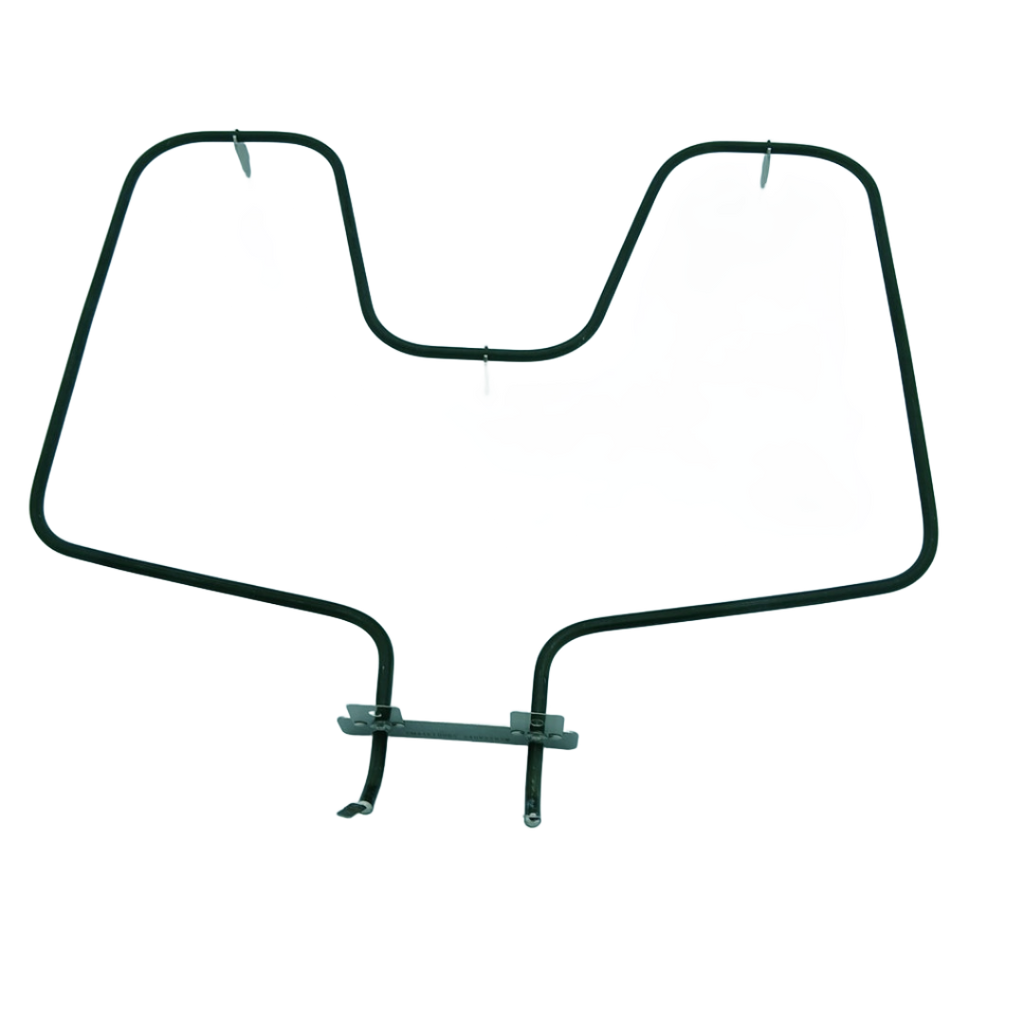
- ✔ Element shows visible cracks, holes, blistering, or burn-through spots on inspection
- ✔ ONLY problem is no heat from the bottom, long preheat times, or uneven baking
Not sure? Send us your model number — we'll confirm before you order.
🔧 Common Symptoms
- Oven won’t heat at all — no temperature rise after preheating
- Oven only heats from the top — broil works but bake does not
- Oven takes 2–3x longer than normal to reach set temperature
- Uneven cooking — food burns on top but stays raw on the bottom
- Burning smell when oven is on — element arcing or shorting
- Visible crack, hole, blister, or burn-through spot on the element coil
✔ If these symptoms match, this is the most likely failed component in the system.
✔ In most cases, replacing this bake element restores full oven heating performance immediately.
📦 Part Details
- Part Number: WS01F11296
- Type: Electric oven lower bake element — long body, OEM direct fit
- Replaces: OEM direct-fit assembly — supersedes WG02F05400, WS01F02247 (no modification required)
- Brands: GE, GE Profile, Café, Hotpoint, Kenmore (GE-built models)
- XPart Aftermarket Option: WS01F11296XP — engineered to meet or exceed OEM specifications at a lower price point
While the bake element is out, inspect the oven temperature sensor (RTD probe) mounted at the back wall of the oven cavity — a failing sensor is the second most common cause of temperature and baking issues and takes only 5 minutes to replace while you already have access.
⚙️ Installation Notes
Skill Level: EASY — 15–25 minutes. Disconnect power to the oven at the breaker before beginning. Remove the two mounting screws at the back of the oven floor that secure the element bracket, gently pull the element forward to expose the wire connectors, disconnect the spade terminals, and pull the old element free. Connect the spade terminals to the new WS01F11296, slide it into position, reinstall the mounting screws, and restore power. Do not force the element — the long-body design requires careful alignment with the rear wall opening before seating.
✓ Compatible Models
Confirmed compatible with select GE, GE Profile, Café, Hotpoint, and Kenmore electric range and wall oven models. Contact us to verify your model number before ordering.
Browse related model hubs: CCS975SD4SS, EMBS525JWW0A, EMBS526JSA0A, EMBS536JSA0A, JBS27DIF2WW, JCB630DK3WW, JCB635DJ2BB, JCBP250DT3WW, JCBP270DM1WW, JCBS250DM1BB, JCBS280DM1WW, JCBS630DK2WW, JCBS631SF1SS, JCBS632SF1SS, MCB757DM1WW, MCB787DR5WW, MCBS523DM1WW, MCBS525DM1WW, MCBS585DR4WW, PC2B930DET2BB, PC2B940SEJ4SS, RCB757DN3WW, RCB790SJ6SA, RCBS540SJ4SA, GE Oven Parts, GE Range Parts, Hotpoint Oven Parts, Kenmore Oven Parts.
💡 Pro Tip
Before replacing the element, pull it forward and inspect the spade terminals and wire connectors at the back — burned or corroded terminals are a common secondary failure that will prevent the new element from working. If the terminals are damaged, replace them at the same time to avoid a repeat repair call.

✓ Model-Specific Repair Pages
✅Compatibility & Cross Reference
Not sure about your model number? Call 1-877-899-7278 and we’ll help you confirm. All brand names are the property of their respective owners and are used for compatibility reference only.
Buy Online Pick Up In-Store
Kitchener, Ontario N2E 1W8


- Choosing a selection results in a full page refresh.

