

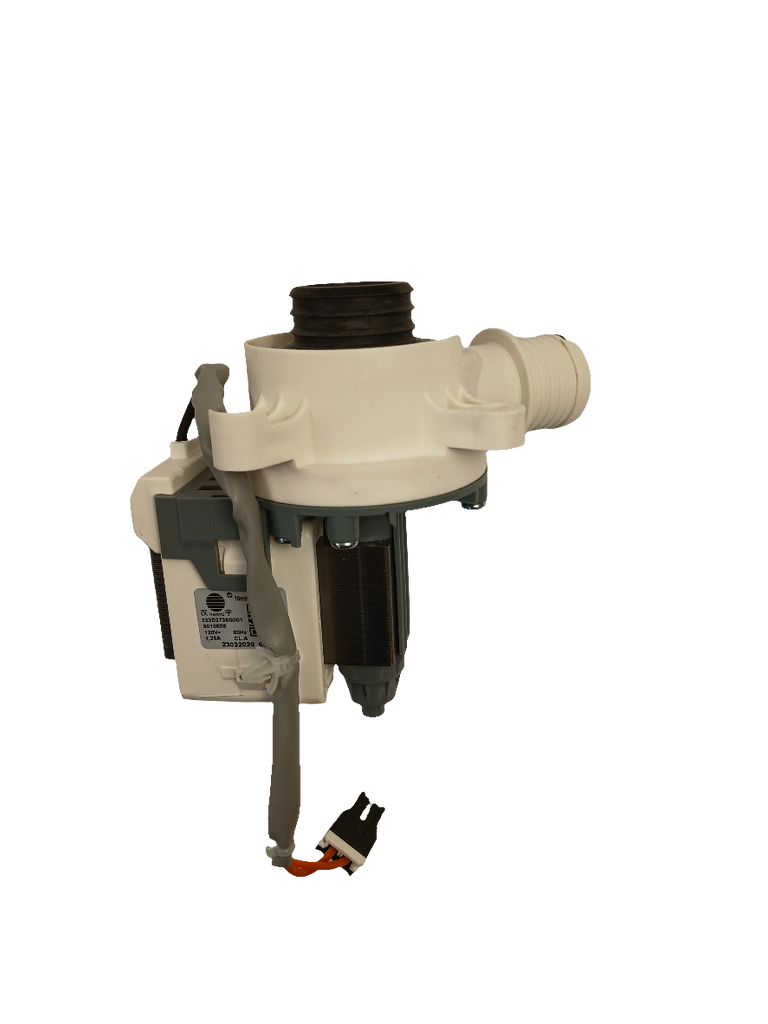
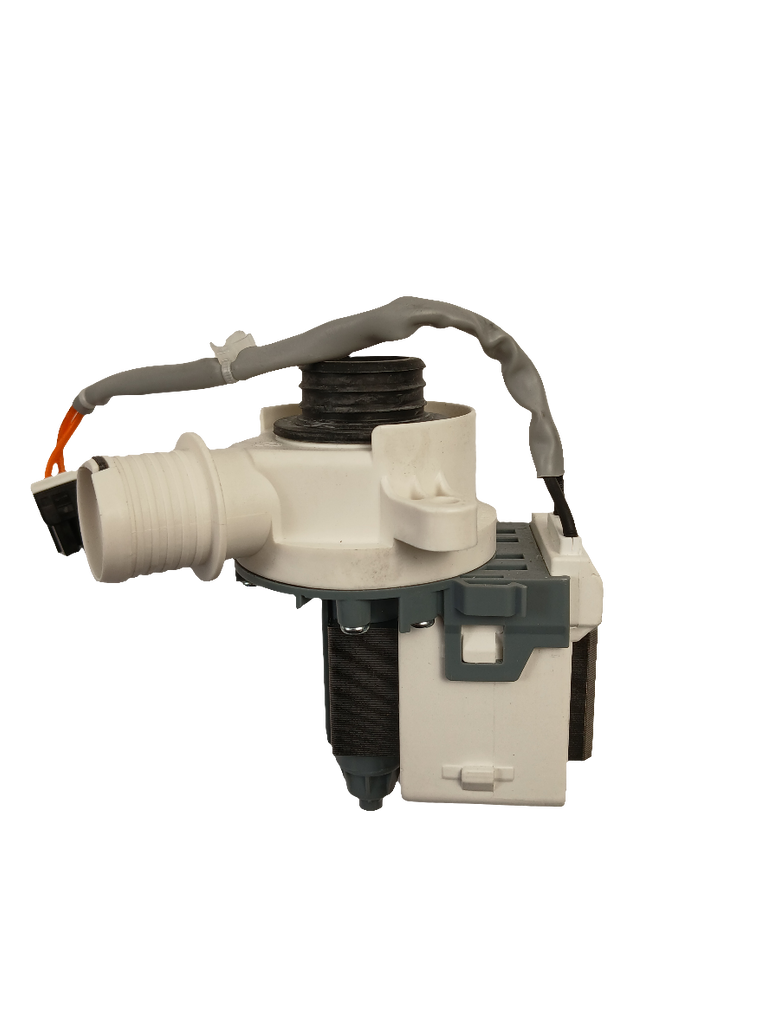


GE Washer drain pump WW01F01791, Fixes Washer won't drain water at end of wash cycle
OEM washer drain pump that removes water from the washer during the drain portion of the cycle.
Confirm your full appliance model number before ordering.
Is This the Right Part?
✅ Cross Reference Information
233D2736G001, WW01F01791
Common Symptoms
- Washer won't drain water at end of wash cycle
- Water remains in drum after cycle completes
- Washer displays drain error codes (OE, E03, E18, F21, etc.)
- Loud grinding, humming, or buzzing noise during drain cycle
- Washer stops mid-cycle and won't advance to spin
- Drain pump runs but water doesn't drain
- Intermittent draining issues or slow drainage
- Pump motor not running at all during drain cycle
- Burning smell coming from washer during drain
- Washer overfills or won't stop filling
- Clothes remain soaking wet after spin cycle
- Visible leak from bottom of washer during drain
Check Before Replacing
- Confirm whether the washer fails to drain during a drain or spin cycle.
- After disconnecting power, inspect the pump area and drain hose for visible blockage, damage, or leakage.
- Listen for unusual noise from the pump during a drain cycle; other components can cause similar symptoms.
Pro Tip
Part Details
Installation Notes
- Tools Required: Phillips head screwdriver, flathead screwdriver, pliers, towels or shallow pan (for water), work gloves, flashlight
- Disconnect Power and Water: Unplug the washer from the electrical outlet. Turn off both hot and cold water supply valves at the wall.
- Access the Pump (Front-Load Models): Tilt the washer back against a wall or have a helper support it. Remove the lower front access panel by releasing clips or removing screws. The drain pump is typically located at the front bottom of the machine.
- Access the Pump (Top-Load Models): Unplug the washer and pull it away from the wall. Remove the rear access panel or cabinet screws to access the pump assembly from the back or bottom.
- Prepare for Water Drainage: Place towels and a shallow pan beneath the pump area. There will be residual water in the pump and hoses.
- Disconnect Drain Hose: Loosen the hose clamp securing the drain hose to the pump outlet using pliers or a screwdriver. Pull the hose off the pump and allow water to drain into your pan.
- Disconnect Inlet Hoses: Remove hose clamps from the pump inlet connections (typically from the tub). Disconnect both hoses and allow them to drain.
- Disconnect Electrical Connector: Locate the wire harness connector attached to the pump motor. Press the release tab and carefully pull the connector straight off the pump terminals.
- Remove Mounting Hardware: Remove the screws or bolts securing the pump assembly to the washer frame or mounting bracket. Note the orientation of the pump for proper reinstallation.
- Remove Old Pump: Carefully lift the WW01F02056 drain pump assembly out of the washer. Check the pump housing and impeller for debris or damage.
- Install New Pump: Position the new drain pump assembly in the mounting location, ensuring proper alignment with mounting holes and hose connections.
- Secure Mounting Hardware: Install and tighten all mounting screws or bolts to secure the pump firmly to the frame.
- Reconnect Inlet Hoses: Attach the inlet hoses from the tub to the pump inlets. Secure with hose clamps, ensuring tight connections to prevent leaks.
- Reconnect Drain Hose: Attach the drain hose to the pump outlet and secure with a hose clamp. Ensure the connection is tight and properly seated.
- Reconnect Electrical Connector: Plug the wire harness connector onto the new pump motor terminals until it clicks securely into place.
- Reassemble Access Panels: Reinstall the front or rear access panel and secure with all screws or clips.
- Restore Power and Water: Plug the washer back in and turn on the water supply valves.
- Test Operation: Run a drain/spin cycle without clothes to verify the new pump operates correctly, drains water properly, and check for any leaks around hose connections.
Verified Compatible Models
GTW220BMK0WW, GTW220BMK1WW, GTW220BMM0WW, GTW220BMM1WW, GTW223BMR0WW, GTW302BMP0WW, GTW302BMP1WW, GTW330BMK0WW, GTW330BMK1WW, GTW330BMM0WW, GTW330BMM1WW, GTW331BMR0WS, GTW334BMR0WS, GTW451BMR0WS, GTW460BMK0WW, GTW460BMK1WW, GTW460BMM0WW, GTW460BMM1WW, GTW465BMK0WS, GTW465BMK1WS, GTW465BMM0WS, GTW465BMM1WS, GTW470BMM0DG, GTW470BMM1DG, GTW485BMK0WS, GTW485BMK1WS, GTW485BMM0WS, GTW485BMM1WS, GTW490BMR0WS, GTW491BMR0DG, GTW491BMR0WS, GTW495DMN0WS, GTW495DMN1WS, GTW550BMR0WS, GTW560BMM0WW, GTW560BMM1WW, GTW575BMM0WS, GTW575BMM1WS, GTW580BMR0WS, GTW580BMR1WS, GTW680BMK0DG, GTW680BMK0WS, GTW680BMM0DG, GTW680BMM0WS, GTW680BMM1DG, GTW680BMM1WS, GTW680BMR0DG, GTW680BMR0WS, GTW680BMR1DG, GTW680BMR1WS, GTW680BMR2DG, GTW680BMR2WS, GTW681BMR0DG, GTW681BMR0WS, GTW685BMR0WS, GTW685BMR1WS, GTW686BMY0WS, GTW690BMT0DG, GTW690BMY0WR, HTW200BMK0WW, HTW200BMM0WW, LGA71215CBAB00, LGA71215CBAB01, LGA72214CBAB00, LGA74215WBAB00, LGA77115CBAB00, LGA77115CBAB01, LGA77115CBAB02, LGA79113CBAB00, LGA79113CBAB01, LGH72201WBAB00, LGH72201WBAB01, LGH73201WBAB00, LGH73201WBAB01, LMC75201WDAB00, LMP74201WDAB00, LMP75201WDAB00, LMP75205WDAB00, LMR75201WDAB00, LMU75201WDAB00, MTW200BMK0WW, MTW200BMM0WW, MTW200BMM1WW, MTW201BMR0WW
Fitment reminder: Match the complete appliance model number, including suffix or revision where applicable, before ordering.
Buy Online Pick Up In-Store
Kitchener, Ontario N2E 1W8


