


Whirlpool Washer Losing Power or Throwing Unexplained Error Codes? Wire Harness W11643701 – Fix Intermittent Failures Fast
If your Whirlpool top-load washer loses power mid-cycle, displays error codes that clear and return with no consistent pattern, or has components that test good individually but won’t respond — the wire harness is the most likely root cause. In most Whirlpool MVW-series top-load washers, the main wire harness is the central nervous system — it connects the control board to the motor, lid lock, water inlet valves, actuators, and sensors. When it fails due to abrasion, pinched wires, corroded connectors, or rodent damage, the washer loses communication between components and produces symptoms that appear to be multiple unrelated failures. ⚡ Common root cause of intermittent and unexplained failures in Whirlpool-platform top-load washers. Part W11643701 is the genuine OEM replacement that supersedes W11335100, W10906034, W10854037, and W10820043 — pre-terminated connectors, correct pinout, no splicing required.
❓ Is This the Right Part?
This is the correct fix if ALL of the following are true:
- ✔ Your washer powers on but fails mid-cycle or intermittently
- ✔ Individual components (motor, lid lock, valves) test good with a multimeter but don’t respond during operation
- ✔ Error codes don’t point consistently to a single failed component
- ✔ ONLY problem is intermittent power loss, random cycle stops, or components not receiving signal despite testing OK
Not sure? Send us your model number — we’ll confirm before you order.
🔧 Common Symptoms
- Washer loses power mid-cycle with no warning
- Error codes appear, clear after power cycling, then return
- Lid lock, motor, or valves don’t respond despite testing good individually
- Washer stops randomly at different points in the cycle — no consistent failure point
- Burning smell or visible wire damage near connectors
- Washer won’t start with no power to the control panel
✔ If these symptoms match, the wire harness is the most likely root cause.
✔ In most cases, replacing this wire harness restores consistent power and normal cycle operation immediately.
📦 Part Details
- Part Number: W11643701
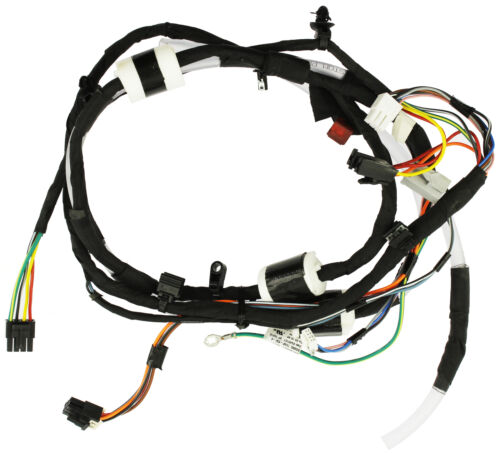
- Type: Main Wire Harness — connects control board to motor, lid lock, water inlet valves, actuators, and sensors; pre-terminated connectors, correct pinout guaranteed
- Replaces: W11335100, W10906034, W10854037, W10820043, PS11757898, AP6023856
- Brands: Whirlpool, Maytag, Amana, Kenmore
Intermittent failures are often connector-level, not full harness failures — inspect each connector for corrosion, burn marks, or spread terminals before ordering. If a single connector is the issue, cleaning or reseating it may resolve the problem. If multiple connectors show damage or the wiring itself is abraded or pinched, full harness replacement is the correct call.
⚙️ Installation
Skill Level: MODERATE TO ADVANCED — 45–90 minutes. Unplug the washer before beginning — critical when working with wiring. Photograph all connector positions and the full harness routing path before disconnecting anything. Disconnect each connector individually, route the new harness in the same path, reconnect in the same positions, and ensure every connector clicks fully into place before reassembling. Run a full test cycle to confirm all components respond correctly.
✓ Compatible Models
Confirmed compatible with WTW5000DW0, WTW5000DW1, WTW5000DW2, WTW5100HW0, WTW5100HW1, WTW5105HW0, WTW6120HW0, WTW6120HC0, WTW7120HW0, WTW7120HC0, MVW6230HW0, MVW6230HC0, MVW7230HW0, MVW7230HC0, MVW8230HW0, MVW8230HC0, MVWB765FW0, MVWB765FC0, MVWB835DW0, MVWB835DC0, NTW4516FW0, NTW4516FW1, NTW4516FW2, NTW4519JW0, NTW4605EW0, NTW4650YQ0, NTW4750YQ0, Kenmore 110.28002791, 110.28002792, 110.28132791, 110.28132792, 110.29002791, 110.29132791, 110.29132792 plus additional Whirlpool-platform models. Contact us to verify your model number before ordering.
💡 Pro Tip
The wire harness follows a specific routing path through the cabinet — clips, guides, and tie points that are easy to miss on reassembly. A full photo of the harness route before you disconnect anything saves significant time and prevents chafing against moving parts after install. Misrouted harnesses are the most common cause of repeat failures after a harness replacement.
✓ Model-Specific Repair Pages
✅Compatibility & Cross Reference
Not sure about your model number? Call 1-877-899-7278 and we’ll help you confirm. All brand names are the property of their respective owners and are used for compatibility reference only.
Buy Online Pick Up In-Store
Kitchener, Ontario N2E 1W8


- Choosing a selection results in a full page refresh.

