Menu


GE Top-Load Washer Won’t Agitate or Won’t Spin? Mode Shifter WW02F00671 – Fix Drive Mode Failures Fast
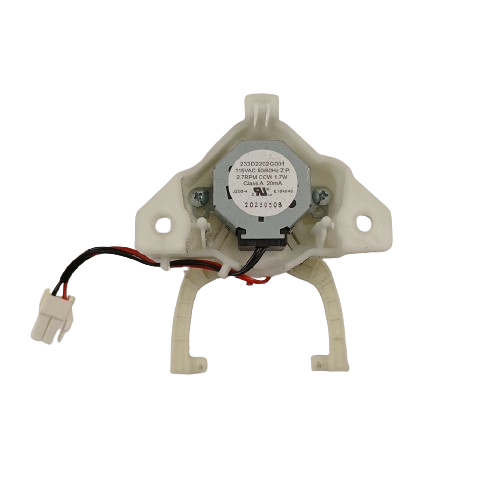
A failed mode shifter is the most common cause of a GE top-load washer that agitates but won’t spin, or fills with water and stops dead mid-cycle. In most GE, Hotpoint, and Haier top-load washers, the mode shifter is the electromechanical actuator that engages and disengages the transmission to switch between agitate and spin modes. When it fails, the washer loses the ability to transition between modes — leaving clothes soaking wet or the machine stuck mid-cycle with grinding or clicking sounds. ⚡ Most common drive system failure in GE top-load washers. Part WW02F00671 is the current genuine OEM replacement (supersedes WW01F03184) that restores full agitate-to-spin transition immediately — no modification required.
❓ Is This the Right Part?
This is the correct fix if ALL of the following are true:
- ✔ Washer powers on and fills with water normally
- ✔ Lid switch confirmed functional (washer attempts to run with lid closed)
- ✔ Drain pump runs and water drains correctly
- ✔ Motor runs but drum fails to agitate or transition to spin
- ✔ ONLY problem is washer not agitating, not spinning, or stopping mid-cycle between modes
Not sure? Send us your model number — we'll confirm before you order.
🔧 Common Symptoms
- Washer agitates but won’t transition to spin — most common customer complaint
- Washer fills with water but drum won’t agitate at all
- Washer stops dead mid-cycle between agitate and spin phases
- Grinding or clicking noises during cycle transitions
- Clothes come out soaking wet after a full cycle
- Wash basket spinning during agitation (wrong mode engaged)
✔ If these symptoms match, this is the most likely failed component in the system.
✔ In most cases, replacing this mode shifter restores full agitate and spin operation immediately.
📦 Part Details
- Part Number: WW02F00671 (current active OEM)
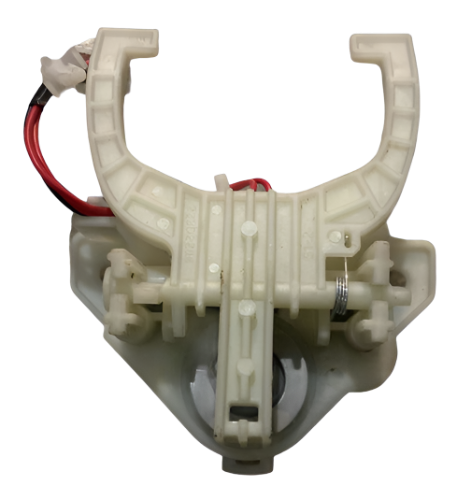
- Type: Washer Mode Shifter Assembly — electromechanical actuator that switches transmission between agitate and spin modes
- Replaces: OEM direct-fit assembly — supersedes WW01F03184, 233D2203G001, 233D2202G001, WH18X27186, WH03X36897, 20230907 (no modification required)
- Brands: GE, Hotpoint, Haier, Moffat
⚠️ Test the Lid Switch First:
A faulty lid switch is the most common misdiagnosis for spin failure on GE top-load washers and costs a fraction of the mode shifter. If the lid switch tests good and the washer still won’t spin, the mode shifter is almost certainly the cause — confirming this first avoids an unnecessary return.
A faulty lid switch is the most common misdiagnosis for spin failure on GE top-load washers and costs a fraction of the mode shifter. If the lid switch tests good and the washer still won’t spin, the mode shifter is almost certainly the cause — confirming this first avoids an unnecessary return.
⚙️ Installation Notes
Skill Level: ADVANCED — 60–90 minutes. Unplug the washer and close water supply valves before beginning. The mode shifter is mounted to the transmission at the bottom of the washer — access requires removing the cabinet panels. Photograph all linkage positions and spring locations before disconnecting. Disconnect the actuator linkage, remove mounting screws, swap the shifter, reconnect linkage per your photos, reassemble, and run a full test cycle through both agitate and spin phases to confirm correct operation.
✓ Compatible Models
Confirmed compatible with GTW220BMK0WW, GTW302BMP0WW, GTW330BMM0WW, GTW460BMM0WW, GTW465BMM0WS, GTW485BMM0WS, GTW560BMM0WW, GTW575BMM0WS, GTW580BMR0WS, GTW680BMM0WS, GTW680BMR0WS, GTW685BMR0WS, HTW200BMK0WW, MTW200BMK0WW, LMH70201WBAB00, LMH72205WBAB00, LMH74201WDAB00, LMH79104WBAB00, LMA71214VBAB00, LMA79115CBAB00, WMA71214CBAB00, WMA72215CGAB00, plus additional GE, Hotpoint, and Haier top-load models. Contact us to verify your model number before ordering.
💡 Pro Tip
WW02F00671 vs WW01F03184 — What’s the Difference?
WW02F00671 is the current active OEM part number that fully supersedes WW01F03184 — they are the same application, GE updated the part number during a design revision. If your parts diagram or service manual shows WW01F03184, order WW02F00671 — it is the correct current replacement and will fit identically. Used option also available for budget repairs on older units.
WW02F00671 is the current active OEM part number that fully supersedes WW01F03184 — they are the same application, GE updated the part number during a design revision. If your parts diagram or service manual shows WW01F03184, order WW02F00671 — it is the correct current replacement and will fit identically. Used option also available for budget repairs on older units.

✅Compatibility & Cross Reference
Not sure about your model number? Call 1-877-899-7278 and we’ll help you confirm. All brand names are the property of their respective owners and are used for compatibility reference only.

Buy Online Pick Up In-Store
Address
101 Trillium Dr
Kitchener, Ontario N2E 1W8
Kitchener, Ontario N2E 1W8
Phone
Hours
Mon–Fri 9 AM–5 PM • Sat 9 AM–1 PM

- Choosing a selection results in a full page refresh.


