4560EL3001A Dryer Idler Pulley Wheel

XPart Supply Ltd. 633190040046

Price
$31.64
Buying Options: OEM

Product variant with selected options does not exist!

Frequently Bought Together

Idler Pulley Wheel, Pulley Wheel, Tension Pulley, Idler Wheel, Belt Tensioner Pulley, Pulley with Bearing

4560EL3001A, AP4438625, 1267529, PS3523032, AH3523032, EA3523032, B00AYBKHUI

LG, Kenmore, GE (select models)

Fits Models: (Ctrl+F and Enter Your Model Number)

LGDLE0332W, DLE0442G, DLE0442W, DLE1310W, DLE2301R, DLE2301W, DLE2512W, DLE2514W, DLE2515S, DLE2516W, DLE3733D, DLE3733S, DLE3733U, DLE3733W, DLE3777W, DLE3786W, DLE3788W, DLE3860W, DLE3875W, DLE3876W, DLE3885C, DLE3885W, DLE3886W, DLE3890W, DLE3900W, DLE4801W, DLE4870W, DLE4970W, DLE5001W, DLE5002W, DLE5911WE, DLE5955G, DLE5955W, DLE5977B, DLE5977SM, DLE5977W, DLE5988B, DLE5988W, DLE6942W, DLE7050W, DLE7070W, DLE7100W, DLE7150W, DLE7177RM, DLE7177WM, DLE7200VE, DLE7200WE, DLE7300VE, DLE7300WE, DLE8377NM, DLE8377WM, DLE9577SM, DLE9577WM, DLEX0001TM, DLEX2450R, DLEX2501R, DLEX2501V, DLEX2501W, DLEX2550R, DLEX2550W, DLEX2650R, DLEX2650V, DLEX2650W, DLEX2655V, DLEX2801L, DLEX2801R, DLEX2801W, DLEX2901V, DLEX2901W, DLEX3001P, DLEX3001R, DLEX3001W, DLEX3070R, DLEX3070V, DLEX3070W, DLEX3250R, DLEX3250V, DLEX3250W, DLEX3360R, DLEX3360V, DLEX3360W, DLEX3370R, DLEX3370V, DLEX3370W, DLEX3470V, DLEX3470W, DLEX3550V, DLEX3550W, DLEX3570V, DLEX3570W, DLEX3650V, DLEX3650W, DLEX3670V, DLEX3670W, DLEX3700V, DLEX3700W, DLEX3875V, DLEX3875W, DLEX3885C, DLEX3885W, DLEX3900B, DLEX3900W, DLEX4000B, DLEX4000W, DLEX4070V, DLEX4070W, DLEX4200V, DLEX4200W, DLEX4270V, DLEX4270W, DLEX4370K, DLEX4370W, DLEX4500B, DLEX4500W, DLEX4970W, DLEX5000V, DLEX5000W, DLEX5001V, DLEX5001W, DLEX5170V, DLEX5170W, DLEX5680V, DLEX5680W, DLEX5780VE, DLEX5780WE, DLEX5870V, DLEX5870W, DLEX5900B, DLEX5900W, DLEX6001V, DLEX6001W, DLEX7177RM, DLEX7177WM, DLEX7200VE, DLEX7200WE, DLEX7300VE, DLEX7300WE, DLEX7600KE, DLEX7600VE, DLEX7600WE, DLEX7700KE, DLEX7700VE, DLEX7700WE, DLEX7800VE, DLEX7800WE, DLEX8000V, DLEX8000W, DLEX8100V, DLEX8100W, DLEX8377NM, DLEX8377WM, DLEX9000V, DLEX9000W, DLGX0002TM, DLGX2451R, DLGX2502R, DLGX2502V, DLGX2502W, DLGX2551R, DLGX2551W, DLGX2651R, DLGX2651V, DLGX2651W, DLGX2656V, DLGX2802L, DLGX2802W, DLGX2902V, DLGX2902W, DLGX3002P, DLGX3002R, DLGX3002W, DLGX3071R, DLGX3071V, DLGX3071W, DLGX3251R, DLGX3251V, DLGX3251W, DLGX3361R, DLGX3361V, DLGX3361W, DLGX3371R, DLGX3371V, DLGX3371W, DLGX3471V, DLGX3471W, DLGX3551V, DLGX3551W, DLGX3571V, DLGX3571W, DLGX3651V, DLGX3651W, DLGX3671V, DLGX3671W, DLGX3701V, DLGX3701W, DLGX3876V, DLGX3876W, DLGX3886C, DLGX3886W, DLGX3901B, DLGX3901W, DLGX4001B, DLGX4001W, DLGX4071V, DLGX4071W, DLGX4201V, DLGX4201W, DLGX4271V, DLGX4271W, DLGX4371K, DLGX4371W, DLGX4501B, DLGX4501W, DLGX4971W, DLGX5001V, DLGX5001W, DLGX5002V, DLGX5002W, DLGX5171V, DLGX5171W, DLGX5681V, DLGX5681W, DLGX5781VE, DLGX5781WE, DLGX5871V, DLGX5871W, DLGX5901B, DLGX5901W, DLGX6002V, DLGX6002W, DLGX7188RM, DLGX7188WM, DLGX7201VE, DLGX7201WE, DLGX7301VE, DLGX7301WE, DLGX7601KE, DLGX7601VE, DLGX7601WE, DLGX7701KE, DLGX7701VE, DLGX7701WE, DLGX7801VE, DLGX7801WE, DLGX8001V, DLGX8001W, DLGX8101V, DLGX8101W, DLGX8388NM, DLGX8388WM, DLGX9001V, DLGX9001W, RN1306AT, RN1306BT, RN1316AS, RN1316BS, RV1306AT, RV1306BT, RV1316AS, RV1316BS

Kenmore79681472210, 79681473210, 79681479210, 79681482210, 79681483210, 79681489210, 79682172210, 79682173210, 79682179210, 79682182210, 79682183210, 79682189210, 79683172210, 79683173210, 79683179210, 79683182210, 79683183210, 79683189210, 79684172210, 79684173210, 79684179210, 79684182210, 79684183210, 79684189210, 79685172210, 79685173210, 79685179210, 79685182210, 79685183210, 79685189210, 79686172210, 79686173210, 79686179210, 79686182210, 79686183210, 79686189210, 79687172210, 79687173210, 79687179210, 79687182210, 79687183210, 79687189210

GE (Select Models)DBXR453EA1WW, DBXR453EA2WW, DBXR453EA3WW, DBXR453EA4WW, DBXR453EB1WW, DBXR453EB2WW, DBXR453EB3WW, DBXR453EB4WW, DBXR453EG1WW, DBXR453EG2WW, DBXR453EG3WW, DBXR453EG4WW

Professional Repair Time: 30-40 minutes
DIY Repair Time: 45-65 minutes
Difficulty Rating: Moderate (2/5) — Requires moderate mechanical skills, unplugging dryer and turning off gas supply, removal of top panel and front panel for access, understanding of belt routing, release of belt tension, removal of retaining clip or nut, removal of old pulley wheel, installation of new pulley wheel with proper orientation, reinstallation of retaining hardware, belt reinstallation with correct routing, reassembly, testing and verification

CRITICAL SAFETY WARNING: This repair involves working inside the dryer cabinet with moving parts and electrical components. Always unplug the dryer and turn off the gas supply (for gas dryers) before beginning work to prevent electrical shock, accidental motor startup, and gas leaks. If uncomfortable with this repair, hire a qualified technician.TOOLS REQUIRED: Phillips screwdriver, flathead screwdriver, putty knife or panel tool, 1/4-inch or 5/16-inch nut driver or socket set, adjustable pliers, flashlight, work gloves.IMPORTANT: This part is the pulley wheel only—does not include mounting bracket or tension spring. Verify your existing bracket and spring are functional before ordering. If the bracket or spring is damaged, order the complete idler pulley assembly (4561EL3002A) instead.

  1. Unplug the dryer from the electrical outlet to ensure complete power disconnection. CRITICAL: Never work on the dryer while it's plugged in.
  2. For gas dryers: Turn off the gas supply at the shutoff valve behind the dryer (turn valve perpendicular to gas line to close).
  3. Move the dryer away from the wall to provide working space and access to the rear panel.
  4. Disconnect the dryer vent hose from the rear of the dryer by loosening the clamp with a screwdriver or pliers.
  5. Take multiple photos of the dryer interior, belt routing, idler pulley position, and spring attachment before disassembly. CRITICAL: Belt routing and pulley orientation must be exact for proper operation.
  6. Remove the lint filter from the lint trap and set aside.
  7. Remove the top panel: Insert a putty knife between the top and front panel near the corners (approximately 3 inches from each side), push up to release the spring clips, and lift the top panel up and back. Some models have screws at the rear—remove if present. Prop the top panel open or remove completely.
  8. Disconnect the door switch wire connector (if accessible from the front) by pulling the connector apart. This prevents wire damage during front panel removal.
  9. Remove the front panel: Remove the screws securing the front panel to the dryer cabinet (typically 2-4 screws at the top corners inside the lint trap opening and 2-4 screws at the bottom corners). Carefully lift the front panel up and forward to disengage it from the cabinet. Set aside.
  10. Locate the idler pulley assembly in the base of the dryer (typically on the right side or center, between the motor and drum, with the drive belt looped around the pulley wheel).
  11. Take detailed close-up photos of the idler pulley wheel from multiple angles, showing: belt routing around the wheel, pulley orientation on the bracket shaft, and relationship to the tension spring and mounting bracket.
  12. Release belt tension by pushing the idler pulley arm toward the motor to create slack in the belt. This compresses the spring and relieves tension.
  13. While holding the idler pulley toward the motor, slip the drive belt off the motor pulley to completely release tension. The idler pulley arm will now move freely.
  14. Slip the drive belt off the idler pulley wheel by pulling it to the side.
  15. Inspect the idler pulley bracket and shaft to determine how the pulley wheel is retained. Most designs use one of these methods: C-clip or E-clip on the shaft end, nut on a threaded shaft, or press-fit design with no retainer.
  16. For C-clip or E-clip retention: Use a flathead screwdriver or needle-nose pliers to carefully pry or pull the retaining clip off the end of the shaft. Caution: Clips can spring off—control carefully and wear safety glasses. Keep the clip in a safe place for reinstallation.
  17. For threaded shaft with nut: Use a nut driver or socket to remove the nut from the end of the shaft. Remove any washers and keep organized.
  18. Remove the old pulley wheel by sliding it off the bracket shaft. Note: Some pulley wheels may be tight on the shaft and require firm pulling. Do not pry against the wheel—can crack it.
  19. Inspect the old pulley wheel for wear indicators: rough or seized bearing (spin the wheel by hand—should rotate smoothly), worn or grooved wheel surface from belt contact, cracks in the wheel body, excessive play or wobble in the bearing, or contamination from lint and debris. This confirms the diagnosis.
  20. Test the old pulley bearing by spinning the wheel by hand. Should rotate smoothly and freely with minimal resistance. Rough, grinding, squealing, or seized rotation = failed bearing.
  21. Inspect the bracket shaft for wear, damage, or bending. The shaft should be straight and smooth with no grooves, rust, or damage. Clean the shaft with a cloth if dirty.
  22. Inspect the tension spring and mounting bracket for damage, cracks, or wear. If the spring is weak, broken, or the bracket is damaged, order the complete idler pulley assembly (4561EL3002A) instead of just the wheel.
  23. Clean the shaft and mounting area with a cloth, removing lint, dust, and debris.
  24. Unpack the new 4560EL3001A idler pulley wheel from its packaging.
  25. Compare the new pulley wheel to the old one to verify dimensions, wheel diameter, bearing type, shaft bore diameter, and overall design match.
  26. Inspect the new pulley wheel for any shipping damage before installation. Spin the wheel by hand—should rotate smoothly and freely with no resistance, noise, or wobble.
  27. Verify the bearing is properly seated in the wheel hub by checking for any looseness or play. The bearing should be firmly press-fit in the wheel with no movement.
  28. Slide the new pulley wheel onto the bracket shaft. The wheel should slide on smoothly with slight resistance. Important: Ensure the wheel is oriented correctly—the belt contact surface should face outward in the same direction as the old wheel.
  29. Push the wheel fully onto the shaft until it's seated against the bracket or shaft shoulder (if present). Some designs have a specific position marked by a shoulder or stop on the shaft.
  30. Reinstall the retaining hardware:For C-clip or E-clip: Position the clip in the shaft groove and press it firmly into place using pliers or a screwdriver. Verify the clip is fully seated in the groove and secure.For threaded shaft with nut: Install any washers in the correct order, then thread the nut onto the shaft and tighten firmly but not excessively. Hand-tight plus 1/4 turn is sufficient.
  31. Verify the pulley wheel is securely retained on the shaft with no excessive play or wobble. The wheel should have minimal side-to-side movement (less than 1/16 inch).
  32. Test the new pulley wheel by spinning it by hand. Should rotate smoothly and freely with no resistance, binding, or noise. The wheel should spin for several seconds before stopping from friction.
  33. Reinstall the drive belt around the idler pulley wheel by looping it over the wheel surface.
  34. Route the drive belt according to your detailed photos: loop it around the drum (ribbed side inward if applicable), under the idler pulley wheel, then around the motor pulley. CRITICAL: Belt routing must be exact.
  35. Push the idler pulley arm toward the motor to create slack in the belt, slip the belt onto the motor pulley, then release the idler pulley arm. The spring tension will automatically tension the belt.
  36. Verify proper belt routing by checking that: the belt sits centered on all pulleys (drum, idler, motor), the belt is not twisted, the idler pulley contacts the smooth (back) side of the belt, and the belt has proper tension.
  37. Check belt tension by pressing on the belt between the idler pulley and motor pulley—should deflect approximately 1/2 inch with moderate pressure.
  38. Manually rotate the drum several complete revolutions by hand to verify smooth operation. The drum should rotate freely without binding, and the idler pulley wheel should rotate smoothly as the belt moves across it.
  39. Listen for any noise from the idler pulley wheel during manual drum rotation—should be completely silent. Any squealing, grinding, or clicking indicates a problem.
  40. Verify the pulley wheel spins freely as the belt moves across it during drum rotation, with no sticking, hesitation, or rough spots.
  41. Reinstall the front panel by positioning it and engaging the bottom tabs, then installing the mounting screws at the top and bottom. Tighten firmly.
  42. Reconnect the door switch wire connector (if disconnected earlier) by pushing the connector together until it clicks.
  43. Lower the top panel back into position and push down firmly at the front corners until the spring clips engage with clicking sounds.
  44. Reinstall the lint filter in the lint trap.
  45. Reconnect the dryer vent hose to the rear of the dryer and secure with the clamp. Ensure the connection is tight with no gaps.
  46. Move the dryer back to its installation location.
  47. For gas dryers: Turn on the gas supply by turning the shutoff valve parallel to the gas line. Check for gas leaks at all connections using soapy water—bubbles indicate leaks.
  48. Restore electrical power by plugging in the dryer.
  49. Run a test cycle (air fluff or timed dry, no heat, 10 minutes, no clothes) to verify proper operation.
  50. Listen carefully during the test cycle for smooth, quiet operation with no squealing, grinding, or unusual noises from the idler pulley wheel. The new wheel should operate silently.
  51. Verify the drum rotates smoothly without hesitation, slipping, or vibration.
  52. Run a second test cycle (normal dry cycle with heat, small load of towels) to verify full operation under load.
  53. Monitor the dryer during the loaded test cycle for smooth operation, proper tumbling action, consistent drum speed, and no belt slipping or noise.
  54. If the dryer operates smoothly with quiet pulley wheel operation, consistent drum rotation, and no belt slipping or noise, the repair is complete.

Safety Notes: Always unplug the dryer and turn off gas supply before working inside the cabinet. Control retaining clips carefully during removal—can spring off. Take extensive photos of belt routing and pulley orientation before disassembly. Verify smooth wheel rotation by hand before closing up. Ensure retaining clip or nut is securely installed. Test operation thoroughly with both empty and loaded cycles. This repair requires moderate mechanical skills and typically takes 40-55 minutes for DIY.

  1. The 4560EL3001A is the pulley wheel only—if your tension spring is weak or the mounting bracket is damaged, order the complete idler pulley assembly (4561EL3002A) instead. Replacing just the wheel when the spring or bracket is also worn results in continued problems and requires another repair. Inspect the spring for stretching, weak tension, or breakage, and check the bracket for cracks, bending, or wear. If either component is compromised, replace the entire assembly for a comprehensive repair.
  2. Squealing noise from the idler pulley area specifically during dryer operation (not when manually rotating the drum) indicates bearing failure in the pulley wheel. The bearing fails from continuous high-speed rotation, heat exposure, and lint contamination. When the bearing seizes or becomes rough, the belt friction against the stationary or rough-rotating wheel creates the squealing sound. If you hear squealing only when the motor is running (not during manual drum rotation), the idler pulley wheel bearing has failed.
  3. The pulley wheel bearing is sealed and maintenance-free—never add grease or oil to the bearing. Modern idler pulley wheels use sealed ball bearings or self-lubricating sleeve bearings that require no external lubrication. Adding grease or oil attracts lint and debris, causes the bearing to overheat from contamination, and actually shortens bearing life. Install the new wheel dry and it will provide 10+ years of quiet, maintenance-free operation.
  4. Always inspect the drive belt for grooves, wear, or damage when replacing the idler pulley wheel—a worn wheel often damages the belt. Failed idler pulley wheel bearings cause the wheel to rotate roughly or seize completely, creating excessive friction that wears grooves into the belt, causes fraying, or generates heat that glazes the belt surface. Installing a new pulley wheel with a damaged belt results in rapid wheel wear and repeat failure. If the belt shows any damage, replace it along with the pulley wheel.
  5. The retaining clip or nut must be securely installed—a loose or missing retainer allows the pulley wheel to slide off the shaft during operation, causing immediate belt failure. After installing the new wheel, verify the C-clip or E-clip is fully seated in the shaft groove with no gaps, or that the retaining nut is tightened firmly. Tug on the wheel to verify it's secure. A wheel that comes off during operation causes the belt to jump off the pulleys, potentially wrapping around the motor shaft and causing motor damage.
  6. Pulley wheel wobble indicates a worn bearing or improper installation—the wheel should spin true with minimal side-to-side movement. After installing the new wheel, spin it by hand and observe the rotation. The wheel should spin smoothly in a circular path with no wobbling, tilting, or eccentric motion. Excessive wobble (more than 1/16 inch side-to-side) indicates: worn bearing (defective part), improper installation (wheel not fully seated on shaft), damaged shaft (bent or worn), or incorrect wheel for your model. Diagnose and correct before operating the dryer.
  7. Lint buildup on the idler pulley wheel and bearing causes overheating and premature failure—clean lint from the dryer interior during wheel replacement. Lint accumulation around the pulley wheel acts as insulation, preventing heat dissipation from the bearing and causing it to run hot and wear faster. Lint can also infiltrate the bearing seal, contaminating the lubricant and causing rapid bearing degradation. During pulley wheel replacement, thoroughly vacuum all lint from the dryer base, motor area, and blower housing.
  8. If the new pulley wheel squeals immediately after installation, the bearing may be defective, the shaft may be damaged, or the belt may be contaminated. New pulley wheels should operate silently from the first rotation. Immediate squealing indicates: defective bearing (return for replacement), damaged or rough shaft (clean or replace bracket), belt contamination from fabric softener or dryer sheets (clean belt with rubbing alcohol), or incorrect belt routing (belt twisted or on wrong side of pulley).
  9. The idler pulley wheel typically lasts 8-12 years with normal use, but can fail prematurely from overloading, lack of maintenance, or belt problems. Regularly overloading the dryer beyond capacity (more than 20-25 pounds dry weight) creates excessive belt tension that stresses the pulley wheel bearing, accelerating wear. Using a worn, damaged, or incorrect belt causes the pulley wheel to work harder, generating heat and shortening bearing life. Replace worn belts promptly and follow load capacity guidelines to extend pulley wheel life.
  10. Belt routing is critical—the idler pulley wheel must contact the smooth (back) side of the belt, not the ribbed side. Most dryer belts have a ribbed inner surface (contacts drum) and smooth outer surface (contacts pulleys). The idler pulley wheel and motor pulley should contact the smooth outer surface. If the belt is installed backwards or routed incorrectly, the idler pulley wheel contacts the ribbed surface, causing rapid wheel wear, bearing damage, and noise. Verify correct belt routing before closing up the dryer.
  11. The pulley wheel shaft on the bracket must be straight and smooth—a bent or worn shaft causes pulley wobble and premature bearing failure. During pulley wheel replacement, inspect the bracket shaft carefully. The shaft should be perfectly straight with no bending, and the surface should be smooth with no grooves, rust, or wear. A bent shaft causes the pulley wheel to wobble during rotation, creating uneven bearing load and rapid wear. A grooved or worn shaft damages the new bearing. If the shaft is damaged, replace the complete idler pulley assembly.
  12. If the belt slips immediately after installing a new pulley wheel, check for weak spring tension, incorrect belt routing, or seized drum rollers. A new pulley wheel with proper bearing function should not cause belt slipping—the spring provides belt tension, not the wheel. If slipping occurs after wheel replacement, diagnose the root cause: weak or broken tension spring (replace complete assembly), incorrect belt routing (verify routing per photos), seized drum rollers creating excessive resistance (replace rollers), or overloading (reduce load size). The pulley wheel only provides a smooth rotating surface for the belt—it doesn't control tension.
  • Loud squealing or screeching noise during operation
  • Grinding or rumbling noise from idler pulley area
  • Belt slipping (drum not rotating or rotating slowly)
  • Dryer drum not rotating at all
  • Intermittent drum rotation (starts and stops)
  • Burning rubber smell (belt friction from seized pulley)
  • Excessive vibration during operation
  • Pulley wobble or rough rotation
  • Clothes not tumbling properly
  • Dryer motor running but drum not moving
  • Belt jumping off pulleys
  • Rapid belt wear or damage


Whirlpool refrigerator replacement parts, Frigidaire refrigerator replacement parts, GE refrigerator replacement parts, Kenmore refrigerator replacement parts, KitchenAid refrigerator replacement parts, LG refrigerator replacement parts, Maytag refrigerator replacement parts, Whirlpool refrigerator drawers and glides replacement, Whirlpool dishwasher replacement parts, GE dishwasher replacement parts, KitchenAid dishwasher replacement parts, Maytag dishwasher replacement parts, Frigidaire dishwasher replacement parts, Kenmore dishwasher replacement parts, Whirlpool washer replacement parts, GE washer replacement parts, Maytag washer replacement parts, Kenmore washer replacement parts, LG washer replacement parts, Whirlpool dryer replacement parts, GE dryer replacement parts, Maytag dryer replacement parts, Kenmore dryer replacement parts, LG dryer replacement parts, Whirlpool range replacement parts, GE range replacement parts, Whirlpool stove replacement parts, GE stove replacement parts, GE oven replacement parts, GE microwave replacement parts, buy Whirlpool refrigerator parts online, buy GE dishwasher parts online, replacement Kenmore washer parts for sale, buy Maytag dryer parts, LG washer replacement parts online, KitchenAid refrigerator parts for sale, Whirlpool stove and range replacement parts

4560EL3001A Dryer Idler Pulley Wheel

The 4560EL3001A is a genuine OEM dryer idler pulley wheel designed for LG, Kenmore, and select GE dryers. This critical component maintains proper tension on the drive belt to ensure smooth, reliable drum rotation and prevent belt slipping during operation. The idler pulley wheel is the rotating component that contacts the drive belt and spins freely on its bearing as the belt moves across it, providing consistent belt tension through spring-loaded pressure from the idler pulley assembly. The idler pulley wheel is essential for proper dryer function—without a functioning pulley wheel with smooth bearing operation, the drum cannot rotate properly, causing poor tumbling action, belt slipping, squealing noises, excessive motor load, and potential damage to the belt and motor. The 4560EL3001A is the pulley wheel component only (does not include the mounting bracket or tension spring), making it ideal for repairs where only the wheel or bearing has failed while the bracket and spring remain functional. The idler pulley wheel is constructed from premium materials including a durable thermoplastic or metal pulley wheel (approximately 2 inches in diameter, designed to handle continuous high-speed belt contact without wear, glazing, or deformation), precision ball bearing or sleeve bearing with sealed design (provides smooth rotation with minimal friction, eliminates need for external lubrication, rated for 10+ years of continuous operation), and corrosion-resistant bearing housing (securely holds the bearing in the wheel hub, prevents bearing migration or looseness). The pulley wheel surface features a smooth or slightly contoured profile that matches the drive belt design (flat or ribbed), ensuring proper belt tracking and grip without causing premature belt wear or damage. The bearing is press-fit into the wheel hub and rotates on a shaft that's part of the idler pulley bracket assembly. The 4560EL3001A replaces older part numbers including AP4438625, 1267529, PS3523032, AH3523032, EA3523032, B00AYBKHUI and features improved bearing design for longer life and quieter operation (50% quieter than previous generation), enhanced bearing seal design for better protection against lint and moisture contamination, upgraded pulley wheel material for better heat resistance and durability (withstands continuous operation at temperatures up to 200°F), improved bearing retention in the wheel hub for better dimensional stability, and optimized wheel profile for better belt contact and reduced wear. The dryer idler pulley wheel operates through continuous rotation and friction-based belt contact: when the dryer operates, the drive motor turns the drive belt which rotates the drum; the drive belt loops around the motor pulley, drum, and idler pulley wheel in a specific routing path; the idler pulley wheel is mounted on a spring-loaded bracket that maintains constant tension on the belt; as the belt moves across the idler pulley wheel, the wheel rotates freely on its bearing; the bearing provides smooth, low-friction rotation that allows the belt to move efficiently without excessive resistance; the pulley wheel absorbs belt vibration and maintains consistent belt tracking; proper pulley wheel bearing function is critical for smooth belt operation, quiet dryer operation, and preventing premature belt and motor wear. Common failure causes include normal wear from age and continuous operation (typical pulley wheel lifespan 8-12 years with average use, 5000-8000 drying cycles), bearing failure from wear causing rough rotation, squealing, or complete seizure, pulley wheel wear creating grooves or flat spots from belt contact, bearing seal failure allowing lint and moisture contamination that damages bearing, lack of lubrication in older non-sealed bearing designs, overheating from excessive belt tension or friction causing bearing degradation, contamination from lint buildup affecting bearing operation, or manufacturing defects. When the idler pulley wheel fails, symptoms include loud squealing, squeaking, or screeching noise during operation (bearing failure or lack of lubrication), grinding or rumbling noise (completely failed bearing with metal-on-metal contact), belt slipping (seized pulley preventing smooth belt movement), dryer drum not rotating or rotating slowly (seized pulley creating excessive resistance), intermittent drum rotation (pulley sticking or binding), visible pulley wheel damage (grooves, cracks, or deformation), burning rubber smell (belt friction from seized pulley), excessive vibration (pulley wobble from worn bearing), or complete belt failure (seized pulley causing belt overheating and breakage). The 4560EL3001A is a pulley wheel only and requires the existing idler pulley bracket and tension spring to be functional. If the bracket or spring is also damaged, order the complete idler pulley assembly (part 4561EL3002A) instead. IMPORTANT: This is the pulley wheel only—does not include mounting bracket or spring. Verify your bracket and spring are functional before ordering. CRITICAL: Always unplug the dryer before working on internal components to prevent electrical shock and accidental motor startup. This is a moderate repair requiring removal of dryer panels to access the idler pulley assembly and drive belt.


Key Features and Design

  • OEM Specifications: Engineered to meet original equipment manufacturer standards, ensuring a precise fit and seamless integration with compatible dryer models like DLE0332W, DLE0442W, and many others.
  • Durable Construction: Built with high-quality materials to withstand regular use, helping maintain the smooth operation of your dryer's belt system for long-lasting results.
  • Compact and Versatile Design: Features a standard idler pulley wheel that fits securely, as seen in detailed views of its sturdy build, making it an ideal choice for quick repairs.

Performance and Benefits

This idler pulley wheel effectively addresses problems like unusual noises or belt slippage, restoring efficient drying cycles and extending the life of your appliance. By choosing this part from XPart Supply Ltd., you'll save on professional repair costs while enjoying a hassle-free installation that gets your dryer back to peak performance, ensuring your laundry routine runs smoothly and reliably.

The 4560EL3001A Dryer Idler Pulley Wheel is a high-quality replacement part for LG and Kenmore dryers. It is designed to meet OEM specifications and will help restore your dryer's performance.

Supported Models:

DLE0332W, DLE0442W, DLE2512W, DLE2514W, DLE2515S, DLE2516W, DLE3733S, DLE3733W, DLE3777W, DLE5955G, DLE5955W, DLE5977B, DLE5977S, DLE5977SM, DLE5977W, DLE6942W, DLE7177WM, DLE8377NM, DLE8377WM, DLE9577SM, DLE9577WM, DLEX7177RM, DLEX7177WM, DLG0332W, DLG0452W, DLG2522W, DLG2524W, DLG2525S, DLG2526W, DLG2532W, DLG3744S, DLG3744W, DLG3788W, DLG5932S, DLG5932W, DLG5966G, DLG5966W, DLG5988B, DLG5988S, DLG5988SM, DLG5988W, DLG6952W, DLG7188RM, DLG7188WM, DLG8388NM, DLG8388WM, DLG9588WM, DLGX0002TM, DLE5932S, TDV10031E, RN1306AT, RN1316AS, TDV10030E, DLG3744D, DLGX5102V, TDV10030G, DLGX5102W, RN1306BT, RN1319VS, DLE3733U, DL TDV10031G, TDV10186GM, DLE0442G, DLG0452G, DLG3744U, TDV10032E, TDV10032G, DLEX8377WM, RV1306AT, RV1316AS, RV1321AS, RV1304A, RV1304B, RV1306BT, RV1319VS, DLE5932W, RN1316A, RN1316B, TDV10035E, TDV10035G, TDV10135E, TDV10135G, DLG2051W, RV1307B, DLG2302R, DLG2102W, DLG2302W, TDV10092EK, DLG2602R, DLG2602W, DLG2702V, RN1319E, RV1310A, RV1310B, TDV10177EM, TDV10092GK, CDE3379WN, RN1317AS


Hard to find parts? We've got them or we'll find them!

Over 10,000 New & Used Parts Ready for Pickup

Show this item number to our store staff to help locate the exact part you need
XPART GTIN/UPC NUMBER
9665533903137

XPart Supply Advantage

Your trusted partner for fast, reliable parts delivery across North America

Lightning Fast Shipping

Same-day processing with expedited delivery options across North America

Massive Inventory

Over 10,000 parts in stock and ready to ship immediately

North America Coverage

Comprehensive shipping network covering USA, Canada, and Mexico

Quality Guaranteed

Premium parts with warranty protection and expert customer support

10K+
Parts in Stock
24-48H
Local Delivery
99.8%
Customer Satisfaction
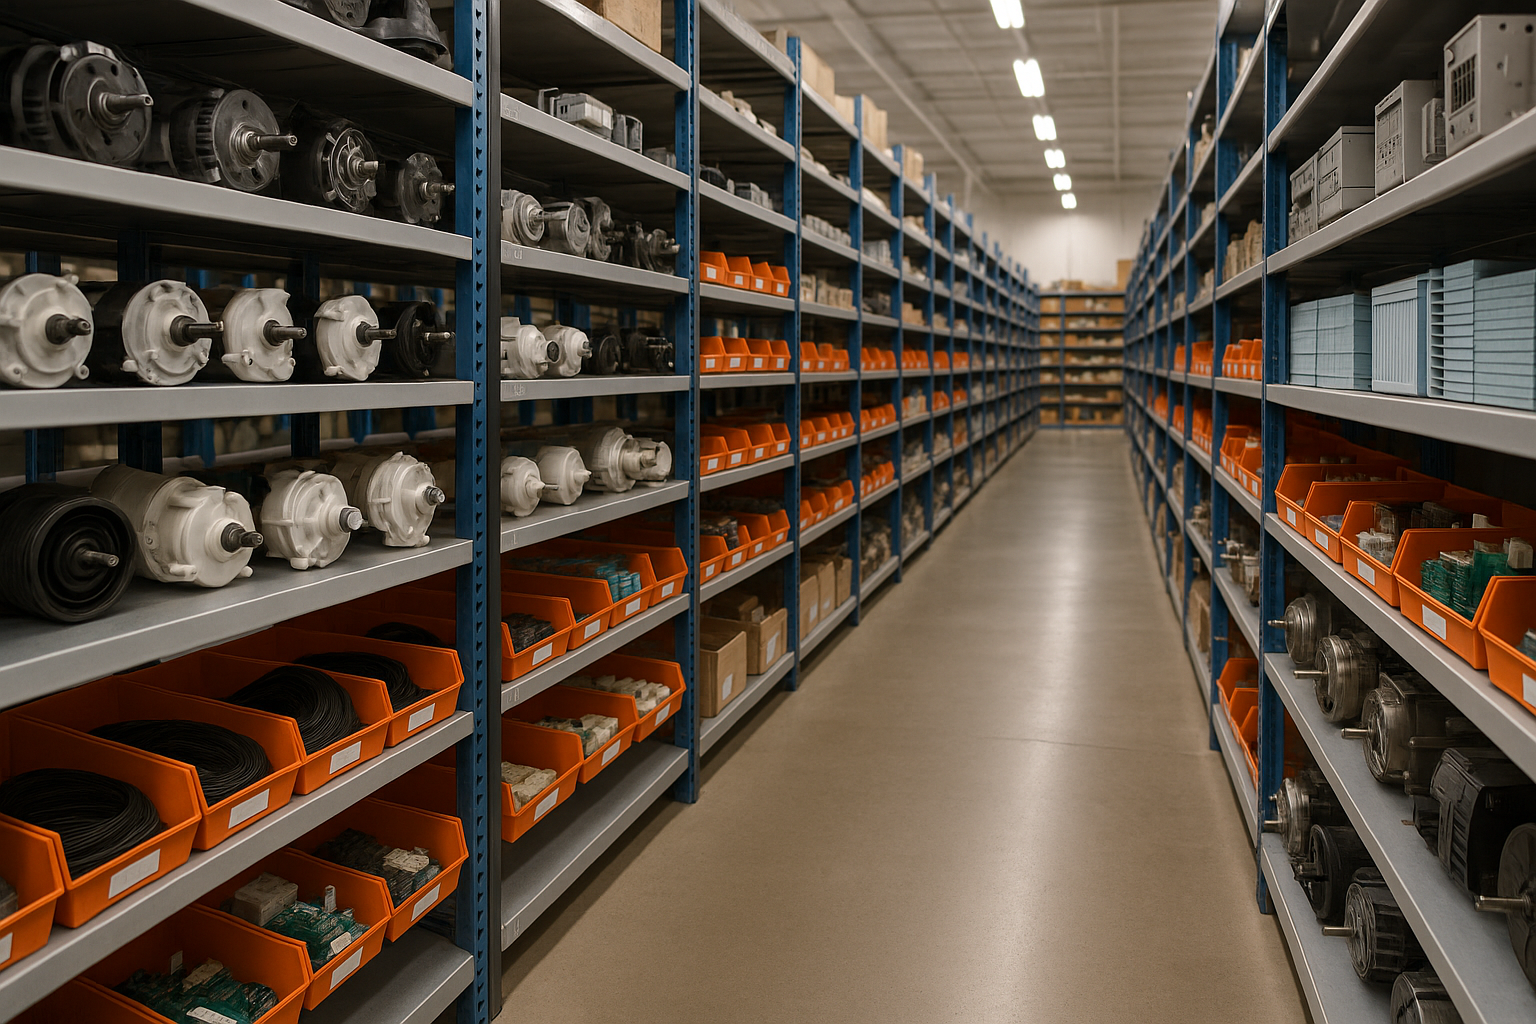
Professional appliance parts warehouse with organized shelving and extensive inventory

Express Warehouse Shipping

Order within the countdown for same-day shipping!

00 Hours
00 Minutes
00 Seconds

In stock orders placed during business hours ship the same day.

Order of $75 or more of eligible items qualify for FREE Shipping.

Same-day shipping deadline has passed

Orders placed now will ship the next business day.

Same-day shipping deadline has passed

Orders placed outside business hours will be processed when we reopen.

Business Hours: Monday - Friday, 9:00 AM - 5:00 PM EST

Trusted Family Business

29 years of Excellence in Appliance Parts

For over 29 years, our family has been dedicated to providing quality appliance parts and exceptional service. What started as a small local business has grown into a trusted name, but we've never forgotten our roots. Every customer receives the personal attention and care that only a family-owned business can provide.

Years of Experience

Our knowledge has been built over the past 29 years in the business, ensuring expert advice for every appliance need.

Personal Service Guarantee

We treat every customer like family, providing personalized solutions and standing behind our products.

Built on Trust

Our reputation has been built one satisfied customer at a time, creating lasting relationships in our community.

Buy Online Pick Up In-Store

Address
101 Trillium Dr
Kitchener, Ontario N2R 1J8
Phone
Hours
Monday - Friday 9:00 AM - 5:00 PM
Get Directions

Contact Us Customer Service

Hard to find parts? We've got them or we'll find them!

Call now for expert appliance parts assistance

Available Monday - Friday, 9AM - 5PM EST