WW02F00669 Dryer Duct Trap Assembly (replaces WW02F00418, WW02F00594, WE14X20617)

XPart Supply Ltd. 840304111612

Price
$90.70

Frequently Bought Together

Stock Notification

Get notified when this product is available again

WW02F00418, WW02F00594, WE14X20617, WW02F00668, WW02F00667, WW02F00666, AP6286813, PS12348597, 4547235, WW02F00670, WW02F00671, WW02F00672

GE, Hotpoint, Haier, General Electric, Monogram, Café, Profile

Fits Models: (Ctrl+F and Enter Your Model Number)

GE: DBXR453EG0WW, DBXR453EG1WW, DBXR453EG2WW, DBXR453EG3WW, DBXR453EG4WW, DBXR453EG5WW, DBXR453EG6WW, DBXR453EG7WW, DBXR453EG8WW, DBXR453EG9WW

GE (continued): DBXR463EG0WW, DBXR463EG1WW, DBXR463EG2WW, DBXR463EG3WW, DBXR463EG4WW, DBXR463EG5WW, DBXR463EG6WW, DBXR463EG7WW, DBXR463EG8WW, DBXR463EG9WW

GE (continued): DBXR473EG0WW, DBXR473EG1WW, DBXR473EG2WW, DBXR473EG3WW, DBXR473EG4WW, DBXR473EG5WW, DBXR473EG6WW, DBXR473EG7WW, DBXR473EG8WW, DBXR473EG9WW

GE (continued): DBXR483EG0WW, DBXR483EG1WW, DBXR483EG2WW, DBXR483EG3WW, DBXR483EG4WW, DBXR483EG5WW, DBXR483EG6WW, DBXR483EG7WW, DBXR483EG8WW, DBXR483EG9WW

GE (continued): DBXR493EG0WW, DBXR493EG1WW, DBXR493EG2WW, DBXR493EG3WW, DBXR493EG4WW, DBXR493EG5WW, DBXR493EG6WW, DBXR493EG7WW, DBXR493EG8WW, DBXR493EG9WW

GE (continued): DBXR503EG0WW, DBXR503EG1WW, DBXR503EG2WW, DBXR503EG3WW, DBXR503EG4WW, DBXR503EG5WW, DBXR503EG6WW, DBXR503EG7WW, DBXR503EG8WW, DBXR503EG9WW

Hotpoint: HDBR453EG0WW, HDBR453EG1WW, HDBR453EG2WW, HDBR453EG3WW, HDBR453EG4WW, HDBR453EG5WW, HDBR453EG6WW, HDBR453EG7WW, HDBR453EG8WW, HDBR453EG9WW

Hotpoint (continued): HDBR463EG0WW, HDBR463EG1WW, HDBR463EG2WW, HDBR463EG3WW, HDBR463EG4WW, HDBR463EG5WW, HDBR463EG6WW, HDBR463EG7WW, HDBR463EG8WW, HDBR463EG9WW

Haier: HDBR453EG0WW, HDBR453EG1WW, HDBR453EG2WW, HDBR453EG3WW, HDBR453EG4WW, HDBR453EG5WW, HDBR453EG6WW, HDBR453EG7WW, HDBR453EG8WW, HDBR453EG9WW

Note: This is a partial list. This dryer duct trap assembly is used in many GE-manufactured dryers built between 2010-2024. Verify your specific model number for compatibility before ordering. Duct trap assemblies are model-specific—using an incompatible assembly may not fit properly or may cause airflow issues.

Professional: 60-90 minutes
DIY: 90-120 minutes
Difficulty Level: Moderate repair (requires front panel removal, careful positioning, risk of improper fit if misaligned)

Required Tools:

  • Phillips screwdriver
  • Flathead screwdriver
  • 1/4" nut driver
  • Needle-nose pliers
  • Work gloves
  • Flashlight
  • Camera or smartphone (for reference photos)
  • Multimeter (for electrical testing if needed)
  • Masking tape and marker (for labeling)
  • Lint brush or vacuum (for cleaning)

Step-by-Step Installation:

  1. Disconnect Power: Unplug the dryer from the electrical outlet or turn off the circuit breaker that supplies power to the dryer. Never work on the dryer with power connected. For gas dryers, also turn off the gas supply valve.
  2. Move Dryer: Pull the dryer away from the wall to provide access to the rear and sides. You'll need at least 3 feet of clearance.
  3. Remove Front Panel (if necessary): Depending on your model, you may need to remove the front panel to access the duct trap assembly:Remove screws securing the front panel (typically 2-4 screws at the top corners or along the top edge)Carefully tilt the front panel forward or lift it upRest the front panel on top of the dryer or support it carefullySome models have the duct trap accessible from the rear—check your model first
  4. Locate Duct Trap Assembly: Look inside the dryer cabinet at the rear or bottom of the drum. You'll see the duct trap assembly—a plastic or metal housing with a lint screen support frame and mounting brackets.
  5. Take Reference Photos (Critical): Before disconnecting anything, take 20-30 clear, close-up photos of the duct trap assembly from multiple angles showing:Overall position and orientation inside the dryerMounting bracket positionsConnection points to the dryer cabinetLint screen support frameExhaust hose connection portAny wire or clip connectionsRelationship to other components (drum, heating element, etc.) This is absolutely critical for correct reinstallation.
  6. Document Assembly Position: Create a detailed diagram or written description showing the exact position of the duct trap assembly inside the dryer cabinet. Note which direction it faces, how it's mounted, and how it connects to other components.
  7. Disconnect Exhaust Hose (if connected): If the external exhaust vent hose is connected to the duct trap assembly:Locate the hose connection point on the duct trapLoosen any hose clamps or fastenersCarefully pull the hose off the connection portPlace the hose aside (you may need to reconnect it to the new assembly)
  8. Remove Mounting Hardware: The duct trap assembly is secured to the dryer cabinet with mounting screws, clips, or brackets (typically 3-6 fasteners). Remove all mounting hardware. Keep these fasteners—you'll need them for reinstallation.
  9. Remove Old Duct Trap Assembly: Once all connections and mounting hardware are removed, carefully pull the old duct trap assembly away from the dryer cabinet. Handle gently to avoid damaging other components or sharp edges. The assembly may be tight—you may need to wiggle it gently to remove it.
  10. Inspect Old Assembly: Examine the old assembly for visible damage: cracks in the plastic housing, melted areas, lint blockage, corrosion, or mechanical damage. Check for lint accumulation inside the duct—this is the most common cause of dryer airflow problems. If lint is clogged inside, this confirms the diagnosis and explains the dryer's reduced performance.
  11. Clean Mounting Area: Wipe down the dryer cabinet area where the duct trap assembly was mounted. Remove any dust, lint, or debris. A clean mounting surface ensures proper assembly installation and good fit.
  12. Compare Old and New Assemblies: Remove the new duct trap assembly from its packaging. Compare the new assembly to the old assembly:Verify the overall size and shape matchCheck that mounting hole positions are identicalConfirm the lint screen support frame matchesEnsure the exhaust hose connection port is in the same locationVerify part numbers match or are compatibleCheck that the assembly is not damaged or cracked
  13. Position New Duct Trap Assembly: Carefully position the new duct trap assembly into the dryer cabinet. Align mounting holes with the mounting points on the cabinet. Ensure the assembly is oriented correctly and positioned exactly as the old assembly was positioned (use your reference photos).
  14. Install Mounting Hardware: Secure the duct trap assembly with mounting screws, clips, or brackets. Tighten screws firmly but do not overtighten—excessive force can crack the plastic housing. Ensure the assembly is securely mounted and doesn't move or shift.
  15. Verify Assembly Fit: Ensure the duct trap assembly fits properly inside the dryer cabinet:The assembly should not interfere with the dryer drum rotationThe assembly should not touch or rub against other componentsThe exhaust hose connection port should be accessibleThe lint screen support frame should be properly positionedThe assembly should sit flush against the mounting points
  16. Reconnect Exhaust Hose: If you disconnected the external exhaust vent hose, reconnect it to the duct trap assembly:Align the hose with the connection port on the duct trapPush the hose onto the connection port until it's fully seatedTighten any hose clamps or fasteners to secure the connectionEnsure the hose connection is airtight and secure
  17. Verify All Connections: Before closing the dryer, carefully verify that:The duct trap assembly is securely mountedAll mounting hardware is tightThe exhaust hose is properly connected and secureNo wires or clips are pinched or damagedThe assembly doesn't interfere with other componentsThe lint screen support frame is properly positioned
  18. Reinstall Front Panel (if removed): If you removed the front panel:Position the front panel back onto the dryerAlign the panel with the mounting pointsEnsure no wires or hoses are pinched between the panel and dryerSecure the panel with all mounting screws
  19. Move Dryer Back: Push the dryer back into position, leaving a small gap from the wall for ventilation and hose clearance.
  20. Restore Power: Plug the dryer back into the electrical outlet or turn on the circuit breaker. For gas dryers, turn on the gas supply valve.
  21. Test Dryer Operation: Start the dryer and run it for 5-10 minutes on a heat cycle:The dryer should start immediatelyThe dryer drum should rotate smoothlyThe heating element should turn on (the dryer should feel warm)Air should flow out of the external vent hose
  22. Verify Airflow: Feel the air coming out of the external vent hose:The airflow should be strong and consistentThe air should be warm or hotThere should be no blockage or weak airflowCompare the airflow to how it was before (if you remember)
  23. Check for Lint Escape: During the test run, check that lint is not escaping into the dryer cabinet or around the duct trap assembly:Open the dryer door during operation (it will stop)Look inside the dryer cabinetThere should be no lint visible around the duct trap assemblyAll lint should be captured by the lint screen and directed through the duct
  24. Test Lint Screen Fit: Remove the lint screen and verify it fits properly in the duct trap assembly's support frame:The lint screen should slide in smoothlyThe screen should sit flush in the frameThe screen should not be loose or wobblyReinstall the lint screen
  25. Monitor for 30 Minutes: Allow the dryer to run for 30 minutes with multiple cycles. Monitor for:Consistent airflow out the vent hoseNormal heating performanceNo unusual noises or vibrationsNo lint escaping into the cabinetNormal drying performanceProper dryer temperature
  26. Full Functionality Test: Run a complete functionality test:Dry a full load of laundry through a complete cycleVerify the dryer heats properlyVerify the drum rotates smoothlyVerify airflow is strong and consistentVerify clothes dry in normal timeVerify no lint escapes into the cabinet
  27. Check External Vent Hose: After the test run, check the external vent hose:Feel the air coming out—it should be warm and strongCheck for any lint buildup around the vent openingVerify the hose is not kinked or blockedEnsure the hose connection is secure
  28. Monitor for 24 Hours: Allow the dryer to operate for 24 hours with multiple loads and monitor for any issues: reduced airflow, lint escaping, heating problems, or operational failures.
  29. Clean Lint Screen Regularly: After installation, establish a routine of cleaning the lint screen before every load:Remove the lint screen from the duct trap assemblyWipe the screen with your hand or a lint brush to remove lintReinstall the screenRegular cleaning prevents lint accumulation and maintains airflow
  30. Inspect Duct Trap Periodically: Every 6 months, inspect the duct trap assembly for lint accumulation:Remove the front panel (if necessary)Look inside the duct trap assemblyIf lint is accumulating, clean it out using a lint brush or vacuumEnsure the duct is clear and not blockedReinstall the front panel

Clean the entire exhaust vent system when replacing the duct trap assembly—lint buildup is the #1 cause of dryer problems. If your old duct trap assembly was clogged with lint or damaged, the external exhaust vent hose and ductwork are almost certainly clogged with lint as well. Installing a new duct trap assembly without cleaning the entire vent system will cause the same problem to recur within weeks or months. Before installing the new assembly, disconnect the external vent hose and clean it thoroughly using a dryer vent cleaning brush or vacuum. If possible, clean the entire vent ductwork from the dryer to the exterior vent opening. Professional dryer vent cleaning costs $150-250 but prevents fires and extends dryer life. A clogged vent system causes 90% of dryer performance problems and is the leading cause of dryer fires.

Verify the duct trap assembly doesn't interfere with drum rotation before closing the dryer. After installing the new duct trap assembly, manually rotate the dryer drum by hand (with power disconnected) to ensure the drum rotates freely and doesn't rub against the duct trap. If the drum rubs or binds, the duct trap assembly may be mispositioned or the wrong part. Reposition the assembly and verify proper clearance. Operating the dryer with the drum rubbing against the duct trap causes excessive wear, noise, and potential damage to both components. Always test drum rotation before restoring power.

The duct trap assembly is the most common source of lint buildup—clean it every 6 months. Even with a new duct trap assembly, lint will accumulate inside the duct over time. Every 6 months, remove the front panel and inspect the duct trap assembly for lint buildup. Use a lint brush or vacuum to clean out any accumulated lint. A clean duct trap maintains maximum airflow and prevents dryer overheating. Professional technicians recommend cleaning the duct trap assembly twice per year, especially for households that do frequent laundry. Lint buildup reduces airflow by 50-70%, causing clothes to take 2-3 times longer to dry and increasing energy costs.

Check the lint screen for damage when replacing the duct trap assembly. The lint screen sits in the duct trap assembly's support frame. If the lint screen is torn, warped, or damaged, it won't capture lint effectively and lint will escape into the duct trap and exhaust vent. Before installing the new duct trap assembly, inspect the lint screen for damage. If the screen is damaged, replace it ($15-25) at the same time as the duct trap assembly. A damaged lint screen combined with a new duct trap assembly still allows lint to escape, causing the same problems.

Verify the exhaust hose connection is airtight—air leaks reduce dryer performance. After reconnecting the external exhaust vent hose to the new duct trap assembly, verify the connection is airtight. Run the dryer and feel around the connection for air leaks. If air is escaping, tighten the hose clamp or use foil tape to seal the connection. Air leaks reduce airflow efficiency by 20-30% and allow lint to escape into the dryer cabinet or laundry room. An airtight connection ensures maximum airflow and prevents lint accumulation.

The duct trap assembly is made of plastic—handle carefully to avoid cracking. The WW02F00669 duct trap assembly is made of heat-resistant plastic that can crack if dropped or handled roughly. During installation, handle the assembly gently and avoid overtightening mounting screws. Excessive force can crack the plastic housing, causing air leaks or structural failure. If the assembly cracks during installation, it must be replaced—cracked assemblies cannot be repaired and will cause airflow problems.

Different dryer models use different duct trap configurations—verify compatibility before ordering. GE dryers manufactured over different years use different duct trap assembly designs. The WW02F00669 replaces older versions (WW02F00418, WW02F00594, WE14X20617) but may not be compatible with all GE dryer models. Verify your exact dryer model number and compare the old duct trap assembly part number before ordering. Installing an incompatible assembly causes poor fit, airflow problems, or interference with other components. Check your dryer's model/serial plate and cross-reference with the manufacturer's parts diagram.

Inspect the blower wheel when replacing the duct trap assembly. The blower wheel (fan) is located near the duct trap assembly and is responsible for pulling air through the dryer drum and pushing it out the exhaust vent. If the blower wheel is clogged with lint or damaged, replacing the duct trap assembly won't fix the airflow problem. While you have the dryer disassembled, inspect the blower wheel for lint buildup or damage. If the blower wheel is clogged, clean it using a lint brush or vacuum. If the blower wheel is damaged (cracked blades, broken hub), replace it ($40-80) at the same time as the duct trap assembly.

Reduced dryer airflow

Clothes taking longer to dry

Dryer overheating or shutting off unexpectedly

Lint escaping into the exhaust vent


Lint accumulation inside the dryer cabinet

Lint screen not fitting properly

Weak airflow out of external vent

Dryer running but not drying clothes

Excessive lint buildup around dryer

Dryer making unusual airflow noises

Moisture or condensation inside dryer

Dryer drum not rotating smoothly (if duct interferes)

Burning smell from dryer (lint buildup)

Dryer thermal fuse blowing repeatedly

High-limit thermostat tripping

Dryer cycling on and off

Clothes coming out damp after full cycle

Visible damage to duct housing

Melted or cracked plastic duct


Whirlpool refrigerator replacement parts, Frigidaire refrigerator replacement parts, GE refrigerator replacement parts, Kenmore refrigerator replacement parts, KitchenAid refrigerator replacement parts, LG refrigerator replacement parts, Maytag refrigerator replacement parts, Whirlpool refrigerator drawers and glides replacement, Whirlpool dishwasher replacement parts, GE dishwasher replacement parts, KitchenAid dishwasher replacement parts, Maytag dishwasher replacement parts, Frigidaire dishwasher replacement parts, Kenmore dishwasher replacement parts, Whirlpool washer replacement parts, GE washer replacement parts, Maytag washer replacement parts, Kenmore washer replacement parts, LG washer replacement parts, Whirlpool dryer replacement parts, GE dryer replacement parts, Maytag dryer replacement parts, Kenmore dryer replacement parts, LG dryer replacement parts, Whirlpool range replacement parts, GE range replacement parts, Whirlpool stove replacement parts, GE stove replacement parts, GE oven replacement parts, GE microwave replacement parts, buy Whirlpool refrigerator parts online, buy GE dishwasher parts online, replacement Kenmore washer parts for sale, buy Maytag dryer parts, LG washer replacement parts online, KitchenAid refrigerator parts for sale, Whirlpool stove and range replacement parts

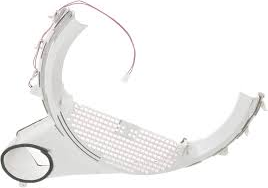
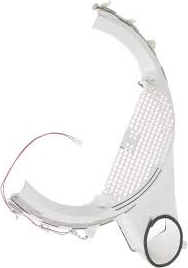
GE WW02F00669 Dryer Duct Trap Assembly

Genuine OEM dryer duct trap assembly for GE and Hotpoint dryers. This critical component is the exhaust air duct that encloses and supports the lint screen in the dryer's exhaust air pathway. The duct trap assembly is a plastic or metal housing that directs hot, moist air from the dryer drum through the lint screen and out of the dryer cabinet toward the external vent hose. The assembly includes the duct housing, lint screen support frame, mounting brackets, and connector ports for the exhaust hose. When this component fails, you'll experience reduced dryer airflow, clothes taking longer to dry, dryer overheating or shutting off unexpectedly, lint escaping into the exhaust vent, visible cracks or damage to the duct, lint accumulation inside the dryer cabinet, or the lint screen not fitting properly. Duct trap assemblies fail due to lint accumulation and blockage, thermal stress from high heat, mechanical damage from foreign objects, plastic degradation from heat exposure, manufacturing defects, or age-related cracking. The duct trap assembly is located inside the dryer cabinet, typically at the rear or bottom of the drum, and connects the dryer drum exhaust to the external vent hose. This assembly replaces WW02F00418, WW02F00594, and WE14X20617, which are older versions.

Key Features and Design

Crafted with durable, high-quality materials, this assembly ensures long-lasting reliability for your GE dryer. Its compact design fits seamlessly into standard dryer systems, making it a straightforward replacement that prevents lint buildup and supports efficient airflow.

  • Built to trap lint and debris, reducing the risk of clogs that can hinder dryer operation.
  • Engineered for compatibility with various GE dryer models, emphasizing ease of installation and robust construction.

Performance and Benefits

This dryer duct trap assembly enhances your dryer's efficiency by minimizing lint accumulation, which can lead to faster drying times and lower energy use. By promoting a cleaner system, it helps prevent potential hazards like overheating, allowing you to enjoy safer, more reliable laundry cycles while extending the life of your appliance.

This GE WW02F00669 dryer duct trap assembly is designed to effectively trap lint and debris, ensuring a clean and efficient drying process. Made with high-quality materials, it is durable and reliable. Keep your dryer running smoothly with this essential part.

Hard to find parts? We've got them or we'll find them!

Over 10,000 New & Used Parts Ready for Pickup

Show this item number to our store staff to help locate the exact part you need
XPART GTIN/UPC NUMBER
9665558413601

XPart Supply Advantage

Your trusted partner for fast, reliable parts delivery across North America

Lightning Fast Shipping

Same-day processing with expedited delivery options across North America

Massive Inventory

Over 10,000 parts in stock and ready to ship immediately

North America Coverage

Comprehensive shipping network covering USA, Canada, and Mexico

Quality Guaranteed

Premium parts with warranty protection and expert customer support

10K+
Parts in Stock
24-48H
Local Delivery
99.8%
Customer Satisfaction
Professional appliance parts warehouse with organized shelving and extensive inventory

Express Warehouse Shipping

Order within the countdown for same-day shipping!

00 Hours
00 Minutes
00 Seconds

In stock orders placed during business hours ship the same day.

Order of $75 or more of eligible items qualify for FREE Shipping.

Same-day shipping deadline has passed

Orders placed now will ship the next business day.

Same-day shipping deadline has passed

Orders placed outside business hours will be processed when we reopen.

Business Hours: Monday - Friday, 9:00 AM - 5:00 PM EST

Trusted Family Business

29 years of Excellence in Appliance Parts

For over 29 years, our family has been dedicated to providing quality appliance parts and exceptional service. What started as a small local business has grown into a trusted name, but we've never forgotten our roots. Every customer receives the personal attention and care that only a family-owned business can provide.

Years of Experience

Our knowledge has been built over the past 29 years in the business, ensuring expert advice for every appliance need.

Personal Service Guarantee

We treat every customer like family, providing personalized solutions and standing behind our products.

Built on Trust

Our reputation has been built one satisfied customer at a time, creating lasting relationships in our community.

Buy Online Pick Up In-Store

Address
101 Trillium Dr
Kitchener, Ontario N2R 1J8
Phone
Hours
Monday - Friday 9:00 AM - 5:00 PM
Get Directions

Contact Us Customer Service

Hard to find parts? We've got them or we'll find them!

Call now for expert appliance parts assistance

Available Monday - Friday, 9AM - 5PM EST