WG04F11712 Dryer Harness (replaces WH19X28477)

XPart Supply Ltd. 883049411712

Sale price
$31.28
Regular price
$35.91
You save
$4.63 (13%)
Condition: New

Product variant with selected options does not exist!

Frequently Bought Together

WH19X28477, AP6885076, PS12729163, EAP12729163, 4396277, WE14X27506, WE14X30305

GE, Hotpoint, RCA

Fits Models: (Ctrl+F and Enter Your Model Number)

GEGTD33EASK0WW, GTD33EASK1WW, GTD33EASK2WW, GTD33EASK3WW, GTD33EASK4WW, GTD33EASK5WW, GTD33EASK6WW, GTD33EASK7WW, GTD33EASK8WW, GTD33EASK9WW, GTD33GASK0WW, GTD33GASK1WW, GTD33GASK2WW, GTD33GASK3WW, GTD33GASK4WW, GTD33GASK5WW, GTD33GASK6WW, GTD33GASK7WW, GTD33GASK8WW, GTD33GASK9WW, GTD40EBMK0DG, GTD40EBMK1DG, GTD40EBMK2DG, GTD40EBMK3DG, GTD40EBMK4DG, GTD40EBMK5DG, GTD40EBMK6DG, GTD40EBMK7DG, GTD40EBMK8DG, GTD40EBMK9DG, GTD42EASJ0WW, GTD42EASJ1WW, GTD42EASJ2WW, GTD42EASJ3WW, GTD42EASJ4WW, GTD42EASJ5WW, GTD42EASJ6WW, GTD42EASJ7WW, GTD42EASJ8WW, GTD42EASJ9WW, GTD42GASJ0WW, GTD42GASJ1WW, GTD42GASJ2WW, GTD42GASJ3WW, GTD42GASJ4WW, GTD42GASJ5WW, GTD42GASJ6WW, GTD42GASJ7WW, GTD42GASJ8WW, GTD42GASJ9WW, GTD45EASK0WW, GTD45EASK1WW, GTD45EASK2WW, GTD45EASK3WW, GTD45EASK4WW, GTD45EASK5WW, GTD45EASK6WW, GTD45EASK7WW, GTD45EASK8WW, GTD45EASK9WW, GTD45GASK0WW, GTD45GASK1WW, GTD45GASK2WW, GTD45GASK3WW, GTD45GASK4WW, GTD45GASK5WW, GTD45GASK6WW, GTD45GASK7WW, GTD45GASK8WW, GTD45GASK9WW, GTD65EBMK0DG, GTD65EBMK1DG, GTD65EBMK2DG, GTD65EBMK3DG, GTD65EBMK4DG, GTD65EBMK5DG, GTD65EBMK6DG, GTD65EBMK7DG, GTD65EBMK8DG, GTD65EBMK9DG, GTD72EBMK0DG, GTD72EBMK1DG, GTD72EBMK2DG, GTD72EBMK3DG, GTD72EBMK4DG, GTD72EBMK5DG, GTD72EBMK6DG, GTD72EBMK7DG, GTD72EBMK8DG, GTD72EBMK9DG

HotpointHTX21EASK0WW, HTX21EASK1WW, HTX21EASK2WW, HTX21EASK3WW, HTX21EASK4WW, HTX21EASK5WW, HTX21EASK6WW, HTX21EASK7WW, HTX21EASK8WW, HTX21EASK9WW, HTX21GASK0WW, HTX21GASK1WW, HTX21GASK2WW, HTX21GASK3WW, HTX21GASK4WW, HTX21GASK5WW, HTX21GASK6WW, HTX21GASK7WW, HTX21GASK8WW, HTX21GASK9WW, HTX24EASK0WW, HTX24EASK1WW, HTX24EASK2WW, HTX24EASK3WW, HTX24EASK4WW, HTX24EASK5WW, HTX24EASK6WW, HTX24EASK7WW, HTX24EASK8WW, HTX24EASK9WW, HTX24GASK0WW, HTX24GASK1WW, HTX24GASK2WW, HTX24GASK3WW, HTX24GASK4WW, HTX24GASK5WW, HTX24GASK6WW, HTX24GASK7WW, HTX24GASK8WW, HTX24GASK9WW

RCARDE33EASK0WW, RDE33EASK1WW, RDE33EASK2WW, RDE33EASK3WW, RDE33EASK4WW, RDE33EASK5WW, RDE33EASK6WW, RDE33EASK7WW, RDE33EASK8WW, RDE33EASK9WW, RDE42EASK0WW, RDE42EASK1WW, RDE42EASK2WW, RDE42EASK3WW, RDE42EASK4WW, RDE42EASK5WW, RDE42EASK6WW, RDE42EASK7WW, RDE42EASK8WW, RDE42EASK9WW

Professional Repair Time: 60-90 minutes
DIY Repair Time: 90-120 minutes
Difficulty Rating: Advanced (4/5) — Requires extensive disassembly, electrical knowledge, and careful documentation; not recommended for inexperienced DIYers

  1. Unplug the dryer from the electrical outlet to ensure complete power disconnection.
  2. Pull the dryer away from the wall to provide adequate working space. Disconnect the exhaust vent hose from the back of the dryer.
  3. Remove the lint screen from the lint trap housing.
  4. Remove the top panel by locating and removing the screws at the rear of the top panel (typically 2 screws), or by releasing the spring clips at the front corners using a putty knife. Lift the top panel up and back.
  5. Disconnect the console wiring harness if the top panel is hinged and needs to be fully removed.
  6. Remove the front panel by locating and removing the screws that secure it to the dryer cabinet (typically 2-4 screws along the top edge beneath the top panel, and sometimes along the bottom edge).
  7. Disconnect the door switch wiring harness from the front panel.
  8. Carefully pull the front panel forward and away from the dryer cabinet, setting it aside in a safe location.
  9. Take multiple photos of the existing wire harness routing before disconnecting anything. Document every connector, wire path, and mounting clip location. This is critical for proper reassembly.
  10. Label each connector with masking tape and a marker to identify its connection point (e.g., "door switch," "thermal fuse," "motor," "control board").
  11. Locate the main wire harness running from the control board to various components throughout the dryer.
  12. Disconnect all connectors from the old harness one at a time, starting from the control board end and working toward the components. Pull connectors straight off—do not twist or bend.
  13. Release any wire harness clips or ties that secure the harness to the dryer frame. Note their locations for reinstallation.
  14. Carefully remove the old wire harness from the dryer, following the routing path documented in your photos.
  15. Inspect the old harness for visible damage such as frayed wires, melted insulation, burnt connectors, or rodent chewing. This confirms the diagnosis.
  16. Unpack the new WG04F11712 wire harness and lay it out on a clean surface.
  17. Compare the new harness to the old one to verify all connectors and wire lengths match. Ensure you have the correct replacement part.
  18. Route the new wire harness through the dryer following the same path as the old harness. Use your photos as a guide.
  19. Secure the harness with the original clips or ties at each mounting point to prevent the wires from contacting moving parts or hot surfaces.
  20. Connect each connector to its corresponding component, matching the labels you applied earlier. Ensure each connector is fully seated and clicks into place.
  21. Verify all connections are secure by gently tugging on each connector. None should pull loose.
  22. Double-check the routing to ensure no wires are pinched, kinked, or in contact with the drum, heating element, or motor.
  23. Reinstall the front panel by aligning it with the cabinet and securing all screws.
  24. Reconnect the door switch wiring harness to the front panel.
  25. Reinstall the top panel by aligning it with the cabinet and securing all screws or clips.
  26. Reconnect the console wiring harness if it was disconnected.
  27. Reinstall the lint screen in the lint trap housing.
  28. Reconnect the exhaust vent hose to the back of the dryer, ensuring it is securely clamped.
  29. Push the dryer back into position against the wall.
  30. Plug the dryer back in and restore power.
  31. Run a test cycle (without clothes) for 10-15 minutes to verify proper operation.
  32. Test all dryer functions including start, heat, timer, and door switch operation.
  33. Listen for any unusual noises such as buzzing, arcing, or clicking from the wiring area.
  34. Monitor the dryer for proper heating and ensure the heating element cycles on and off normally.
  35. Check for any error codes on the control panel. If codes appear, verify all connections are secure.
  36. Inspect the wire harness area for any signs of overheating, burning smells, or smoke.
  37. If all checks pass, load the dryer normally and run a full cycle to confirm the repair is complete.
  38. If problems persist, verify all connectors are properly seated and the harness is routed correctly. Consult the dryer's wiring diagram for troubleshooting.

Safety Notes: Always ensure the dryer is unplugged before working on it. Never operate the dryer with exposed or damaged wiring. Improper wire harness installation can cause short circuits, component damage, or fire hazards. If you are not confident in electrical work, hire a qualified technician.

Document everything before you start. Take extensive photos of the wire harness routing, connector positions, and clip locations from multiple angles. A wire harness replacement is one of the most complex dryer repairs, and improper routing or connections can cause multiple failures. Your photos are your roadmap for reassembly.

Label every connector before disconnecting. Use masking tape and a marker to label each connector with its destination (e.g., "door switch," "thermal fuse," "motor"). This simple step prevents confusion during reassembly and ensures every connection is correct.

Inspect for root causes of harness failure. Wire harnesses don't fail randomly. Look for evidence of overheating (melted insulation), physical damage (pinched wires), rodent activity (chew marks), or moisture intrusion (corrosion). If you don't identify and correct the root cause, the new harness will fail too.

Check the heating element for shorts to ground. A shorted heating element can cause the wire harness to overheat and fail. Before installing the new harness, test the heating element with a multimeter. It should show continuity between the two terminals and no continuity to ground (the metal housing). If it shows continuity to ground, replace the heating element before installing the new harness.

Verify the control board is not damaged. A faulty control board can cause excessive current draw that damages the wire harness. If the old harness shows signs of overheating near the control board connectors, test the control board before installing the new harness. A damaged control board will destroy the new harness.Route the harness away from hot surfaces. Ensure the new harness does not contact the heating element, exhaust duct, or any other hot surfaces. Use the original mounting clips and ties to secure the harness in the factory-specified routing path. Improper routing can cause premature harness failure.

Test all connections before reassembly. After connecting the new harness, gently tug on each connector to verify it's fully seated. A loose connector can cause intermittent operation or component failure. Also verify no wires are pinched or kinked.

This harness is model-specific. The WG04F11712 is designed for specific GE, Hotpoint, and RCA dryer models. Always verify compatibility before ordering. Using an incorrect harness can result in non-fit, improper connections, or electrical faults.

Consider replacing related components. If the wire harness failed due to overheating, the thermal fuse, thermostats, or heating element may also be damaged. Inspect these components and replace as necessary to prevent future harness failures.

  • Dryer will not start or run at all
  • Dryer runs but produces no heat
  • Intermittent operation (dryer starts and stops randomly)
  • Error codes displayed on control panel related to wiring faults
  • Door switch not functioning properly
  • Control board not responding to user inputs
  • Heating element not cycling on and off correctly
  • Motor runs but drum does not turn
  • Burnt or melted wire connectors
  • Visible wire damage, fraying, or rodent chewing
  • Short circuits or tripped breakers when dryer is operated
  • Intermittent display or control panel issues


Whirlpool refrigerator replacement parts, Frigidaire refrigerator replacement parts, GE refrigerator replacement parts, Kenmore refrigerator replacement parts, KitchenAid refrigerator replacement parts, LG refrigerator replacement parts, Maytag refrigerator replacement parts, Whirlpool refrigerator drawers and glides replacement, Whirlpool dishwasher replacement parts, GE dishwasher replacement parts, KitchenAid dishwasher replacement parts, Maytag dishwasher replacement parts, Frigidaire dishwasher replacement parts, Kenmore dishwasher replacement parts, Whirlpool washer replacement parts, GE washer replacement parts, Maytag washer replacement parts, Kenmore washer replacement parts, LG washer replacement parts, Whirlpool dryer replacement parts, GE dryer replacement parts, Maytag dryer replacement parts, Kenmore dryer replacement parts, LG dryer replacement parts, Whirlpool range replacement parts, GE range replacement parts, Whirlpool stove replacement parts, GE stove replacement parts, GE oven replacement parts, GE microwave replacement parts, buy Whirlpool refrigerator parts online, buy GE dishwasher parts online, replacement Kenmore washer parts for sale, buy Maytag dryer parts, LG washer replacement parts online, KitchenAid refrigerator parts for sale, Whirlpool stove and range replacement parts

WG04F11712 Dryer Harness by XPart Supply Ltd.

The WG04F11712 is a genuine OEM wire harness assembly for GE, Hotpoint, and RCA electric dryers. This harness is a critical electrical component that connects the dryer's control board to various components including the door switch, thermal fuse, thermostats, heating element, motor, and user interface. The harness consists of multiple wires bundled together with connectors at each end, designed to route power and control signals throughout the dryer. Over time, wire harnesses can fail due to heat exposure, vibration, physical damage, rodent chewing, connector corrosion, or wire insulation breakdown. When the harness fails, symptoms can vary widely depending on which wires are affected—the dryer may not start, may run but not heat, may display error codes, or may experience intermittent operation. Damaged or frayed wires can also create short circuits or fire hazards. The WG04F11712 replaces the older WH19X28477 harness and is a direct plug-and-play replacement. Replacing a damaged wire harness restores proper electrical connections throughout the dryer and eliminates intermittent faults caused by poor wiring.

Key Features and Design

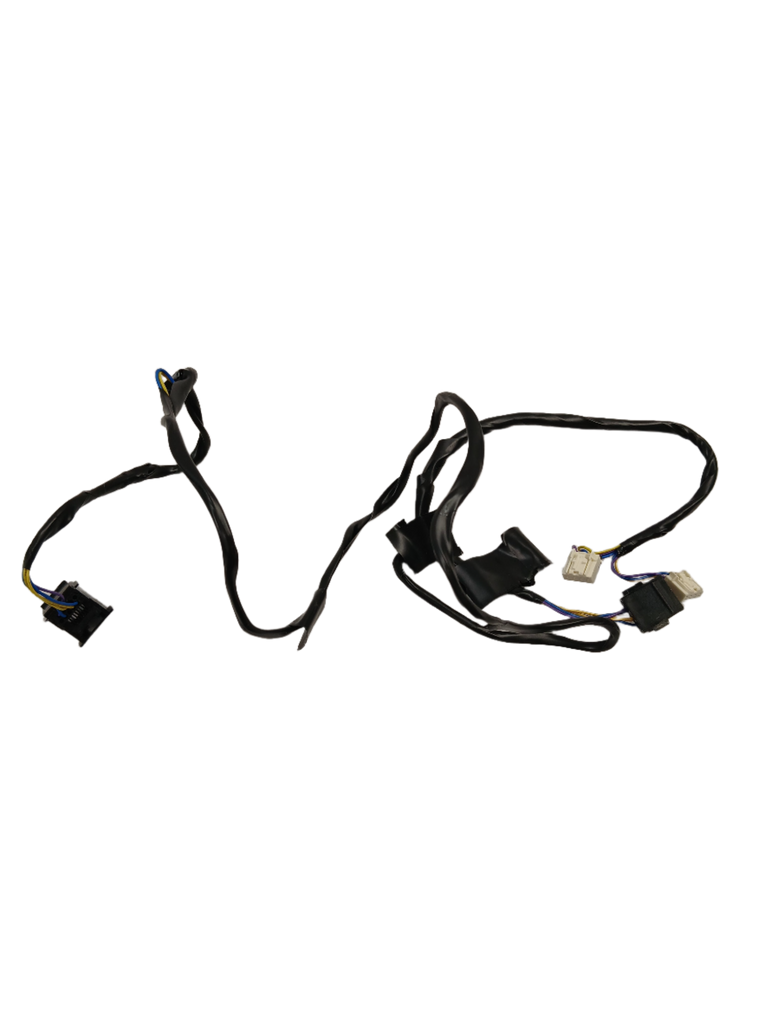
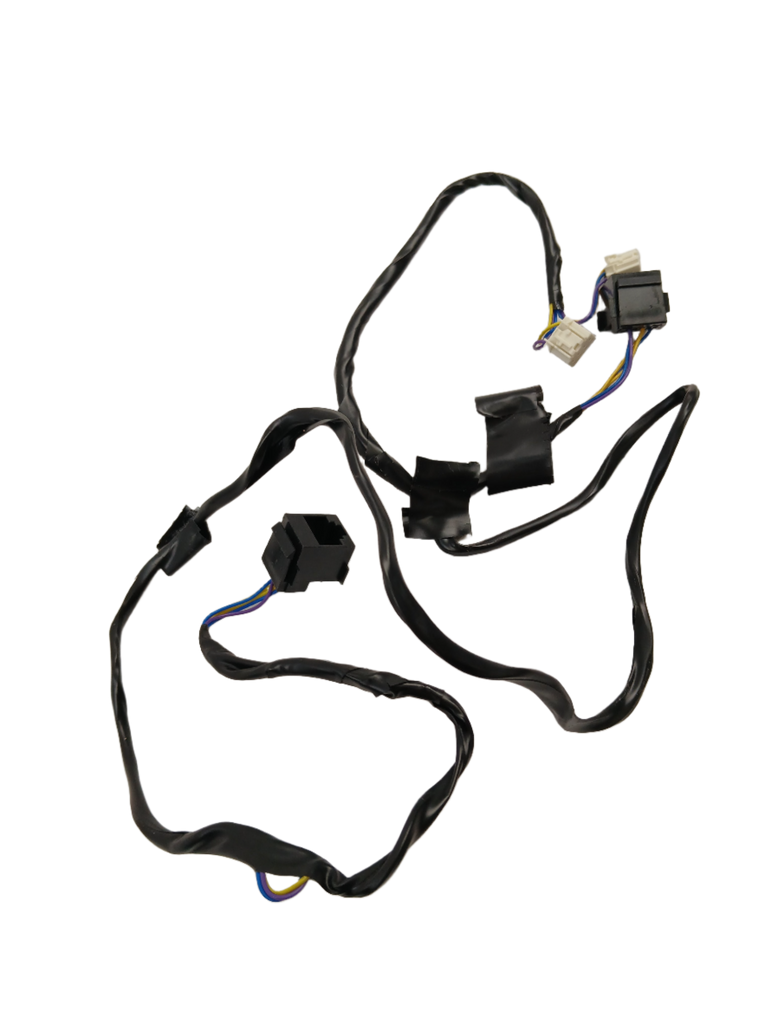
This durable dryer harness features high-quality construction with precise engineering for long-lasting reliability. Crafted from robust materials, it ensures safe and efficient operation, making it an essential component for your appliance's electrical system. Compatible with models such as GFT14ESSM0WW, GFT14ESSM1WW, QFT15ESSN0WW, and QFD15ESMN0WW, its design focuses on secure connections to prevent common issues.

  • High-quality materials: Built for durability and resistance to wear, supporting everyday use.
  • Precise engineering: Replaces part WH19X28477 with exact specifications for a seamless fit.
  • SKU WG04F11712: Easily identifiable for quick ordering and inventory management.

Performance and Benefits

The WG04F11712 Dryer Harness solves electrical connection problems in your dryer, restoring peak performance and preventing potential safety hazards. By ensuring stable power flow, it enhances your dryer's efficiency, reduces energy waste, and extends the appliance's lifespan, providing peace of mind and cost savings for everyday laundry needs. From XPart Supply Ltd., this part is engineered to deliver dependable results, making appliance maintenance straightforward and effective.

This durable dryer harness is expertly designed to provide the necessary electrical connections for peak performance, ensuring safe and efficient operation of your dryer. With its high-quality construction and precise engineering, it guarantees long-lasting use and reliable results.

Part number WG04F11712 replaces WH19X28477

Supported Models:

GFT14ESSM0WW, GFT14ESSM1WW, QFT15ESSN0WW, QFD15ESMN0WW

Hard to find parts? We've got them or we'll find them!

Over 10,000 New & Used Parts Ready for Pickup

Show this item number to our store staff to help locate the exact part you need
XPART GTIN/UPC NUMBER
9665466138913

XPart Supply Advantage

Your trusted partner for fast, reliable parts delivery across North America

Lightning Fast Shipping

Same-day processing with expedited delivery options across North America

Massive Inventory

Over 10,000 parts in stock and ready to ship immediately

North America Coverage

Comprehensive shipping network covering USA, Canada, and Mexico

Quality Guaranteed

Premium parts with warranty protection and expert customer support

10K+
Parts in Stock
24-48H
Local Delivery
99.8%
Customer Satisfaction
Professional appliance parts warehouse with organized shelving and extensive inventory

Express Warehouse Shipping

Order within the countdown for same-day shipping!

00 Hours
00 Minutes
00 Seconds

In stock orders placed during business hours ship the same day.

Order of $75 or more of eligible items qualify for FREE Shipping.

Same-day shipping deadline has passed

Orders placed now will ship the next business day.

Same-day shipping deadline has passed

Orders placed outside business hours will be processed when we reopen.

Business Hours: Monday - Friday, 9:00 AM - 5:00 PM EST

Trusted Family Business

29 years of Excellence in Appliance Parts

For over 29 years, our family has been dedicated to providing quality appliance parts and exceptional service. What started as a small local business has grown into a trusted name, but we've never forgotten our roots. Every customer receives the personal attention and care that only a family-owned business can provide.

Years of Experience

Our knowledge has been built over the past 29 years in the business, ensuring expert advice for every appliance need.

Personal Service Guarantee

We treat every customer like family, providing personalized solutions and standing behind our products.

Built on Trust

Our reputation has been built one satisfied customer at a time, creating lasting relationships in our community.

Buy Online Pick Up In-Store

Address
101 Trillium Dr
Kitchener, Ontario N2R 1J8
Phone
Hours
Monday - Friday 9:00 AM - 5:00 PM
Get Directions

Contact Us Customer Service

Hard to find parts? We've got them or we'll find them!

Call now for expert appliance parts assistance

Available Monday - Friday, 9AM - 5PM EST