WPW10730972 Washer Drain Pump Assembly (replaces W10130913)

XPart Supply Ltd. 706597525949

Sale price
$172.98
Regular price
$235.98
You save
$63 (27%)
Buying Options: OEM
Condition: New

Product variant with selected options does not exist!

Frequently Bought Together

W10730972, W10130913, AP5958431, PS11757304, 850024, W10117829, W10183434, W10276397, W10349814, W10536347, W10661045, 8540024, AP6023956, EAP11757304, PS11757304, W10130913VP, WPW10730972VP

Whirlpool, Maytag, Kenmore, Roper, Estate, Inglis, Admiral

Fits Models: (Ctrl+F and Enter Your Model Number)

Whirlpool: WFW9150WW00, WFW9150WW01, WFW9150WW02, WFW9151YW00, WFW9151YW01, WFW9151YW02, WFW9250WR00, WFW9250WR01, WFW9250WR02, WFW9250WL00

Whirlpool (continued): WFW9250WL01, WFW9250WL02, WFW9351YW00, WFW9351YW01, WFW9351YW02, WFW9400SZ00, WFW9400SZ01, WFW9400SZ02, WFW9400SU00, WFW9400SU01

Whirlpool (continued): WFW9400SU02, WFW9400SW00, WFW9400SW01, WFW9400SW02, WFW9400VE00, WFW9400VE01, WFW9400VE02, WFW9450WR00, WFW9450WR01, WFW9450WR02

Maytag: MHW5500FW0, MHW5500FW1, MHW5500FW2, MHW5500FC0, MHW5500FC1, MHW5500FC2, MHW6000XW0, MHW6000XW1, MHW6000XW2, MHW6000XG0

Maytag (continued): MHW6000XG1, MHW6000XG2, MHW6630HC0, MHW6630HC1, MHW6630HC2, MHW6630HW0, MHW6630HW1, MHW6630HW2, MHW7000XW0, MHW7000XW1

Maytag (continued): MHW7000XW2, MHW8000AG0, MHW8000AG1, MHW8000AG2, MHW8000AW0, MHW8000AW1, MHW8000AW2, MHW8100DC0, MHW8100DC1, MHW8100DC2

Kenmore: 11045081400, 11045081401, 11045081402, 11045091400, 11045091401, 11045091402, 11045092400, 11045092401, 11045092402, 11045096400

Kenmore (continued): 11045096401, 11045096402, 11047581600, 11047581601, 11047581602, 11047591600, 11047591601, 11047591602, 11047596600, 11047596601

KitchenAid: KFWS8100WH00, KFWS8100WH01, KFWS8100WH02, KFWS8100BL00, KFWS8100BL01, KFWS8100BL02, KFWM8100WH00, KFWM8100WH01, KFWM8100WH02, KFWM8100BL00

Amana: NFW5800HW0, NFW5800HW1, NFW5800HW2, NFW5800DW0, NFW5800DW1, NFW5800DW2, NTW4516FW0, NTW4516FW1, NTW4516FW2, NTW4519JW0

Jenn-Air: JFW2300WS00, JFW2300WS01, JFW2300WS02, JFW2400WS00, JFW2400WS01, JFW2400WS02, JFW2500WS00, JFW2500WS01, JFW2500WS02, JFW2600WS00

Note: This is a partial list. This washer drain pump assembly is used in thousands of Whirlpool-manufactured front-load and top-load washers built between 2010-2024. Verify your specific model number for compatibility before ordering. Drain pumps are model-specific—verify your model number and existing pump configuration before ordering.

Professional: 45-60 minutes
DIY: 60-90 minutes
Difficulty Level: Moderate repair (requires panel removal, hose disconnection, risk of water spillage and leaks if connections aren't secure)

Required Tools:

  • Phillips screwdriver
  • Flathead screwdriver
  • 1/4" nut driver
  • 5/16" nut driver
  • Needle-nose pliers
  • Channel-lock pliers
  • Work gloves
  • Flashlight
  • Camera or smartphone (for reference photos)
  • Towels (to catch residual water)
  • Bucket or shallow pan (to catch water)
  • Masking tape and marker (for labeling hoses)

Step-by-Step Installation:

  1. Disconnect Power: Unplug the washer from the electrical outlet. Never work on the washer with power connected.
  2. Turn Off Water Supply: Turn off both hot and cold water supply valves behind the washer.
  3. Move Washer: Pull the washer away from the wall to provide access to the rear and sides. You'll need at least 3 feet of clearance.
  4. Prepare for Water Drainage: Place towels and a bucket or shallow pan near the work area. The drain pump and hoses contain residual water that will drain when disconnected.
  5. Access Drain Pump (Front-Load Washers): For front-load washers, the drain pump is typically accessed from the bottom front:Locate the lower front access panel (kickplate) at the bottom of the washerRemove screws securing the access panel (typically 2-4 screws)Pull the access panel off to expose the drain pump areaYou should now see the drain pump and coin trap filter
  6. Access Drain Pump (Top-Load Washers): For top-load washers, the drain pump is typically accessed from the rear or by tipping the washer:Remove the rear access panel if your model has one, ORCarefully tip the washer backward (have a helper support it) to access the pump from the bottomPlace a sturdy support under the washer to hold it in the tipped position
  7. Locate Drain Pump: Identify the drain pump—a black or gray plastic housing with inlet and outlet hoses connected, and an electrical wire harness connector.
  8. Take Reference Photos (Critical): Before disconnecting anything, take 20-30 clear, close-up photos showing:The drain pump position and orientationAll hose connections (inlet from tub, outlet to drain)Wire harness connector positionMounting bracket configurationHose clamp positions and typesAny labels or markings on hoses This is absolutely critical for correct reinstallation.
  9. Label All Hoses: Use masking tape and marker to label each hose:Label the inlet hose from the tub (typically larger diameter)Label the outlet hose to the drain (typically smaller diameter)Label which port each hose connects to on the pumpThis prevents confusion during reinstallation
  10. Drain Residual Water from Pump: Before disconnecting hoses, drain residual water from the pump:Locate the coin trap filter cover on the front of the pump (if equipped)Place a shallow pan or towels under the pumpSlowly unscrew the coin trap filter cover (water will drain out)Allow all water to drain (typically 1-2 cups)Remove the coin trap filter and inspect for debris (coins, buttons, small items)Set the filter aside—you may need to transfer it to the new pump
  11. Disconnect Wire Harness: Disconnect the electrical wire harness from the drain pump:Locate the wire harness connector on the pump motorPress the release tab on the connectorPull the connector straight off the pump terminalsDo not pull on wires, only on the connector housing
  12. Remove Inlet Hose: Disconnect the inlet hose from the pump (hose from tub to pump):Position your bucket or pan under the connection to catch waterUse channel-lock pliers to squeeze or loosen the hose clampSlide the hose clamp away from the pump connectionTwist and pull the hose off the pump inlet portWater will drain—allow it to drain into your bucketKeep the hose clamp—you'll need it for reinstallation
  13. Remove Outlet Hose: Disconnect the outlet hose from the pump (hose from pump to drain):Position your bucket or pan under the connection to catch waterUse channel-lock pliers to squeeze or loosen the hose clampSlide the hose clamp away from the pump connectionTwist and pull the hose off the pump outlet portWater will drain—allow it to drain into your bucketKeep the hose clamp—you'll need it for reinstallation
  14. Remove Pump Mounting Hardware: The drain pump is secured to the washer cabinet with mounting screws or clips (typically 2-4 fasteners):Remove all mounting screws or release mounting clipsKeep these fasteners—you'll need them for reinstallationSupport the pump with one hand as you remove the last fastener
  15. Remove Old Drain Pump: Once all connections and mounting hardware are removed, carefully pull the old drain pump out of the washer cabinet. Handle gently to avoid spilling residual water.
  16. Inspect Old Pump: Examine the old pump for visible damage:Look for cracks in the pump housingCheck the impeller for damage or foreign objectsLook for signs of leaking (water stains, corrosion)Inspect the inlet and outlet ports for blockageCheck the motor for burning or overheating damageIf the impeller is jammed or damaged, this confirms the diagnosis
  17. Check for Foreign Objects: Inspect the old pump for foreign objects:Look inside the pump housing for coins, buttons, small clothing items, or debrisThese objects cause impeller jamming and pump failureRemove all debris and dispose of itIf significant debris is found, advise the customer to check pockets before washing
  18. Clean Hose Connections: Wipe down the inlet and outlet hoses where they connect to the pump. Remove any debris, lint, or residue. Clean connections ensure proper seal and prevent leaks.
  19. Compare Old and New Pumps: Remove the new drain pump assembly from its packaging. Compare the new pump to the old pump:Verify the overall size and shape matchCheck that inlet and outlet port positions are identicalConfirm the mounting bracket configuration matchesEnsure the wire harness connector is the same typeVerify part numbers match or are compatibleCheck that the pump is not damaged or defective
  20. Transfer Coin Trap Filter (if necessary): If your old pump has a coin trap filter and the new pump doesn't include one:Remove the coin trap filter from the old pumpClean the filter thoroughlyInstall the filter into the new pumpMost new WPW10730972 pumps include a new coin trap filter
  21. Position New Drain Pump: Carefully position the new drain pump into the washer cabinet:Align the pump with the mounting points on the cabinetEnsure the inlet and outlet ports are oriented correctly (match your reference photos)Verify the wire harness connector is accessibleThe pump should sit in the same position as the old pump
  22. Install Mounting Hardware: Secure the drain pump with mounting screws or clips:Install all mounting fastenersTighten screws firmly but do not overtightenEnsure the pump is securely mounted and doesn't move or shift
  23. Connect Inlet Hose (Critical Step): Reconnect the inlet hose to the pump (hose from tub to pump):Align the hose with the pump inlet port (typically the larger port)Push the hose onto the inlet port until it's fully seated (typically 1-2 inches)Position the hose clamp over the connectionUse channel-lock pliers to tighten the hose clamp securelyVerify the hose is fully seated and the clamp is tightTug the hose gently to ensure it won't pull off
  24. Connect Outlet Hose (Critical Step): Reconnect the outlet hose to the pump (hose from pump to drain):Align the hose with the pump outlet port (typically the smaller port)Push the hose onto the outlet port until it's fully seated (typically 1-2 inches)Position the hose clamp over the connectionUse channel-lock pliers to tighten the hose clamp securelyVerify the hose is fully seated and the clamp is tightTug the hose gently to ensure it won't pull off
  25. Verify Hose Connections: Before reconnecting the wire harness, carefully verify that:The inlet hose is connected to the correct pump port (from tub)The outlet hose is connected to the correct pump port (to drain)Both hoses are fully seated on their portsBoth hose clamps are tight and secureNo hoses are kinked, twisted, or pinchedCompare to your reference photos to confirm correct connections
  26. Reconnect Wire Harness: Reconnect the electrical wire harness to the drain pump:Align the wire harness connector with the pump motor terminalsPush the connector straight onto the terminals until you hear or feel a clickVerify the locking tab engages on the connectorGently tug the connector to ensure it's fully seated and won't pull off
  27. Reinstall Coin Trap Filter: If you removed the coin trap filter, reinstall it:Thread the coin trap filter cover into the pump housingTighten the filter cover hand-tight (do not overtighten)Ensure the filter is fully seated and sealed
  28. Verify All Connections: Before closing the washer, carefully verify that:The drain pump is securely mountedBoth hoses are connected to the correct ports and are secureThe wire harness is connected and lockedThe coin trap filter is installed and tightNo hoses are kinked or pinchedNo tools or debris are left in the washer cabinet
  29. Reinstall Access Panel: For front-load washers, reinstall the lower front access panel:Position the access panel back onto the washerSecure the panel with all mounting screwsEnsure the panel is flush and secure
  30. Return Washer to Upright Position: For top-load washers that were tipped, carefully return the washer to its upright position with a helper.
  31. Move Washer Back: Push the washer back into position, leaving a small gap from the wall for hose clearance.
  32. Restore Water Supply: Turn on both hot and cold water supply valves.
  33. Restore Power: Plug the washer back into the electrical outlet.
  34. Test Drain Pump Operation: Run a drain/spin cycle to test the new pump:Set the washer to drain/spin cycle (no clothes)Start the cycleThe drain pump should activate immediatelyListen for the pump motor running (should be a steady humming sound)Water should drain from the tub within 2-3 minutesThe pump should operate quietly with no grinding or loud noises
  35. Check for Leaks: During the drain cycle, carefully inspect all connections for leaks:Check the inlet hose connection at the pumpCheck the outlet hose connection at the pumpCheck the pump housing for leaksCheck the coin trap filter for leaksIf any leaks are found, stop the washer, disconnect power, and retighten the leaking connection
  36. Verify Complete Drainage: After the drain cycle completes:Open the washer door or lidCheck that all water has drained from the tubThere should be no standing waterIf water remains, the pump may not be working correctly or hoses may be kinked
  37. Test Full Wash Cycle: Run a complete wash cycle with no clothes:Start a normal wash cycleThe washer should fill normallyThe washer should agitate or tumble normallyThe washer should drain completely during the drain cycleThe washer should spin normallyMonitor for any error codes or operational issues
  38. Listen for Pump Noise: During the drain cycle, listen carefully for pump-related noises:The pump should operate with a steady, quiet humming soundGrinding indicates debris in the impeller or pump damageLoud humming indicates the pump is working hard (possible blockage)Rattling indicates loose mounting or internal damageThe pump should be noticeably quieter than the old failed pump
  39. Monitor for 30 Minutes: Allow the washer to run through multiple complete cycles. Monitor for:Consistent drainage performanceNo leaks from pump connectionsNo unusual noises from the pumpNormal operation of all cyclesNo error codes or operational failures
  40. Full Functionality Test: Run a complete functionality test:Wash a full load of laundry through a complete cycleVerify the washer drains properly during the drain cycleVerify the drain time is normal (2-3 minutes)Verify no leaks occur during operationVerify no error codes appearVerify clothes are properly washed and spun
  41. Monitor for 24 Hours: Allow the washer to operate for 24 hours with multiple loads and monitor for any issues: drainage problems, leaks, unusual noises, error codes, or operational failures.
  42. Clean Coin Trap Filter Regularly: After installation, establish a routine of cleaning the coin trap filter every 3-6 months:Remove the lower front access panelPlace a shallow pan under the coin trapUnscrew the coin trap filter coverRemove the filter and clean out any debrisReinstall the filter and coverRegular cleaning prevents pump blockage and extends pump life

Always check for foreign objects in the old pump and coin trap—debris is the #1 cause of pump failure. Before installing the new pump, thoroughly inspect the old pump housing and coin trap filter for foreign objects: coins, buttons, bobby pins, small clothing items, or debris. These objects jam the impeller and cause pump failure. If significant debris is found, the new pump will fail quickly unless you address the root cause. After installing the new pump, advise the customer to check pockets before washing and to clean the coin trap filter every 3-6 months. An estimated 60% of drain pump failures are caused by foreign objects, not defective pumps.

The WPW10730972 is a redesigned pump with improved reliability—always upgrade to this version. The WPW10730972 features a more robust motor, improved impeller design, and better seal quality compared to older W10130913 pumps. Even if your washer originally came with a W10130913, always replace it with the upgraded WPW10730972 version. The WPW10730972 costs the same but lasts significantly longer and handles debris better. This upgrade is especially important for households that frequently wash items with loose buttons, coins, or small objects in pockets.

Verify inlet and outlet hose connections are correct—reversed hoses cause immediate pump failure. The drain pump has two ports: inlet (from tub, typically larger) and outlet (to drain, typically smaller). If you connect the hoses backwards, the pump will try to pump water in the wrong direction and will fail immediately or operate very inefficiently. Before reconnecting hoses, verify which port is inlet and which is outlet (check your reference photos or pump labeling). One reversed hose connection causes immediate pump malfunction and potential motor damage.

Tighten hose clamps securely—loose clamps cause leaks that damage the washer and floor. After reconnecting the inlet and outlet hoses, verify both hose clamps are tight and secure. Loose hose clamps cause water leaks during the drain cycle, potentially damaging the washer cabinet, floor, or subfloor. After tightening clamps, tug each hose gently to ensure it won't pull off. Run a test drain cycle and inspect all connections for leaks before considering the repair complete. One loose hose clamp can cause hundreds of dollars in water damage.

Clean the coin trap filter every 3-6 months—regular maintenance prevents pump failure. The coin trap filter captures debris before it reaches the pump impeller. If the filter isn't cleaned regularly, it becomes clogged and reduces drainage performance or causes the pump to work harder and fail prematurely. After installing the new pump, establish a maintenance routine: clean the coin trap filter every 3-6 months (more frequently for large households). Regular filter cleaning extends pump life by 2-3 times and prevents most drainage problems.

Check the drain hose for kinks or blockages—a blocked drain hose mimics pump failure. Before replacing the drain pump, always verify the drain hose (from pump to household drain) is not kinked, crushed, or blocked. A kinked drain hose causes the same symptoms as a failed pump: slow drainage, water remaining in tub, error codes. After installing the new pump, inspect the entire drain hose path and ensure it's not kinked or blocked. An estimated 20% of "pump failures" are actually drain hose blockages.

The pump motor is not serviceable—if it fails, the entire assembly must be replaced. Unlike some older pump designs where the motor and housing were separate, the WPW10730972 is a complete sealed assembly. If the motor fails, you cannot replace just the motor—the entire pump assembly must be replaced. Do not attempt to disassemble the pump or repair the motor. Simply remove the old assembly and install the new complete assembly. Attempting to repair the pump wastes time and voids any warranty.

Error codes F21, F33, SD, and F02 indicate drainage problems—but verify the pump is actually faulty before replacing. These error codes indicate the washer detected a drainage problem, but the pump may not be the root cause. Before replacing the pump ($55-75), verify: (1) the coin trap filter is not clogged, (2) the drain hose is not kinked or blocked, (3) the household drain is not clogged, (4) foreign objects are not jamming the impeller. If all these items check out and the pump still doesn't drain, then replace the pump. An estimated 30% of pumps replaced due to error codes were actually fine—the problem was a clogged filter or kinked hose.

  • Washer not draining
  • Water remaining in tub after cycle
  • Very loud grinding or humming noise during drain cycle
  • Error codes F21, F33, SD, or F02 displayed
  • Washer stopping mid-cycle with water in tub
  • Slow drainage taking 10+ minutes
  • Visible water leaks from pump area
  • Washer won't advance to spin cycle
  • Clothes soaking wet after cycle
  • Drain pump not running at all
  • Intermittent drainage problems
  • Pump runs but doesn't drain water
  • Burning smell from pump area
  • Pump motor overheating
  • Coin trap filter clogged or damaged
  • Impeller jammed with foreign objects
  • Pump housing cracked or leaking
  • Weak drainage or reduced flow


Whirlpool refrigerator replacement parts, Frigidaire refrigerator replacement parts, GE refrigerator replacement parts, Kenmore refrigerator replacement parts, KitchenAid refrigerator replacement parts, LG refrigerator replacement parts, Maytag refrigerator replacement parts, Whirlpool refrigerator drawers and glides replacement, Whirlpool dishwasher replacement parts, GE dishwasher replacement parts, KitchenAid dishwasher replacement parts, Maytag dishwasher replacement parts, Frigidaire dishwasher replacement parts, Kenmore dishwasher replacement parts, Whirlpool washer replacement parts, GE washer replacement parts, Maytag washer replacement parts, Kenmore washer replacement parts, LG washer replacement parts, Whirlpool dryer replacement parts, GE dryer replacement parts, Maytag dryer replacement parts, Kenmore dryer replacement parts, LG dryer replacement parts, Whirlpool range replacement parts, GE range replacement parts, Whirlpool stove replacement parts, GE stove replacement parts, GE oven replacement parts, GE microwave replacement parts, buy Whirlpool refrigerator parts online, buy GE dishwasher parts online, replacement Kenmore washer parts for sale, buy Maytag dryer parts, LG washer replacement parts online, KitchenAid refrigerator parts for sale, Whirlpool stove and range replacement parts

WPW10730972 Washer Drain Pump Assembly

Genuine OEM washer drain pump assembly for Whirlpool, Maytag, and Kenmore front-load and top-load washers. This critical component is the complete drain pump system that removes water from the washer tub during the drain and spin cycles. The assembly includes the electric drain pump motor, pump housing, impeller, inlet/outlet ports, wire harness connector, mounting bracket, and integrated coin trap filter. The pump operates at 120V AC and is designed to pump water from the tub through the drain hose to the household drain system. When this component fails, you'll experience the washer not draining, water remaining in the tub after the cycle, very loud grinding or humming noises during drain cycle, error codes F21, F33, SD, or F02 displayed, the washer stopping mid-cycle with water in the tub, slow drainage taking 10+ minutes, or visible water leaks from the pump area. Drain pumps fail due to foreign objects blocking the impeller (coins, buttons, small clothing items), bearing wear from continuous use, impeller damage from debris, electrical motor failure, seal deterioration causing leaks, age-related degradation, or manufacturing defects. The drain pump is located at the bottom front or bottom rear of the washer cabinet, accessible by removing the lower front panel or tipping the washer. This assembly replaces W10730972, W10130913, AP5958431, PS11757304, and many other previous drain pump versions. The WPW10730972 is a redesigned version with improved reliability and a more robust motor compared to older W10130913 pumps.


Key Features and Design

This energy-efficient drain pump features a durable construction and a high-performance motor for long-lasting reliability. Crafted with precision, it boasts quiet operation that minimizes noise during cycles, making it an ideal upgrade for everyday use. Compatible with a wide range of models, including popular Whirlpool and Maytag units, this assembly is built to fit seamlessly and restore your machine's functionality.

  • Durable materials: Engineered for strength and longevity to withstand regular wear.
  • Quiet motor: Reduces vibration and noise for a more peaceful laundry experience.
  • Energy-efficient design: Helps maintain optimal performance while supporting cost savings on your energy bills.

Performance and Benefits

By replacing a faulty drain pump, the WPW10730972 helps resolve common issues like poor drainage or standing water, extending the life of your washing machine and preventing costly repairs. Enjoy enhanced efficiency that keeps your laundry routine running smoothly, with this genuine replacement part delivering dependable results you can trust from XPart Supply Ltd.

The WPW10730972 Washer Drain Pump is an energy-efficient component designed to keep your washing machine working properly. This pump is an exact replacement for the model, featuring a durable construction and a high-performance motor for quiet operation. Get your appliances running smoothly with this reliable replacement pump.

Part number WPW10730972 replaces 8540024, 8540025, 8540027, 8540028, 8540996, W10117829, W10130913, W10183434, W10190647, W10190648, W10201457, W10730972, WPW10730972VP

Supported Models:

11041932510, 11041942710, 11046462500, 11046462501, 11046472500, 11046472501, 11047511700, 11047511701, 11047511702, 11047512600, 11047512601, 11047512602, 11047512603, 11047512604, 11047512605, 11047531700, 11047531701, 11047531702, 11047532600, 11047532601, 11047532602, MHWE300VW00, MHWE301YG00, MHWE500VP00, MHWE500VP01, MHWE500VW00, MHWE500VW01, MHWE900VJ00, MHWE900VJ01, MHWE900VW00, MHWE900VW01, MHWZ400TB00, MHWZ400TB01, MHWZ400TB02, MHWZ400TQ00, MHWZ400TQ01, MHWZ400TQ02, MHWZ400TQ03, MHWZ600TB00, MHWZ600TB01, MHWZ600TB02, MHWZ600TE00, MHWZ600TE01, MHWZ600TK00, MHWZ600TK01, MHWZ600TK02

Hard to find parts? We've got them or we'll find them!

Over 10,000 New & Used Parts Ready for Pickup

Show this item number to our store staff to help locate the exact part you need
XPART GTIN/UPC NUMBER
9665401913633

XPart Supply Advantage

Your trusted partner for fast, reliable parts delivery across North America

Lightning Fast Shipping

Same-day processing with expedited delivery options across North America

Massive Inventory

Over 10,000 parts in stock and ready to ship immediately

North America Coverage

Comprehensive shipping network covering USA, Canada, and Mexico

Quality Guaranteed

Premium parts with warranty protection and expert customer support

10K+
Parts in Stock
24-48H
Local Delivery
99.8%
Customer Satisfaction
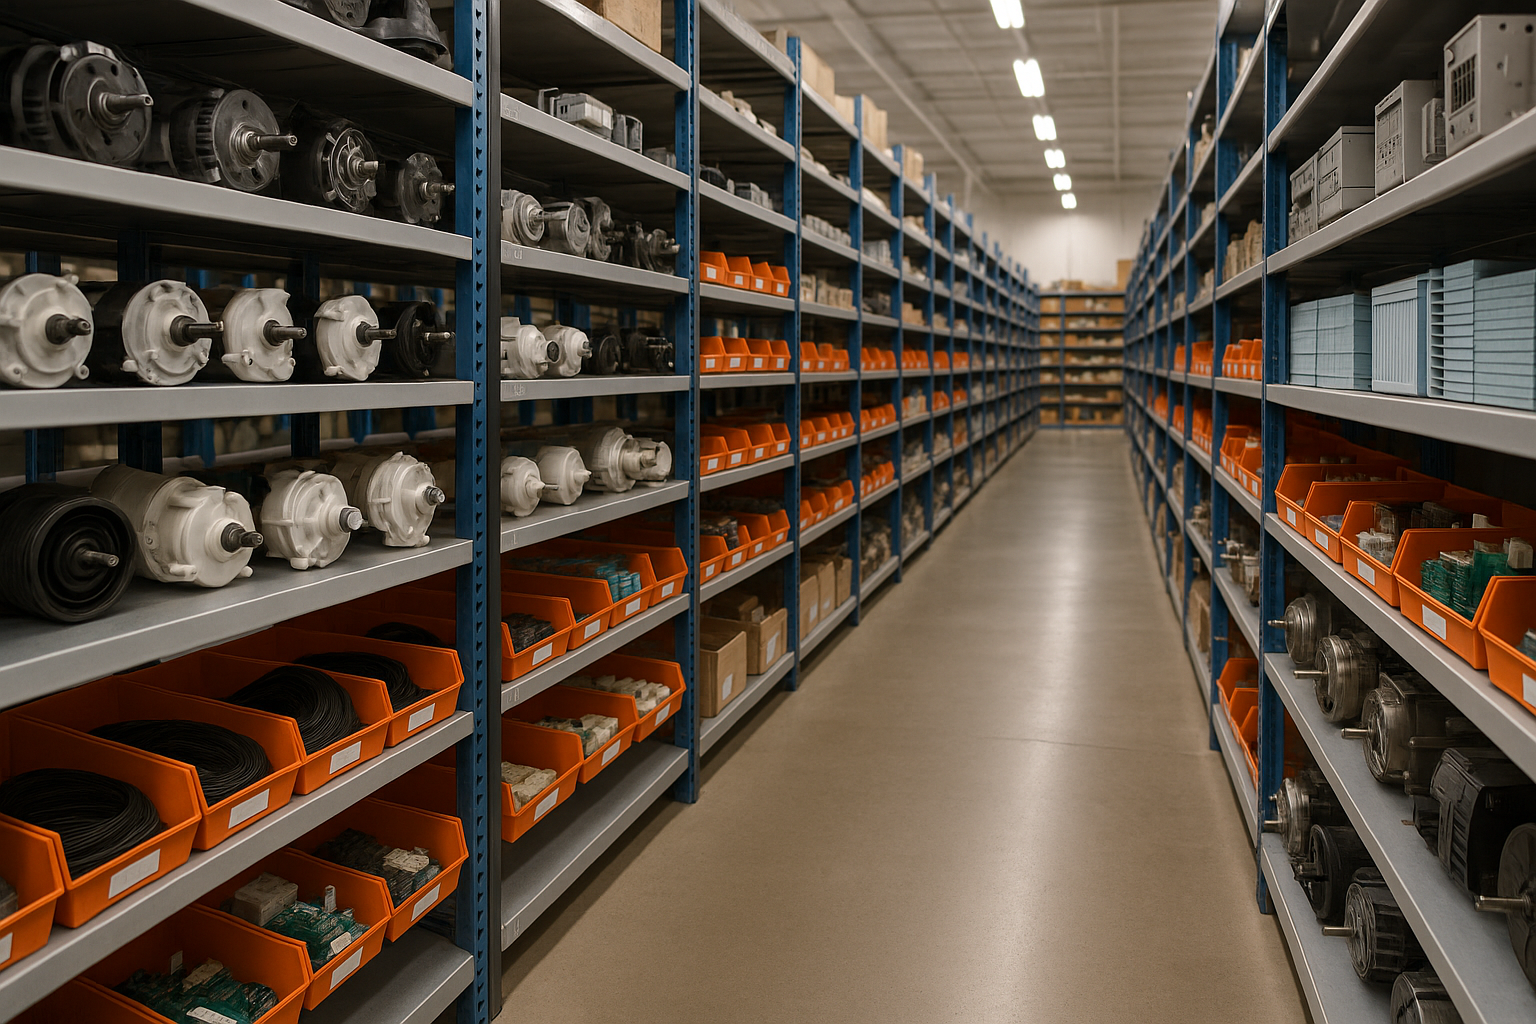
Professional appliance parts warehouse with organized shelving and extensive inventory

Express Warehouse Shipping

Order within the countdown for same-day shipping!

00 Hours
00 Minutes
00 Seconds

In stock orders placed during business hours ship the same day.

Order of $75 or more of eligible items qualify for FREE Shipping.

Same-day shipping deadline has passed

Orders placed now will ship the next business day.

Same-day shipping deadline has passed

Orders placed outside business hours will be processed when we reopen.

Business Hours: Monday - Friday, 9:00 AM - 5:00 PM EST

Trusted Family Business

29 years of Excellence in Appliance Parts

For over 29 years, our family has been dedicated to providing quality appliance parts and exceptional service. What started as a small local business has grown into a trusted name, but we've never forgotten our roots. Every customer receives the personal attention and care that only a family-owned business can provide.

Years of Experience

Our knowledge has been built over the past 29 years in the business, ensuring expert advice for every appliance need.

Personal Service Guarantee

We treat every customer like family, providing personalized solutions and standing behind our products.

Built on Trust

Our reputation has been built one satisfied customer at a time, creating lasting relationships in our community.

Buy Online Pick Up In-Store

Address
101 Trillium Dr
Kitchener, Ontario N2R 1J8
Phone
Hours
Monday - Friday 9:00 AM - 5:00 PM
Get Directions

Contact Us Customer Service

Hard to find parts? We've got them or we'll find them!

Call now for expert appliance parts assistance

Available Monday - Friday, 9AM - 5PM EST