W10805015 Dishwasher Pump & Motor

XPart Supply Ltd. 883049805015

Sale price
$425.99
Regular price
$621.57
You save
$195.58 (31%)

Frequently Bought Together

WPW10805015, AP6020066, PS11753379, EAP11753379, 8193524, W10158351, W10510667, W10782773, W10876537

Whirlpool, KitchenAid, Maytag, Jenn-Air, Amana, Kenmore

Fits Models: (Ctrl+F and Enter Your Model Number)

Whirlpool

WDF520PADM0, WDF520PADM1, WDF520PADM2, WDF520PADM3, WDF520PADM4, WDF520PADM5, WDF520PADM6, WDF520PADM7, WDF520PADW0, WDF520PADW1, WDF520PADW2, WDF520PADW3, WDF520PADW4, WDF520PADW5, WDF520PADW6, WDF520PADW7, WDF530PAYM0, WDF530PAYM1, WDF530PAYM2, WDF530PAYM3, WDF530PAYW0, WDF530PAYW1, WDF530PAYW2, WDF530PAYW3, WDF540PADM0, WDF540PADM1, WDF540PADM2, WDF540PADM3, WDF540PADM4, WDF540PADM5, WDF540PADM6, WDF540PADM7, WDF540PADW0, WDF540PADW1, WDF540PADW2, WDF540PADW3, WDF540PADW4, WDF540PADW5, WDF540PADW6, WDF540PADW7, WDF560SAFM0, WDF560SAFM1, WDF560SAFM2, WDF560SAFM3, WDF560SAFW0, WDF560SAFW1, WDF560SAFW2, WDF560SAFW3, WDF750SAYM0, WDF750SAYM1, WDF750SAYM2, WDF750SAYM3, WDF750SAYW0, WDF750SAYW1, WDF750SAYW2, WDF750SAYW3, WDT710PAYM0, WDT710PAYM1, WDT710PAYM2, WDT710PAYM3, WDT710PAYW0, WDT710PAYW1, WDT710PAYW2, WDT710PAYW3, WDT720PADM0, WDT720PADM1, WDT720PADM2, WDT720PADW0, WDT720PADW1, WDT720PADW2, WDT730PAHZ0, WDT730PAHZ1, WDT730PAHZ2, WDT730PAHZ3, WDT750SAHZ0, WDT750SAHZ1, WDT750SAHZ2, WDT750SAHZ3

KitchenAid

KDFE104HBL0, KDFE104HBL1, KDFE104HBL2, KDFE104HPS0, KDFE104HPS1, KDFE104HPS2, KDFE104HWH0, KDFE104HWH1, KDFE104HWH2, KDFE204EPA0, KDFE204EPA1, KDFE204EPA2, KDFE204ESS0, KDFE204ESS1, KDFE204ESS2, KDFE204EWH0, KDFE204EWH1, KDFE204EWH2, KDFE304GPS0, KDFE304GPS1, KDFE304GPS2, KDFE304GWH0, KDFE304GWH1, KDFE304GWH2, KDFE454CSS0, KDFE454CSS1, KDFE454CSS2, KDFE454CWH0, KDFE454CWH1, KDFE454CWH2, KDFM404KPS0, KDFM404KPS1, KDFM404KPS2, KDFM404KWH0, KDFM404KWH1, KDFM404KWH2, KDPM354GPS0, KDPM354GPS1, KDPM354GPS2, KDPM354GWH0, KDPM354GWH1, KDPM354GWH2, KDPM604KPS0, KDPM604KPS1, KDPM604KPS2, KDPM604KWH0, KDPM604KWH1, KDPM604KWH2, KDPM804KPS0, KDPM804KPS1, KDPM804KPS2, KDPM804KWH0, KDPM804KWH1, KDPM804KWH2

Maytag

MDB4949SDM0, MDB4949SDM1, MDB4949SDM2, MDB4949SDM3, MDB4949SDW0, MDB4949SDW1, MDB4949SDW2, MDB4949SDW3, MDB4949SHZ0, MDB4949SHZ1, MDB4949SHZ2, MDB4949SHZ3, MDB7949SDM0, MDB7949SDM1, MDB7949SDM2, MDB7949SDM3, MDB7949SDW0, MDB7949SDW1, MDB7949SDW2, MDB7949SDW3, MDB7949SHZ0, MDB7949SHZ1, MDB7949SHZ2, MDB7949SHZ3, MDB8959SFZ0, MDB8959SFZ1, MDB8959SFZ2, MDB8959SFZ3, MDB8959SKZ0, MDB8959SKZ1, MDB8959SKZ2, MDB8959SKZ3, MDB8959SWZ0, MDB8959SWZ1, MDB8959SWZ2, MDB8959SWZ3, MDB9959SKZ0, MDB9959SKZ1, MDB9959SKZ2, MDB9959SKZ3, MDB9959SWZ0, MDB9959SWZ1, MDB9959SWZ2, MDB9959SWZ3, MDB9959SFZ0, MDB9959SFZ1, MDB9959SFZ2, MDB9959SFZ3

Jenn-Air

JDB8000AWB0, JDB8000AWB1, JDB8000AWB2, JDB8000AWP0, JDB8000AWP1, JDB8000AWP2, JDB8000AWS0, JDB8000AWS1, JDB8000AWS2, JDB8000AWW0, JDB8000AWW1, JDB8000AWW2, JDB9000CWP0, JDB9000CWP1, JDB9000CWP2, JDB9000CWS0, JDB9000CWS1, JDB9000CWS2, JDB9000CWW0, JDB9000CWW1, JDB9000CWW2, JDB9600CWB0, JDB9600CWB1, JDB9600CWB2, JDB9600CWP0, JDB9600CWP1, JDB9600CWP2, JDB9600CWS0, JDB9600CWS1, JDB9600CWS2, JDB9600CWW0, JDB9600CWW1, JDB9600CWW2AmanaADB1400AGS0, ADB1400AGS1, ADB1400AGS2, ADB1400AGW0, ADB1400AGW1, ADB1400AGW2, ADB1400AWB0, ADB1400AWB1, ADB1400AWB2, ADB1400AWW0, ADB1400AWW1, ADB1400AWW2, ADB1500ADB0, ADB1500ADB1, ADB1500ADB2, ADB1500ADS0, ADB1500ADS1, ADB1500ADS2, ADB1500ADW0, ADB1500ADW1, ADB1500ADW2, ADB1700ADB0, ADB1700ADB1, ADB1700ADB2, ADB1700ADS0, ADB1700ADS1, ADB1700ADS2, ADB1700ADW0, ADB1700ADW1, ADB1700ADW2

Kenmore

665.12773K310, 665.12773K311, 665.12773K312, 665.12774K310, 665.12774K311, 665.12774K312, 665.12775K310, 665.12775K311, 665.12775K312, 665.12776K310, 665.12776K311, 665.12776K312, 665.12777K310, 665.12777K311, 665.12777K312, 665.12778K310, 665.12778K311, 665.12778K312, 665.12779K310, 665.12779K311, 665.12779K312, 665.12783K310, 665.12783K311, 665.12783K312, 665.12784K310, 665.12784K311, 665.12784K312, 665.12787K310, 665.12787K311, 665.12787K312

Professional Repair Time: 45-60 minutes
DIY Repair Time: 60-90 minutes
Difficulty Rating: Moderate (3/5) — Requires hose disconnection and reconnection, spray arm removal, and careful component handling; some mechanical skill recommended

  1. Close the water supply valves at the wall to prevent water discharge during disassembly.
  2. Unplug the dishwasher from the electrical outlet or turn off the circuit breaker to ensure complete power disconnection.
  3. Remove the lower dishrack by pulling it straight out of the dishwasher.
  4. Remove the spray arm by unscrewing the center hub or releasing the retaining clip, depending on your model.
  5. Remove the spray arm support or filter assembly to access the pump housing beneath.
  6. Take multiple photos of the pump assembly, its mounting location, and all wire and hose connections before disconnecting anything. This is critical for proper reassembly.
  7. Locate the pump and motor assembly at the bottom of the dishwasher tub in the sump area.
  8. Disconnect the wire harness connector from the pump motor by carefully pulling the connector straight off. Some models may have a locking tab that must be released first.
  9. Label the wire connector with masking tape to identify its position for reassembly.
  10. Locate and disconnect the inlet hose that supplies water to the pump. Place a towel beneath the connection to catch residual water. Some hoses are secured with spring clamps or screw clamps.
  11. Locate and disconnect the outlet hose(s) that carry water from the pump to the spray arms. Place towels beneath to catch water.
  12. Locate and disconnect the drain hose (if the pump is also responsible for draining). Place a towel beneath to catch water.
  13. Support the pump assembly from beneath to prevent it from falling into the sump when the mounting hardware is removed.
  14. Remove the mounting bolts, screws, or retaining clips that secure the pump assembly to the dishwasher tub or support bracket (typically 2-4 fasteners). Some models use a twist-lock mechanism.
  15. Carefully lift the old pump and motor assembly out of the dishwasher, tilting it as needed to clear the tub opening and hose connections.
  16. Inspect the old pump assembly for visible damage such as cracked housing, damaged impeller blades, worn seals, or debris lodged in the impeller chamber.
  17. Clean the sump area thoroughly, removing any debris, food particles, broken glass, mineral deposits, or standing water that could damage the new pump.
  18. Inspect the inlet, outlet, and drain hose connections for cracks, kinks, or damage. Replace hoses if they show signs of wear.
  19. Inspect the spray arm support and filter assembly for cracks or damage. Replace if necessary.
  20. Unpack the new W10805015 pump and motor assembly from its packaging. Handle carefully to avoid damaging the impeller or seals.
  21. Compare the new assembly to the old one to verify all connections, mounting points, hose ports, and wire connector positions match. Ensure you have the correct replacement part.
  22. Position the new pump and motor assembly in the same location and orientation as the old assembly, aligning it with the sump opening.
  23. Align the mounting holes or twist-lock tabs with the dishwasher tub or support bracket.
  24. Secure the pump assembly with the mounting bolts, screws, or retaining clips, tightening firmly but not over-tightening (which can crack the pump housing or strip threads).
  25. Verify the pump is properly seated and does not wobble or shift. The pump should sit flush against the tub bottom.
  26. Reconnect the inlet hose to the pump inlet port, ensuring the connection is tight and secure. Use a hose clamp if necessary and tighten firmly.
  27. Reconnect the outlet hose(s) to the pump outlet port(s), ensuring all connections are tight and secure. Verify hose orientation matches your photos.
  28. Reconnect the drain hose (if applicable), ensuring it is tight and secure with no kinks.
  29. Verify all hose connections are properly oriented and not kinked, twisted, or pinched.
  30. Reconnect the wire harness connector to the pump motor, ensuring it is fully seated and clicks into place. Match the connector to your label or photo.
  31. Verify the connector is secure by gently tugging on it. It should not pull loose.
  32. Reinstall the spray arm support or filter assembly, ensuring it is properly seated and locked into place.
  33. Reinstall the spray arm by aligning it with the support and securing the center hub or retaining clip.
  34. Reinstall the lower dishrack by sliding it back into the dishwasher.
  35. Restore the water supply by opening the supply valves.
  36. Plug the dishwasher back in or turn the circuit breaker back on to restore power.
  37. Run a test cycle (without dishes) on a short wash cycle to verify proper pump operation.
  38. Listen for the pump motor to start within a few seconds of the cycle beginning. The motor should run smoothly without grinding, squealing, or rattling noises.
  39. Verify water is spraying from the spray arms during the wash cycle. Water should spray forcefully and evenly from all nozzles.
  40. Check for water leaks at all hose connections and around the pump housing during the test cycle. If leaks are present, stop the cycle immediately and tighten the connections.
  41. Verify the dishwasher fills properly and water circulates throughout the tub.
  42. Verify the dishwasher drains properly at the end of the cycle. Water should drain completely from the tub within a reasonable time.
  43. Listen for any unusual noises such as grinding, squealing, rattling, or cavitation sounds from the pump area during the entire cycle.
  44. Monitor water temperature to ensure the wash cycle is heating water properly. Water should be warm to hot during the wash phase.
  45. If all checks pass, load the dishwasher normally with a typical load of dishes and run a full cycle to confirm the repair is complete.
  46. If water is not spraying, verify the outlet hose is connected and not kinked. Check the spray arm nozzles for blockages. Ensure the pump motor is running.
  47. If water pressure is weak, verify the inlet hose is not kinked or clogged. Check the inlet water valve for proper operation. Inspect the pump impeller for damage or debris.
  48. If the pump does not start, verify the wire harness connector is fully seated and the circuit breaker has not tripped. Test the electrical outlet with a multimeter.
  49. If water is leaking, stop the cycle immediately and tighten all hose connections. Replace hoses if they are cracked or damaged. Verify the pump housing is not cracked.
  50. If grinding or squealing noises occur, stop the cycle and inspect the pump impeller for debris or damage. Remove any foreign objects and restart the cycle.
  51. If the dishwasher does not drain, verify the drain hose is not kinked or clogged. Check the drain valve for proper operation. Ensure the pump drain port is not blocked.

Safety Notes: Always ensure the dishwasher is unplugged before working on it. Close the water supply valves to prevent accidental water discharge. Be prepared for residual water in the hoses and sump—place towels beneath all connections before disconnecting. Never operate the dishwasher without the pump assembly installed or with the sump exposed. Avoid touching the impeller blades, as they can be sharp.

Always inspect the sump and impeller chamber for debris. Before installing the new pump, thoroughly clean the sump area and impeller chamber. Debris such as broken glass, food particles, utensil fragments, or mineral deposits can damage the new pump impeller immediately upon startup. A clean sump is essential for pump longevity and performance.

Check the inlet water valve before replacing the pump. If the dishwasher does not fill properly, the inlet water valve may be faulty rather than the pump. Test the inlet valve with a multimeter to verify it opens during the fill cycle. A faulty inlet valve will starve the pump of water and cause poor performance or failure.

Verify all hose connections are tight and use proper clamps. Loose hose connections are a common cause of water leaks, reduced water pressure, and air leaks that cause cavitation noises. Use hose clamps on all inlet, outlet, and drain hose connections. Tighten clamps firmly with a screwdriver—hand-tight is not sufficient.

Inspect the spray arm nozzles for blockages. If water is not spraying forcefully after pump replacement, the spray arm nozzles may be clogged with mineral deposits or food debris. Remove the spray arms and soak them in white vinegar for 30 minutes to dissolve mineral buildup. Use a small wire or toothpick to clear individual nozzles.

Check for kinks or crushing in the hoses. Kinked, crushed, or pinched hoses restrict water flow and reduce pump performance dramatically. Inspect all hoses during installation and ensure they are routed properly without sharp bends or compression points. Replace any damaged hoses with new ones.

Test the drain valve and drain hose. If the dishwasher does not drain properly after pump replacement, the drain valve may be faulty or the drain hose may be clogged. Verify the drain hose is not kinked and the drain valve opens during the drain cycle. Clean the drain hose with a plumbing snake if necessary.

Monitor water temperature during the cycle. The pump should circulate hot water during the wash phase. If water remains cold, the heating element may be faulty or the thermostat may not be functioning. Verify the heating system is working properly.

This assembly includes both pump and motor. The W10805015 is a complete pump and motor unit—you cannot replace just the motor or just the pump. If either component fails, the entire assembly must be replaced.

Verify the correct replacement for your model. Always verify your dishwasher model number matches one of the compatible models before ordering. Using an incorrect pump can result in non-fit, improper connections, or poor performance.

Run multiple cycles before declaring the repair complete. After installing the new pump, run at least 2-3 full wash cycles and monitor for leaks, unusual noises, or inadequate water pressure. Address any issues immediately before they cause further damage or mold growth in the dishwasher.

  • Water not spraying from spray arms during wash cycle
  • Weak or inadequate water pressure from spray arms
  • Dishes not getting clean despite proper detergent use
  • Grinding, squealing, or rattling noises from the pump area
  • Pump motor does not start or run
  • Dishwasher does not fill with water properly
  • Water not circulating through the wash system
  • Water not draining from the tub at end of cycle
  • Visible water leaking from the pump housing or connections
  • Pump motor runs intermittently (starts and stops randomly)
  • Error codes related to pump or circulation system
  • Burnt smell or smoke from the pump area
  • Cavitation noises (crackling or popping sounds) from the pump


Whirlpool refrigerator replacement parts, Frigidaire refrigerator replacement parts, GE refrigerator replacement parts, Kenmore refrigerator replacement parts, KitchenAid refrigerator replacement parts, LG refrigerator replacement parts, Maytag refrigerator replacement parts, Whirlpool refrigerator drawers and glides replacement, Whirlpool dishwasher replacement parts, GE dishwasher replacement parts, KitchenAid dishwasher replacement parts, Maytag dishwasher replacement parts, Frigidaire dishwasher replacement parts, Kenmore dishwasher replacement parts, Whirlpool washer replacement parts, GE washer replacement parts, Maytag washer replacement parts, Kenmore washer replacement parts, LG washer replacement parts, Whirlpool dryer replacement parts, GE dryer replacement parts, Maytag dryer replacement parts, Kenmore dryer replacement parts, LG dryer replacement parts, Whirlpool range replacement parts, GE range replacement parts, Whirlpool stove replacement parts, GE stove replacement parts, GE oven replacement parts, GE microwave replacement parts, buy Whirlpool refrigerator parts online, buy GE dishwasher parts online, replacement Kenmore washer parts for sale, buy Maytag dryer parts, LG washer replacement parts online, KitchenAid refrigerator parts for sale, Whirlpool stove and range replacement parts

W10805015 Dishwasher Pump & Motor

The W10805015 is a genuine OEM pump and motor assembly for Whirlpool and affiliated brand dishwashers. This assembly combines the wash pump motor and impeller into a single unit that circulates water throughout the dishwasher during the wash and rinse cycles. The motor drives the impeller, which forces pressurized water through the spray arms to clean dishes effectively. Over time, the pump motor can fail due to bearing wear, seal degradation, impeller damage from hard objects (broken glass, utensils), debris accumulation (food particles, mineral deposits), or motor burnout from electrical issues or overheating. When the pump motor fails, symptoms include water not spraying from the spray arms, weak water pressure, dishes remaining dirty after a full cycle, unusual grinding or squealing noises during operation, the pump motor not starting, or water not circulating properly. Some models may display error codes indicating a circulation fault. The W10805015 is a direct replacement for older pump assemblies and restores proper water circulation, improves wash performance, and eliminates noise issues caused by a failing pump. Replacing the pump motor assembly is essential for maintaining effective dishwashing performance and preventing further damage to the dishwasher's hydraulic system.

Key Features and Design

  • Engineered as a direct replacement part for various dishwasher models, including KDPM354GBS0, KDTM354DSS0, and others, ensuring a perfect fit for enhanced compatibility.
  • Constructed with durable materials for long-lasting reliability, this OEM-style pump and motor assembly focuses on efficient water drainage and circulation.
  • From XPart Supply Ltd., a trusted provider of high-quality appliance parts, this component delivers straightforward installation without the need for specialized tools.

Performance and Benefits

This W10805015 Pump & Motor effectively resolves common issues like poor drainage or incomplete cycles, restoring your dishwasher to optimal operation and saving you time on household chores. By enhancing water flow and reducing the risk of leaks, it improves cleaning efficiency and extends the lifespan of your appliance, making it a smart choice for maintaining a hassle-free kitchen environment.

Part Number W10805015 replaces W10464691, W10673255, W10788708

Supported Models:


KDPM354GBS0

KDPM354GPS0

KDTM354DSS0
Dishwasher - DISHWASHER

KDTM354DSS1
Dishwasher - DISHWASHER

KDTM354DSS3
Dishwasher - DISHWASHER

KDTM354DSS4
Dishwasher - DISHWASHER

KDTM354DSS5

KDTM354EBS1
Dishwasher - DISHWASHER

KDTM354EBS2
Dishwasher - DISHWASHER

KDTM354EBS3

KDTM354ESS0
Dishwasher - DISHWASHER

KDTM354ESS1
Dishwasher - DISHWASHER

KDTM354ESS2
Dishwasher - DISHWASHER

KDTM354ESS3

KDTM384EBS0
Dishwasher - DISHWASHER

KDTM384EBS1
Dishwasher - DISHWASHER

KDTM384EBS2

KDTM384EBS3
Dishwasher

KDTM384ESS0
Dishwasher - DISHWASHER

KDTM384ESS1
Dishwasher - DISHWASHER

KDTM384ESS2

KDTM384ESS3
Dishwasher

Hard to find parts? We've got them or we'll find them!

Over 10,000 New & Used Parts Ready for Pickup

Show this item number to our store staff to help locate the exact part you need
XPART GTIN/UPC NUMBER
9665425309985

XPart Supply Advantage

Your trusted partner for fast, reliable parts delivery across North America

Lightning Fast Shipping

Same-day processing with expedited delivery options across North America

Massive Inventory

Over 10,000 parts in stock and ready to ship immediately

North America Coverage

Comprehensive shipping network covering USA, Canada, and Mexico

Quality Guaranteed

Premium parts with warranty protection and expert customer support

10K+
Parts in Stock
24-48H
Local Delivery
99.8%
Customer Satisfaction
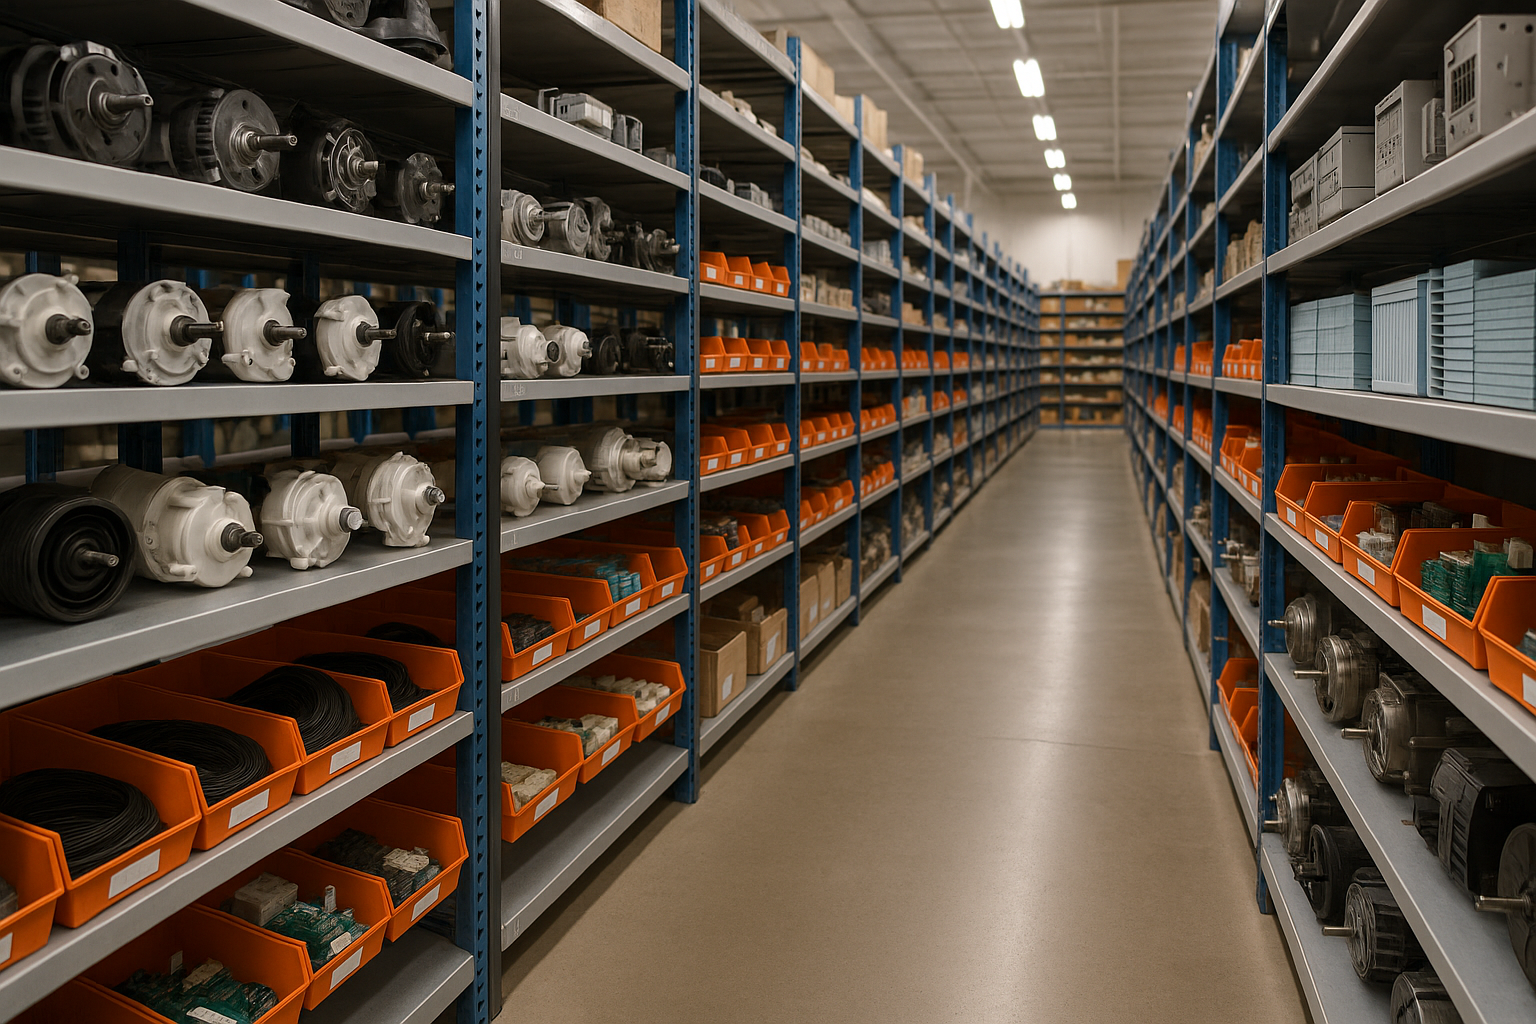
Professional appliance parts warehouse with organized shelving and extensive inventory

Express Warehouse Shipping

Order within the countdown for same-day shipping!

00 Hours
00 Minutes
00 Seconds

In stock orders placed during business hours ship the same day.

Order of $75 or more of eligible items qualify for FREE Shipping.

Same-day shipping deadline has passed

Orders placed now will ship the next business day.

Same-day shipping deadline has passed

Orders placed outside business hours will be processed when we reopen.

Business Hours: Monday - Friday, 9:00 AM - 5:00 PM EST

Trusted Family Business

29 years of Excellence in Appliance Parts

For over 29 years, our family has been dedicated to providing quality appliance parts and exceptional service. What started as a small local business has grown into a trusted name, but we've never forgotten our roots. Every customer receives the personal attention and care that only a family-owned business can provide.

Years of Experience

Our knowledge has been built over the past 29 years in the business, ensuring expert advice for every appliance need.

Personal Service Guarantee

We treat every customer like family, providing personalized solutions and standing behind our products.

Built on Trust

Our reputation has been built one satisfied customer at a time, creating lasting relationships in our community.

Buy Online Pick Up In-Store

Address
101 Trillium Dr
Kitchener, Ontario N2R 1J8
Phone
Hours
Monday - Friday 9:00 AM - 5:00 PM
Get Directions

Contact Us Customer Service

Hard to find parts? We've got them or we'll find them!

Call now for expert appliance parts assistance

Available Monday - Friday, 9AM - 5PM EST