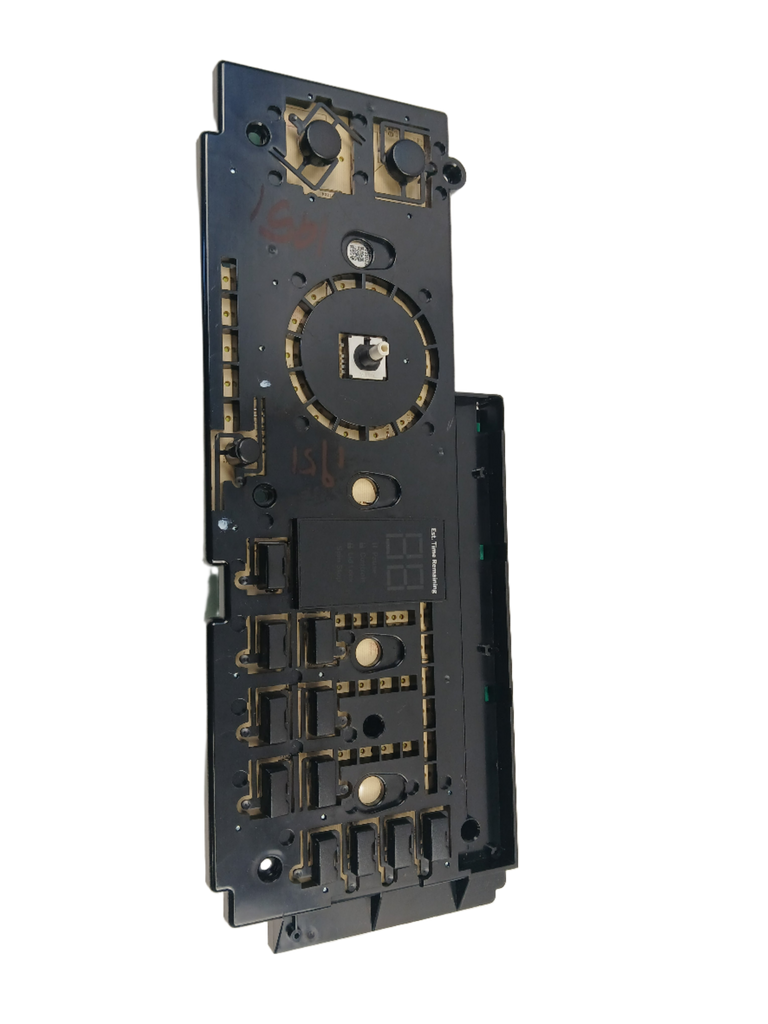
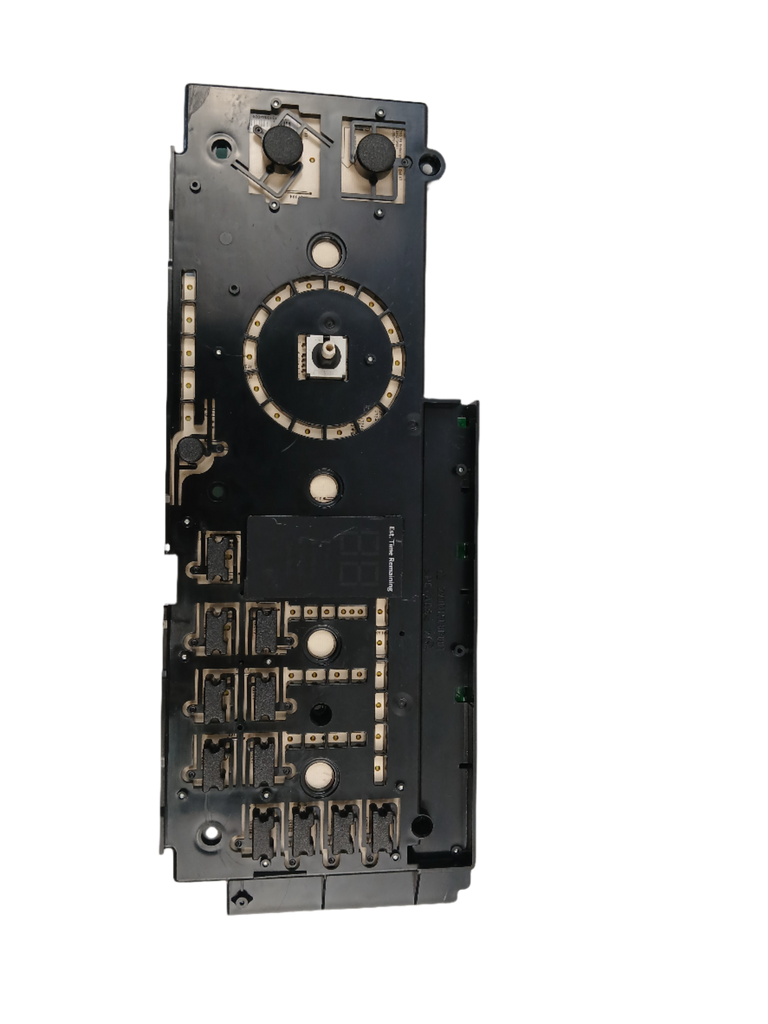


CONTROL PANEL BUTTONS COMPLETELY UNRESPONSIVE — PRESSING BUTTONS DOES NOTHING
GE Washer UIMC BOARD ASM WW01F01731, Fixes Control panel buttons completely unresponsive — pressing buttons does nothing
UIMC BOARD ASM
Part WW01F01731Replaces 233D2322G001GE
Confirm your full appliance model number before ordering.
Is This the Right Part?
Part NumberWW01F01731
Replaces233D2322G001
ManufacturerGE
Appliance TypeWasher
Part TypeUIMC BOARD ASM
✅ Cross Reference Information
233D2322G001
Common Symptoms
- Control panel buttons completely unresponsive — pressing buttons does nothing
- Display screen blank — no numbers, no text, no indicators
- Display flickering or flashing intermittently
- Display shows garbled or scrambled characters
- Some buttons work but others don't respond
- Buttons require excessive force or multiple presses to register
- Indicator lights won't illuminate
- Indicator lights stuck on — won't turn off
- Indicator lights flickering randomly
- Error code stuck on display — won't clear after reset
- Washer appears dead from the control panel but has power to the outlet
- Can't select wash cycles — panel doesn't respond to cycle button
- Can't change temperature or spin speed settings
- Start button won't work — no response when pressed
- Random beeping from control panel
- Control panel beeps but washer won't start cycle
- Display shows incorrect cycle information or time
- Panel works intermittently — functions sometimes, dead other times
- Washer starts on its own — phantom button presses (short circuit on UI board)
- Burning smell from control panel area (component burnout)
- Control panel got wet — stopped working after water exposure
Check Before Replacing
- Verify whether cycle selections register on the control interface.
- Verify whether the washer display operates.
Pro Tip
Moisture is the #1 killer of washer UI boards — and it's preventable.
Part Details
Part NumberWW01F01731
Part TypeUIMC BOARD ASM
ManufacturerGE
Appliance TypeWasher
Installation Notes
- Safety Note:
- Always disconnect power before working on your washer. The UI board operates on low voltage, but the washer is connected to 120V AC.
- Tools Needed:
- Phillips screwdriver
- 1/4" nut driver or socket
- Torx screwdriver (T15 or T20, model-dependent)
- Flathead screwdriver (for prying clips)
- Smartphone or camera (to photograph connections)
- Work gloves
- Installation Steps:
- Preparation:
- Disconnect power
- – Unplug the washer from the electrical outlet or turn off the circuit breaker.
- Close water supply valves
- (optional but recommended).
- Access the User Interface Board:
- 3.
- Locate the control console:
- The UI board is inside the control console — the housing at the top front of the washer that contains the display and buttons.
- Remove the control console top or rear cover:
- Depending on the model, access may be from the top or rear of the console.
- Top access:
- Remove screws along the top rear edge of the console. Lift or tilt the top cover.
- Rear access:
- Remove screws securing the rear cover of the console. Pull the cover off.Some models require removing the detergent dispenser drawer first for clearance.
- Locate the UI board:
- The UI board is mounted directly behind the front control panel fascia (the panel with the printed button labels).It's a circuit board with ribbon cables or wire harness connectors.You'll see the back side of the display and the touchpad contact points.
- Document and Disconnect:
- 6.
- Photograph all connections
- – Take clear photos of every ribbon cable, wire harness, and connector attached to the UI board. Note positions and orientations. 7.
- Disconnect ribbon cables:
- Ribbon cables (flat, flexible cables) typically have a locking tab or ZIF (zero insertion force) connector.
- Locking tab:
- Flip the small locking tab up to release the ribbon cable, then gently slide the cable out.
- Push connector:
- Press the release tab and pull the connector straight out.
- Be very gentle with ribbon cables — they're fragile.
- Disconnect wire harness connectors:
- Press release tabs and pull connectors straight off.Note which connector goes where.
- Remove the Old UI Board:
- 9.
- Remove mounting screws or release clips:
- The UI board is typically secured with Phillips or Torx screws, or plastic snap clips.
- Remove all fasteners.
- Separate the UI board from the control panel fascia:
- The board may be attached to the fascia with adhesive, clips, or screws.Carefully separate them — the fascia (printed panel) is reused with the new board.If the new board comes with a new fascia, use the new one.
- and set aside.
- Install the New UI Board:
- 12.
- Attach the new WW01F01951 board to the control panel fascia:
- - Align the new board with the fascia, ensuring touchpad contacts line up with the printed button positions. - Secure with screws, clips, or adhesive as original. 13.
- Mount the board in the console:
- - Position the board assembly in the console housing. - Secure with mounting screws or clips. 14.
- Reconnect all ribbon cables and wire harnesses:
- - Refer to your photos. - Insert ribbon cables carefully into their connectors and lock the tabs. - Push wire harness connectors firmly until they click. -
- Double-check every connection
- — a loose ribbon cable is the #1 cause of "new board doesn't work" callbacks. 15.
- Verify all connections:
- - Count connectors and compare to photos. - Ensure no cables are pinched, folded, or strained.
- Reassemble:
- 16.
- Reinstall the console cover:
- - Position the cover and secure with screws. - Ensure no cables are pinched between the cover and housing. 17.
- Reinstall the detergent dispenser drawer
- (if removed).
- Test the Repair:
- 18.
- Restore power
- – Plug in the washer or turn on the circuit breaker. 19.
- Verify display powers on:
- - The display should illuminate and show the default cycle or standby screen. - All indicator lights should function normally. 20.
- Test all buttons:
- - Press each button on the control panel — cycle selection, temperature, spin speed, options, Start/Pause. - Verify each button registers and the display responds accordingly. 21.
- Run a test cycle:
- - Select a short cycle (Quick Wash or Rinse & Spin). - Press Start and verify the washer begins operating. - Monitor the display — it should show cycle progress and time remaining. - Verify the washer completes the cycle normally. 22.
- Check for error codes
- — The display should be clear of any error codes after a successful test cycle.
Verified Compatible Models
Fitment reminder: Verified compatibility is maintained by the XPart Model Hub Network. Match the complete appliance model number before ordering.
Buy Online Pick Up In-Store
Address
101 Trillium Dr
Kitchener, Ontario N2E 1W8
Kitchener, Ontario N2E 1W8
Phone
Hours
Mon–Fri 9 AM–5 PM • Sat 9 AM–1 PM